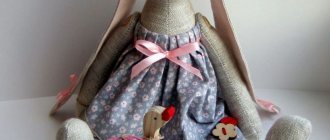
Bag doll
To sew a doll you will need:
- three types of cotton fabric - plain for the body and two types with a pattern for the dress and apron;
- filler;
- decorative elements - lace, ribbons;
- disappearing marker;
- acrylic eye paint;
- narrow elastic band;
- wool for felting for hair (you can make hair in another way);
- threads, sewing accessories.
Description
We start by making a pattern. The photo below shows half of it to scale. Print in the required size and cut out.
Fold the fabric in half with the wrong side out, pinching it so that the layers of fabric do not move. We lay out the pattern (don’t forget, we need a complete piece), outline the contours.
We sew along the marked line, leaving an open area for turning.
Cut with serrated scissors with an allowance of 3 mm.
Turn the part inside out and straighten all the seams.
Iron it.
We lay the filler, distributing it evenly and tightly. Sew up the remaining hole.
Now let's move on to the dress.
Fold the fabric intended for this part in half with the wrong side out, and chop it off.
We will mark the dress directly on the fabric according to the diagram.
We transfer the drawing to the fabric.
We sew only the side seams, leaving the rest unstitched. In the previous photo, the side seams are shown by arrows.
We cut out, leaving allowances on the sleeve cuts and rollout - up to 10 mm, on the bottom cut - up to 25 mm (for the drawstring under the elastic).
We turn and sew the seams and edges of the roll-out and sleeves.
Along the lower edge of the hem, we make the first fold by 5-7 mm and iron it. Then we make another turn at 18-20 mm, iron and stitch it, leaving a hole for the elastic.
Turn the dress inside out and iron it.
The next stage of work is sewing the apron.
We cut out a rectangular piece 20 by 45 cm.
We trim the edges, sew on lace or ribbons, and decorate to your taste.
We sew the finished apron to the dress, 1-2 cm away from the armpits. In order to do this evenly and neatly, we draw a marking line on the dress.
The apron is sewn with gathering along the top edge. This can be done in two ways: sew the edge with a large stitch and tighten the thread, forming small folds, or lay large folds along the upper edge, secure them with pins and sew.
Let's try to assemble the main parts of the doll.
The dress is too big at the neckline; it needs to be gathered and sewn on. We lay the folds and grab them with hand stitches.
When performing this stage of work, it is convenient to use small pliers and a thimble.
We decorate the fixed rollout with lace, hiding the seams underneath.
To accomplish the main task - storing packages - we insert an elastic band into the drawstring at the bottom of the dress. It is convenient to do this by pinning the ends of the elastic with pins. One of them will not allow the elastic to hide in the drawstring, and the second will make it easier to push through.
Sew the ends of the tucked elastic and sew up the open area of the drawstring.
Let's do our doll's hair.
Sew a loop on the back of the head.
Finally, we decorate the doll’s face – we draw eyes and cheeks.
The doll is ready, you can put the bags for storage!
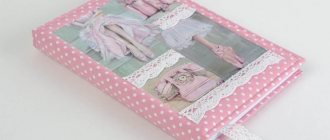
The simplest option
As mentioned above, the easiest option is to sew a bag for bags. Any material is suitable for manufacturing: chintz, flannel, silk, interlock, corduroy; a velor bag will look very elegant, and a linen product will be somewhat reminiscent of a Provençal village.
Here, too, there are several approaches to making the product.
To create such a package, you need to take a rectangular piece of fabric of the required size. Next, the upper part is stitched so that there is a tunnel left for threading the tying rope. After this, the workpiece is turned over to the wrong side and stitched along the bottom and side. The product is turned inside out, ties are inserted, and a loop is sewn on which the bag will hang at its location. Schematically the finished product looks like this:
Next, the front side is decorated to your liking. Pieces of fabric, lace, beads, beads, etc. are suitable for this, but even without additional decor, such a bag will add comfort and order to the kitchen.
Related article: Pearl pattern with knitting needles for snood with description and video
Another option for making a bag would be a product in the shape of a “sausage” or candy. Here the hole for inserting bags is located at the bottom of the product.
The manufacturing pattern is the same as for a bag with top ties, the difference is that here the ties are located at the bottom. You can also make different versions of such a bag: both with a bookmark of bags on top, and with a bookmark at the bottom. When choosing the first option, the upper part of the product is not stitched, but only the edges are processed. If you add a little imagination and perseverance, then with the help of a selection of fabrics and decorations you can turn it into such a bag, for example, into a carrot or corn, or a New Year tree, or even a house.
Goose bag
To make a goose with your own hands you will need:
- fabric in three colors;
- padding polyester, ribbon;
- elastic - flat underwear or hat (can be replaced with a simple ribbon);
- beads – 2 pcs.;
- retainer;
- buttons;
- threads, sewing accessories.
Description
We mark on the fabric the details of the head (with a neck, but without a beak) and wings of the packet doll according to life-size patterns.
Cut out the marked parts with allowances. For the beak we prepare a small piece of fabric.
We attach it to the cut of the head and iron the seam.
We fix the seams at two points with pins and outline the contours of the beak. We sew it according to the markings.
We trim the allowances on the pattern lines with curly scissors. We assemble the blanks for paws and wings in pairs.
We turn the wings and paws completely inside out. We turn the neck partially out to make it easier to fill it with filler.
We sew off the ends of the wings and paws to approximately half the length along the front side.
We fill the head and neck with filler, gradually turning the part inside out. Place the filler tightly into the paws. We partially fill the wings with filler, only in the lower zone of the feathers.
For the bag bag, cut out a strip of 50 by 95 cm. Cut it in half into two almost squares.
We place the paws along the axis of the future bag and pin them.
We sew the blanks along one side and the bottom edge, while simultaneously attaching the legs.
We turn the upper sections to the wrong side by 40 mm.
We make one line along the edge of the hem, then a second - after 1 cm. The result is a drawstring for the elastic.
We sew together the second side of the bag. With one line we reach the drawstring from below, the second - from above, leaving the entrance to the drawstring open.
We fold the lower corners of the bag into a triangle with a center line along the seam, pin it and sew it with a perpendicular stitch.
Thread an elastic band or ribbon into the drawstring. We bring the ends to the front side, pass them through the clamp, and fasten the beads to the ends.
Sew up the bottom edge of the neck. We place the neck in the center of the bag to the inside. You can also sew the neck to the outer back side. This is up to you to determine.
Sew open areas on the wings. Place the wings on the bag and pin them.
We sew them on by hand with a few stitches.
We provide additional fixation to the wings by sewing buttons. We sew eyes onto the muzzle.
We sew a button on the back of the bag's neck to secure the toy.
We attach a loop of strong thread to it, wrapping it several times around the button.
We tie a decorative ribbon around the neck. We put the bags in the bag and tighten the rubber band. The goose bag is ready!
Video master class on sewing a bag goose
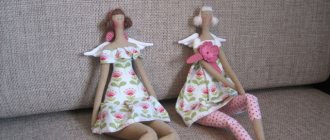
The basis
For the doll's body you will need a simple pattern with a torso, neck and head. It should be drawn on cardboard and cut out along the contour.
Carefully study the master class before starting work, this will allow you to avoid many mistakes that beginners make when working with fabric.
Take a piece of light-colored fabric and fold it in half so that the wrong side is facing up. If you choose sliding fabric, first secure the workpiece with a pin. Attach the pattern and trace it using a special marker or fabric pencil.
Using a sewing machine, stitch around the edges of your piece, leaving a small hole so that the piece can be turned inside out later. Then cut out the part, having first retreated at least 4 mm from the contour.
INTERESTING: We sew clothes for dolls
Erase the outline from the product using water or a brush if you used a fabric pencil. Turn the part inside out and fill it with padding polyester or holofiber. Then you need to manually sew the hole closed with a blind stitch.
Hair
To decorate your tilde with two luxurious braids, you will need a skein of knitting thread, floss or wool for felting. Follow the tutorial carefully so that the tilde's hairstyle comes out realistic and neat.
Weave two thick braids with a slight allowance at the top so that they can later be sewn to the head. To allow the braids to be playfully twisted and shaped, weave a piece of wire into the braids during the making process.
The main part of the head will be hidden under the cap, so braids and small bangs are enough for the hair. The braids should be sewn to the head using a basting stitch, and if you are using wool, take a felting needle and beat the wool into the fabric.
INTERESTING: How to make a Nutcracker with your own hands
You can sew a small cap with your own hands from lace and felt. The headdress should be decorated with ribbon or artificial flowers.