After creating a pattern for women's or men's trousers, you can begin sewing them.
To sew well-fitting trousers with your own hands, you need to follow a certain sequence of work. In this article we will look at a typical technology for sewing trousers.
In order to cut the fabric correctly, you need to familiarize yourself with some cutting recommendations.
Cutting out the trouser parts
First of all, the fabric must be prepared for cutting before it begins, that is, if necessary, decatified (processed to prevent shrinkage).
Carefully examine the front side of the fabric: the direction of the grain thread, pile, pattern, etc. Typically, the warp threads on a fabric run in the direction of the edge of the fabric.
If the fabric to be cut has a pile covering (plush, velvet, corduroy) or the pattern of the fabric is directed in one direction, then all the main parts are laid out in one direction.
On fabrics with a large pattern, the pattern pieces are laid out so as to preserve the pattern as much as possible or arrange it symmetrically.
On striped fabrics, the middle of all parts should coincide with the middle of the central strip. On checked and striped fabrics, the pattern pieces should be laid out so that the checks and stripes match at the places where they are joined.
As a rule, the layout on the fabric begins with the main parts, then additional ones are placed in the remaining gaps.
When laying it out on fabric, remember to leave room for seam allowances.
Be sure to check that the direction of the grain thread on each piece matches the direction of the grain thread on the fabric, securing each piece with pins to prevent movement during cutting.
Next, each part is outlined with chalk or soap, marking all control lines and cut out with seam allowances.
Seam allowances:
- for hem 4-6 cm
- on side and step seams 1-1.5 cm
- on the middle back seam 2-3 cm (if you need to widen the trousers)
- along the middle front line to a one-piece facing for a zipper 3-4 cm
- the width of the remaining allowances is 1 cm
Sequence of sewing trousers:
- Marking the position of pockets and darts;
- WTO (wet heat treatment) of the front and back parts of the trousers;
- Trying on trousers;
- Processing pockets and darts on the front and back of trousers;
- Zipper processing;
- Stitching side and step sections of trousers;
- Sewing the middle sections of trousers;
- Preparation of belt loops;
- Processing the upper cut of trousers with a belt;
- Processing the bottom of the trousers;
- Final finishing of the product.
Fabric selection
Before choosing a suitable fabric, you should decide what type of trousers it will be used for: everyday wear or holiday wear. And at what time of the year, in what weather: cold winter, hot summer, cool autumn or uncertain spring.
Fabrics are divided into two types:
- Summer ones - most often these are natural materials, since in hot weather artificial textiles do not remove moisture and do not allow the skin to “breathe”, which can lead to overheating of the body.
- Winter - there is only one requirement for such fabrics: they retain heat well. In this case, both artificial and natural materials are suitable.
Linen
Distinctive properties:
- Not electrified;
- Does not require special care;
- The fabric is natural and environmentally friendly;
- Conducts heat well;
- The material contains silica, which prevents the development of a number of bacteria while wearing clothes made from this material;
- Long service life.
You might be interested in Setting up a sewing machine: how to adjust it yourself
Linen pants
The trousers are made of linen fabric and are simple, comfortable and easy to wear. Due to different processing techniques, the fabric can be either dense or light, but it does not lose its breathability property in any case. An excellent summer clothing option made from natural material.
Additional Information! For business suits, where a denser fabric is required, flaxen thread is used.
Viscose
Distinctive properties:
- Absorbs moisture well;
- Lightweight and breathable fabric;
- Hypoallergenic;
- Soft and delicate texture;
- Easy to wash;
- Holds the color well, even after numerous washes.
Viscose pants
A budget-friendly fabric option with excellent performance characteristics. Resistant to wear, comfortable to wear, fits nicely to the body - an excellent option for everyday use in the summer or spring.
Chambray
Distinctive properties:
- Wear-resistant;
- Despite its density, the fabric is quite light;
- Hygroscopic and breathable;
- Not electrified;
- Does not wrinkle;
- Easy to wash and withstands spinning well.
The material belongs to the group of denim fabrics. The structure is somewhat similar to cambric. This fabric is demi-season and is suitable for sewing trousers for any weather. Sewing trousers from this material will not cause any difficulties; even the most inexperienced craftsman can easily tailor any model thanks to its texture, suitable for any type of figure.
Gabardine (wool, artificial)
Distinctive properties:
- Long service life;
- Lightweight and pleasant to the touch fabric;
- Moisture-resistant and wrinkle-resistant material;
- Draped.
This fabric has a twill weave. Great for sewing winter pants, the material retains heat well. Ironing is only permissible with steam; do not iron too hard, as this may cause the fabric to become shiny.
Gabardine
The choice of fabrics must be taken quite responsibly. It is worth considering not only external characteristics, but also distinctive properties. You can also use satin, corduroy or velvet for sewing; these materials never go out of fashion.
Stage 1. Pockets and darts
It is recommended to mark the position of the pocket and darts on the front and back of the trousers before any processing begins. After wet-heat treatment, this will be difficult to do, since the parts will acquire a given volume.
After marking the pocket and waist dart lines on one part, it needs to be transferred to the paired part. Then manually lay lines of straight stitches along the marked lines so that the marking lines are preserved during processing.
See pocket location options here.
Stage 2. Wet heat treatment of trousers (WHT)
Wet -heat treatment refers to the pulling and tightening of individual sections of trousers to give them a shape that matches the contours of the body.
For skinny trousers, WTO is necessary to a greater extent than for loose-fitting trousers. It is better not to subject fabrics with stripes or checks to WTO, since ironing and pulling the fabric will disrupt the pattern.
WTO can be avoided on wide or short trousers (it is enough to iron the crease), as well as when using fabrics made of cotton, viscose or silk.
WTO is not performed on trousers made from fabrics containing a large percentage of synthetic fibers.
WTO of the front halves of the trousers
1. Both front halves are folded with the right sides inward, aligning the control lines and the ironing lines.
2. At the same time, step and side cuts are pulled down on the two halves at the level of the calf from the knee line. The slack of tissue formed in this area is tightened to the arrow line.
The bulge in the hip area is slightly squished only for stretchy fabric and steep hips. If the thigh is very convex, then a pull-up is performed in the step area along the arrow line.
If the fabric stretches and when cutting there is a wave along the bow line, then in this area you can stitch it using a machine stitch.
3. Both halves of the trousers are turned to the other side and all operations are repeated.
4. Separate the front halves and fold each one along the ironing line with the wrong side inward and lightly iron along the fold.
The step and side cuts are aligned in the knee area so that there is no broken line. You can remove it by lightly pulling or adjusting it with scissors.
The ironing line is further tightened under the knee, and the side and step sections are further stretched. After this, when a beautiful shape of the trouser leg appears, the ironing line is finally ironed.
5. Check the equality of the front halves by placing them on top of each other and aligning the control lines.
WTO of the back halves of trousers
1. The back halves of the trousers are folded together with the right sides inward, aligning the control lines and the ironing lines.
2. At the level of the knee, the side and step sections are pulled back, the resulting slack in the tissue is pressed towards the arrow line.
At the level of the calf, the side and step cuts are ironed, and a pull is made along the arrow line.
Pull back the seat line, while ironing out the resulting slack in the area of the subgluteal fold.
If a bulge has formed in the area of the hip line, then it is ironed out or simply secured with machine stitching.
3. Both halves of the trousers are turned to the other side and all operations are repeated.
4. Each half is folded separately along the ironing line, inside out, aligning the control lines.
A slight pull is performed along the fold in the calf area, and the resulting or remaining slack in the seam area is ironed.
The knee area is tightened along the arrow, and pulled back at the seams.
Squeeze well in the area of the subgluteal fold.
5. Check the equality of the back halves of the trousers by placing them on top of each other, aligning the control lines.
After wet-heat treatment, check the coincidence of the lengths of the step and side sections of the front and back halves of the trousers by placing them one on top of the other.
Necessary measures and rules for taking them
Basic rules for taking measurements correctly:
- Measurements should be taken from a person wearing tight-fitting clothes or underwear expected to be worn with the product that needs to be sewn.
- The waist should be marked with a strap or ribbon or braid.
- When taking measurements, a person should stand straight, relaxed and in his usual position, so that his posture is in a natural position.
- The measuring tape should fit snugly against the person’s body, and in no case should it pinch it, much less be lowered.
- The measurement is made on the right side, where the body is most developed; if you are left-handed, then by analogy on the left.
You may be interested in this Instructions for sewing children's sheets with elastic for cribs
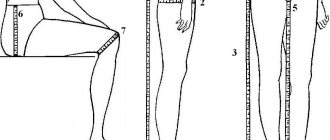
Required measurements for sewing pants:
Half-waist circumference (St) - the measurement is taken at the narrowest point of the waist, the centimeter is taken strictly along the horizontal part of the waist (for recording, you should divide the data by 2).
Half-hip circumference (Sb) - measurement is taken at the most protruding points of the hips, horizontally (for recording, you should divide the data by 2).
Sat
Pants length - measurement is taken from the waist to the heel along the side line (the full number is recorded).
Pants length to the kneecap (Dbk) - measurement is taken from the waist line to the middle of the knee (the full number is recorded).
Knee circumference (Ok) - the knee circumference is measured from a seated person whose leg is bent 90 degrees. For trousers that must fit snugly, the measurement is taken with the straight leg (the entire measurement is recorded).
OK
Thigh circumference - Measurement is taken at the widest part at the top of the leg (the entire measurement is recorded).
About
Calf circumference (Gi) - the measurement is taken on the widest part of the leg under the knee, on the calf muscles (the measurement is recorded in full).
Ankle circumference (Oc) - the measurement is taken under the inside of the ankle, horizontally (the measurement is recorded in full).
Osch
Groin length (Dp) - from the waist from the back, through the groin, to the front side of the waist line (the measurement is recorded in full).
Seat Height (S) - Measurements are taken from a seated position on a chair, from the waist line to the seat of the chair (the entire measurement is recorded).
Stage 3. Trying on trousers
Baste the trouser parts along the marked lines, while checking the alignment of all control marks.
The trousers prepared for fitting are put on, the fastener is pinned. Inspect and, if necessary, clarify or correct:
- the width of the trousers along the waist, hips, knees, bottom.
- length of trousers and depth of seat line
- correct position of the ironing line
- location of darts and their depth
- location of pockets
- belt position
After trying on the trousers, unroll the trousers; if you need to complete the WTO of all halves separately, check their equality and finally iron the ironing line.
Pants for going out
Why not! Knowing all the secrets of this procedure, you can make them yourself, even without a pattern.
Get pants that fit you well.
- Fold one pant leg into the other, baste with thread along all seams or pin: side to side, crotch to crotch, then around the middle seam. Here's a pattern for you using old trousers!
- Let's start cutting the back half:
- Fold the fabric right sides inward.
- Place the back of your old pants on it.
- Draw chalk on the fabric along the seam lines: middle, side, step.
- Draw a waist line.
- Draw all the lines again as neatly and evenly as possible.
How to translate before:
- Place the front half of the trousers on the fabric and do the same manipulation.
- Transfer the crotch stitch.
- Sew the side seam.
- Make all lines even and smooth.
- From the waistline of the front part of the product, set aside the length of the trousers + hem allowance.
- Check the length of the crotch and side seams of both halves. The crotch seam should match the crotch, and the side seams should also match well.
What allowances to make:
- along the middle, step, side seams - 1.5 cm
- at the bottom - 3.0 cm
- waist - 1.0 cm
- leave 4.0 cm for the fastener
Adjust the measurements in the drawing to your parameters (hip, waist), then cut out.
To be sure, transfer the details first onto paper and then onto the material.
Let's start sewing
- Place the middle seam. On the front half, leave space for the fastener, and attach the rest.
- Connect both halves at the side and crotch seams.
- Put the workpiece on and pin along the front line of the fastener. Remove excess fabric.
After trying on, make the necessary changes.
- Sew the side seams. Process the cuts using an overlocker and iron them.
- For strength, go through the middle seam with a double stitch or one stitch twice.
- Sew the crotch seams, starting from the bottom of one leg, until it intersects with the middle seam, do not stop, continue sewing to the bottom of the second leg. Serve, iron.
- Sew on a zipper, sew on a belt. Fold the bottom by hand.
Stage 4. Processing pockets and darts
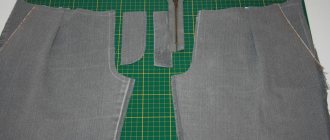
Sew darts along the marked lines on the front and back halves of the trousers. First, iron the dart allowances to the edge, then iron them to the middle cuts, ironing the slack at the ends of the darts.
On the main parts, process pockets: a pocket with a cutting side, a pocket with a frame, an invoice.
Overcast all sections of the main parts, except for the waist line.
Secure the waistline in each half of the trousers from stretching by making a fine stitch or gluing it with a strip of non-woven fabric.
Prepare the bottom of the trousers for sewing the instep and side seams. If you have a regular hem at the bottom, you can immediately glue the inside of the hem and its seam allowance, and if you have a hem with a cuff, you can glue it depending on the type of cuff.
DIY sewing
Sewing different types of trousers is discussed below.
Bananas
Master class on sewing banana style pants.
Pattern:
- Front and back halves of trousers - 2 pieces each;
- Side cut, one-piece with pocket - 2 pieces;
- Pocket burlap - 2 pieces;
- Waist part - 4 pieces;
- Belt belts - 6 pieces, width at your own discretion, on average 3-5 cm, and length 7-9 cm.
Banana
Sewing bananas according to the patterns made:
- On the front part you should make a pocket with a trimmed side.
- On the back you need to sweep and stitch the dart. Iron everything to the middle seam along the back of the trousers.
- Do the same with the side and inside seams, and the middle seam up to the valance.
- Sew in a zipper.
- Reinforce the belt with thermal fabric.
- Sew in a belt.
- Tuck the bottom of the pants and hand baste them with a blind seam.
- Baste the belt loops on the trouser waistband.
At your discretion, the belt can be made either high or low.
For pregnant
We sew women's trousers for pregnant women with a knitted insert in the front. This wide insert is the key point in sewing this type of pants. You can also model the insert based on the selected fabric and touching only the front part of the trousers: draw a circle along the lines of the side seam, stepping back 5-6 cm from it.
You might be interested in this About patterns and sewing procedures for a-line dresses
For pregnant
The place where the crotch seams lose their curve and become a straight line is on the bottom line or at the insertion point of the jersey.
- It is also worth thinking about the location of the zipper in advance, if it is needed.
- You should choose fabric with a small amount of elastin, so it will not stretch much and will retain its shape as the belly grows.
- It is better to grind elastin 4 times for winter wear, and 2 times for summer wear.
Insulated with padding polyester
The Müller pattern outlined earlier is used, only an additional lining based on padding polyester or tape is added, a wide waist elastic is sewn in and cuffs are placed on the bottom of the pants.
Oriental style with elastic band
We sew women's trousers in oriental style. When purchasing fabric, you should make sure that it is of sufficient length; it must correspond to the length parameters of the trousers. For bloomers or Aladdin pants, it is best to choose flowing fabric. Bright accessories for decorating trousers are also acceptable.
The pattern for oriental pants is shown in the picture below.
Trousers
Measuring and stitching is done in a similar way to the banana pants pattern.
Homemade pants without a pattern
A large number of options for how to cut trousers without patterns and drawings for beginners are stored on the Internet; one of the simple methods is described below.
Required measurements:
- Hip and waist circumference (before recording, the indicator must be increased by 6-8 cm);
- Full length from waist to toe;
- Saddle length;
- Groin freeze.
- Ankles and knees are recorded as 18 and 21 cm, respectively, regardless of other dimensions.
Important! If you need trousers with a looser style, you should make wider allowances.
After measuring, you should transfer all the data to the wrong side of the fabric using a tailor's chalk and cut out all the details. After stitching, you need to decide on the belt - it can be a drawstring or an elastic band. If there is an elastic band, then it should be pulled in until the base is sewn together.
3 types
Palazzo pants, joggers and cigarettes.
Palazzos themselves resemble a trouser skirt since the flare goes directly from the hip. Sewing is done according to the Italian method, the pattern is provided in the picture below.
Palazzo Pants Pattern
Joggers are pants that are comfortable for everyday wear, low-rise, tight-fitting at the hips and not too narrow at the ankle. Sewing is done using the Muller technique. The pattern is provided in the picture below.
Jogger pants pattern
Cigarette trousers highlight women's sexuality. And the straight cut goes well with jackets and blouses. These trousers can be sewn either according to Muller’s drawings or according to the Italian method. The pattern is presented below.
Sewing beautiful trousers in women's styles does not take much time. These patterns can also be used for sewing children's pants for boys and girls. A fraction of old clothes can also be suitable for a quick pattern of home pants. Careful selection of fabrics guarantees long wear. Nowadays, especially in Moscow, classic types of trousers are popular. Wool and cotton trousers, diluted with lace, will look very impressive and original at the waist. Synthetic fabrics, such as viscose, have excellent stretch, which will allow the pants to fit perfectly on any figure. And classic linen is wonderful for daily use, the only drawback is that it wrinkles easily. But all its advantages cover this trifle.
Stage 7. Stitching middle sections
Turn one half of the trousers inside out. Place the trouser halves right sides inside one another.
Pin and stitch the back middle sections with two lines, laying the second line at a distance of 0.1 cm from the first while pulling the seam back.
Iron the seam allowances from the top to the step rounding.
Stitching side seams
1) Fold the zipper and the front half of the trousers face to face along the side seams, strictly aligning the control lines of the hip, step, knee and align the snares. Cut the sections not only along the control lines, but also in the spaces between them.
2) Sweep along the back half of the trousers from the knee up and down. The pins are removed and the basting is ironed.
3) It’s better to use a pattern and a ruler to draw a soap line on the side of the front half of the trousers along which the stitching will go. Scribble from the front half of the trousers:
- from the waist to the bottom of the trousers
- from the knee line up and down, pulling the fabric well
4) Iron the seam while pulling it back.
For an adjustment seam , baste along the back half of the trousers, stitch along the front half of the trousers. Press the seam on each side, pulling it apart. Iron both allowances towards the back half of the trousers, check the fabric flow from the face and iron here using an iron. On the front side of the trousers, at a distance of 0.1-0.5-0.7 cm from the inner seam, place a second finishing line, pulling the fabric well, iron.
22. If the trouser belt consists of two halves, then sew them separately to each half of the trousers and iron them. If the belt is cut in one piece, then it is sewn on at the end of sewing the trousers.
23. Stitch the crotch seams.
Stage 8. Preparation of belt loops
The number of belt loops and their width depends on the trouser model. On average, the finished belt width is 1 cm.
Take a strip of fabric 4 cm wide and iron the longitudinal sections towards the middle with the wrong side inward. Next, fold the strip in half lengthwise with the inside out. Stitch along the lengthwise edges and topstitch the fold along the edge.
Cut the belt loop piece into six pieces.
The belt loops are placed two on the front of the trousers (above the darts/between the folds and above the side pockets) and one on the back (above the darts at the waist).
Place the belt loops right sides down on the front side of the trousers, pin and baste.
After attaching the waistband, fold the top edges of the belt loops inward and stitch the folds onto the waistband of the trousers.
Where to start
Trousers are an essential part of any wardrobe. Sewing them yourself is not difficult. All you need is a sewing machine and creative inspiration. Despite the fact that today you can buy almost any model of trousers, there can be many reasons to sit down to needlework .
Why sew trousers:
Saving. The easiest way to save money on expensive brands is to learn how to sew yourself. Over time, the experience gained will allow you to create truly high-quality things, indistinguishable from Italian or French ones.- Originality. To be different from others and look fashionable, it is enough to dress in non-standard things. This can be done by mastering simple sewing techniques.
- Textile. Sometimes a piece of fabric lying around makes you think of a handmade masterpiece. Such ideas cannot be driven away. You need to sew fashionable things and look pretty!
- Non-standard figure. It happens that owners of non-standard shapes have to search for suitable trousers for a long time and to no avail. The time spent can be used in other ways by sewing clothes that fit perfectly.
The first step is to decide what kind of trousers should be. Determine the season in order to choose the appropriate fabric.
Summer trousers without lining are the easiest to sew. Those who have not encountered sewing before are advised to start their tailoring journey with them.
