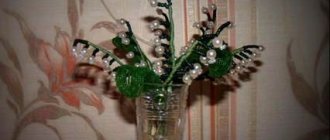
One of the most widely used materials in needlework is beads. It is used to make jewelry, handbag trim, figurines and much more. The use of material as decorative elements at holidays and memorable events is no exception. Sometimes one beaded Christmas ball can be enough to create a unique image and New Year's mood, especially if it is not customary to put up a Christmas tree in the house and it is replaced by a branch in a vase.
Creating spherical shapes
Beads are a voluminous material. To make bead balls, or rather, products as close to them in shape as possible, polyhedra are woven. There are at least three basic forms based on 3, 4 and 5 beads. To make them you will need very few beads: 6, 12 and 30 pieces, respectively. Depending on the size of the beads, the balls range from 1 to 10 cm in diameter.
For the simplest three-dimensional figure, it is better to take larger beads, otherwise it will be very small. Here is a short master class on making a ball with three beads:
- Collect 3 beads and close them in a ring. Leave one edge of the working thread 10-15 centimeters long for ease of tightening the finished figure.
- Add 2 more beads to the working thread. Secure them by threading the needle sequentially through the first and second beads.
- Pick up the sixth bead, pass the needle through the fourth, second, and third.
- Complete the figure by connecting the fifth, sixth and third beads again. The thread can be hidden.
If you want to weave a fullerene from beads, the ball weaving pattern starts with 5 beads. The initial stage of creating such a ball is similar to weaving a flower. When using small beads, such balls can be hung on a earring to make earrings, and can also be used as components of necklaces, bracelets, and key rings.
Larger beads can be used as a basis for multilayer structures. Such specimens will attract attention not only with their regular geometric shapes, but also with the bright play of light on the edges. Faceted beads and bicones are well suited for such models.
Beading master class: Tying a ball with beads
Author: Beadturtle.
LJ NatalieS Perlen
for example, take 9/0 beads (2.6 mm), crochet thread No. 20, hook 0.75, warp ball 15 -17 mm
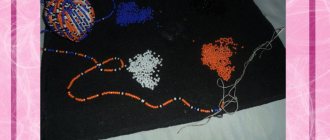
In order to better see where to make additions when knitting, I took beads of two main colors - dark gold and a light mixture (beige-white), in the description I will call it dark and light
We string beads onto a knitting thread, in our case it will be: 5 dark beads 5 times (1 dark + 1 light) 5 times (1 dark + 2 light) 5 times (1 dark + 3 light) 5 times (1 dark + 4 light) 20 times (1 dark + 5 light) 5 times (1 dark + 4 light) 5 times (1 dark + 3 light) 5 times (1 dark + 2 light) 5 times (1 dark + 1 light) 5 dark
we start crocheting with beads, like any other rope, from a chain of air loops we put a loop on the hook, move the bead, grab the thread behind it, drag it through the loop onto the hook and so on 5 times
the first row turned out to be a braid with 5 beads,
second row - we connect the braid into a ring, for this we insert the hook into the loop of the braid under the first bead, grab the thread and pull the loop onto the hook, you will get two loops on the hook
move the bead, grab the thread behind it and drag it through two loops on the hook
in this way we knitted the first stitch of the second row, the second stitch must be knitted in the same loop, in the next picture you can clearly see where to insert the hook (I hope 
we knit our second column with beads into this loop and in the same way we knit two columns with beads into each subsequent loop of the braid under the beads, we get a row of 10 beads in a circle, dark and light beads alternate in it 5 times (as we typed)
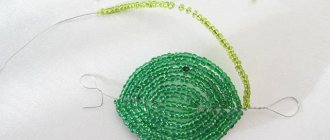
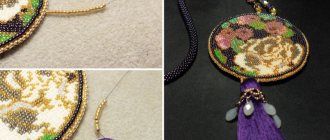
In the third row we will begin to knit the braids into a loop under the light beads (along the green arrow in the next photo)
a common mistake - they try to knit under the thread coming out of the bead (along the yellow arrow), under this thread they knit half-columns in thin strands, in our case this is not necessary
in the following picture you can see how the first stitch of the third row is knitted, then we knit another stitch with beads into the same loop
under the next (dark) bead we knit only one column with beads and repeat this in a circle 5 times (two columns for a light bead, one column for a dark one), we get a row of 15 beads in a circle
fourth row - under the first (light) bead we will knit two columns, under the next two (we have them light and dark) - one column each, we get a row of 20 beads in a circle
in the fifth row we also make an addition - from one loop we knit two stitches, then in the next three loops - one stitch at a time, we get a row of 25 beads. In our case, it’s easy to track when the row ends, as soon as there are not 4 beads between the dark beads, but 5 light beads, which means the fifth row is connected (in case we lost count)
and view from the back
sixth row - under the first bead of the previous row we knit two columns, under the next four in one column and so on 5 times in a circle, we get a row of 30 beads
we knit the next three rows (7th, 8th and 9th) without adding, 30 stitches with beads in a circle, we get such a “hat”
from the tenth row we begin decreasing at this stage we need to select a bead of suitable size and place it in our “hat”, I placed the bead on a wire pin so as not to lose the hole later, then we will knit around this base bead
I make decreases simply by skipping one loop
10th row - we begin to knit not in the first loop of the previous row, but in the second (the first one was simply skipped), then we knit four times along the column in each next loop and again jump over one, etc. to the end of the row, we get a row of 25 beads. 11th row - skip one loop, then along the column in the next three loops, etc. to the end of the row, we get a row of 20 beads 12th row - skip one loop, knit a stitch in the next two loops, knit this way 5 times, we get 15 beads in a circle 13th row - skip one loop, knit a stitch in the next one, we knit this way 5 times, there will be 10 beads in the circle 14th row - we knit all the last 5 beads through one loop
how to monitor the increase or decrease if all the beads are the same color or just a mixture? here everyone adapts himself, as if it’s more convenient for someone, I would string a piece of paper onto a thread after each row, it’s easier not to get lost in which row you’re in, knit a row, tear off the piece of paper, put a tick in front of the row entry, etc. If you just count the rows and loops in your head, then it’s probably easy to get lost and add too much or in the wrong place (I think so, I’m absent-minded)
if there is a pattern in the bead, then the additions can be followed by the pattern
There are also descriptions of knitted beads that start with 6 beads in a circle, or 7, or even 8
the number of rows and beads in a circle must be adjusted, based on your knitting density, thickness of thread, hook, size of beads, there cannot be one rule for all occasions
how do they tie balls with a thin black thread and very small beads?... this is a mystery of nature for me, most likely I have already gotten my hands on tying with larger beads and a light thread
Now my very personal opinion is that crocheting balls with beads is a hassle, it’s very inconvenient to start, the loops are hard to see in the first rows, it’s easy to get lost...
It’s much easier (and even faster for me) to braid the base ball with beads using a mosaic or brick stitch
Mosaic weaving
If the craftswoman does not know how to crochet, and the solid pattern for the ball is very attractive, then you can use mosaic weaving.
Two methods have been developed here:
- from the edges to the middle;
- from the center to the edges.
The difference in methods may seem small, but very significant. In the first case, 2 halves are created, which are then sewn together on the frame. In the second, a “belt” is first woven on two threads, and then hemispheres are made. The variety of patterns obtained is great, and when using beads of different sizes, it tends to infinity.
We braid shiny New Year's balls with beads
Such skill in beadwork as New Year's balls made of beads is not yet very widespread. To make a New Year's ball from beads, you don't have to be a great craftsman; even a novice amateur can make it.
But New Year's and Christmas balls will decorate your interior with colorful and colorful reflections. Raising the pre-holiday mood.
Learn how to braid a festive ball with beads
This master class will help us make and weave a New Year's ball from beads. To do this, you need the following accessories:
- beads;
- bugles of different sizes;
- fishing line;
- scissors;
- needle;
- lighter or matches;
- Christmas ball.
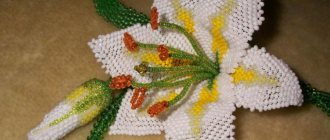
Master class on creating a New Year's ball, we start by unwinding a fishing line two meters long. We insert the first side into a needle, and on the other we create a castle from small beads, using the method of making beads several times in a circle. Next, we take large pieces of glass, lowering them down. One, in the opposite direction. We have a cross. We make six such blanks, stringing 6 beads between them.
We continue our manipulations, stringing four pieces of large beads, weaving another cross. After finishing the weaving, remove the bead clasp and tie the ends. The unoccupied edge of the thread is removed using cauterization.
Thread the needle through the large glass pieces to reach the top of the figure. We create a new ridge of weaving by stringing small glass beads, along the edges there are two beads and four large beads, from which we again create our figure. On a fishing line, string a glass bead and 2 pebbles from the edge, inserting a needle into the top of the cross located nearby. We perform such manipulations 5 times.
We thread the line into the top and bring it out through the top of the next ridge. The third tier begins with three glass pieces on the sides, and a glass bead in the middle. Take 4 more pieces and do the same. The difference between the second and third tiers is that instead of a short one, there is a long pebble, and on the sides, instead of one, there are three. Completing the third tier, we again bring the fishing line to the top of the figure of the third ridge.
The fourth tier is the same as the previous one. But the next tier will be significantly different, differing in short glass beads. While weaving it, drape the mesh over the ball, completing the braiding. At the end, you need to attach all the crosses to each other, thanks to small beads. After all, strengthen the edges of the fishing line and treat with fire.
The master class on braiding Christmas balls is ready. Hang these beautiful balls in the most visible place of the tree.
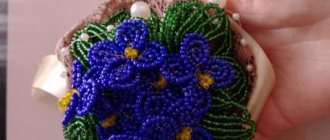
Decorating New Year's balls
This master class consists of creating Christmas tree decorations according to a different scheme.
Take the following accessories:
- pearls of different sizes;
- bicone of different sizes;
- bugles and beads;
- thread.
Thread a needle and thread one meter and twenty centimeters long. String a small bead and leave it in the middle. Then, we string the beads in the following order: pebbles of four mm, a bicone of the same volume and 1 bead. Then there are four pieces of glass. We will have a blank in the form of a cross. Three more things. We have formed a segment from a different set of basic material. For the first page, eighteen segments must be made.
Complete the braiding when the length reaches 26 cm. Tie the edges of the fishing line after passing the needle through the final bead.
Collect pebbles and you need to make 2 more shapes, pass the thread so that the edges are separated on the sides. This type of weaving will be located in the center.
We also need to make a ring that will decorate the top of the ball, consisting of pearls. We unwind a thread two meters long and string beads, then a pearl and four beads, passing through the first pebble. The first segment has formed. The number of segments is the same as in the middle of the ball.
We created two rings. Now, they need to be connected. On a fishing line, we string a bicone, a bead, a pearl, beads, a glass bead, three pieces of glass, a glass bead and a bead. After collecting all this material, insert the needle into the top of the cross of a large ring. This results in a connection between the upper and lower rings.
After securing the thread, cast on the same material indicated above, only in reverse order. Again we insert the needle into the top of the cross, and then into the bicone and pearl located nearby.
Now, you need to make and connect each segment to the segment of the adjacent ring. We have formed 18 segments, there will be 18 lines between them. By combining all this, we have a half-finished Christmas ball. We decorate its bottom. Insert a thread into the top of the cross of a large ring and create an additional cross. Take seven beads, pearls and eight seed beads. Pass the needle through a further cross. Again, two pieces of glass and tighten the thread, strengthening it.
We need to make a hanging element for the New Year's ball. Take the pebbles in the following order: a bead, a glass bead, three pieces of glass, a pearl and a bicone. We go back through all our materials and draw out the thread. Take the beads and strengthen them again. The result was an arch with a pendant.
Repeat this 17 times. At the end, you need to strengthen the thread well. Our master class of New Year's balls is considered completed.
To reinforce the material, you can watch a video lesson on New Year's accessories, which clearly shows examples and patterns of weaving Christmas tree accessories.
Video: Learning to braid Christmas balls
rukodelnichaem.ru
New Year's balls made of beads and beads: weaving patterns
Original New Year's balls made of beads and beads, the weaving patterns of which we offer in this lesson, will make your Christmas tree unique and will give a festive mood to all your guests.
Tools and materials Time: 1 hour • Difficulty: 2/10
- wire for working with beads;
- beads and beads of various colors, shapes and sizes;
- balloon.
Hobbies are wonderful, but at the same time, every person, especially the fair sex, should remember about their appearance and everyday issues, we invite you to familiarize yourself with one interesting online store https://bonprixss.ru with free delivery and other interesting bonuses!
Step-by-step weaving instructions
These beautiful New Year's balls made of beads and beads are a good opportunity not only to decorate the Christmas tree in an original way, but also to put to good use the remains of various materials from previous works.
Step 1: string beads onto wire
It is better to choose beautiful wire, as it will form the basis of our product. You simply take a skein and string a lot of beads and seed beads onto a tail of wire, alternating them with each other. How and in what quantity is up to you. The more beads there are on the wire, the more there will be on the decorative ball itself.
Step 2: wrap the wire around the ball
Next, we take and inflate a balloon. And you shouldn’t try too hard; there will simply be nowhere to put large decorative balls.
After the ball and bead base are ready, you can begin work. Our ball will serve as a guide for the wire, as we will simply begin to wind it around. Be careful so that the ball does not burst prematurely. Gradually, a woven cocoon will form around the ball, not too thick, and the beads will serve as decoration for such an unusual decoration.
When you think that your ball is completely ready, the excess wire is cut off and the tail is hidden in the nearest bead or bead.