Recommendations for choosing fabric
You can use any fabric as a fabric, it all depends on the month in which the overalls will be used. You can use cotton for the summer, footer or fleece material for the winter, and jeans for the fall. For complete comfort, the upper part of the product is made double. The bottom material is noticeable on the pocket flap and strap fastenings; for the lining fabric you need to take something light and hypoallergenic, for example, cotton or chintz.
Attention! The color can also be varied, both single-color products and combined ones, it all depends on personal preferences.
To calculate the required amount of material, first of all you need to make a pattern for the overalls, and then lay it out on the table or floor, taking into account the number of elements and small allowances for freedom of fit. Measure the resulting space.
Winter product model
In addition to the material, you will need to purchase accessories for the product (zippers, buttons, etc.). This article uses a set of a frame with a banner.
The product with buttons will look great. You need to sew loops on the top of the product, and sew buttons on the straps at the desired height. In this case, the straps must be made with a length reserve of 4 cm. You can also purchase a special zipper for overalls. It is better to take completely natural fabric so as not to cause problems with children's delicate skin. It will be expensive, but the quality and health of the child are above all.
To decorate the pockets, you can take a large button and sew a satin ribbon along the edges. Find more decoration ideas in craft magazines.
Making a pattern on paper
Preparing a sketch of a future product with a hood is done in several steps:
Children's sleeping bag
- On paper you need to draw the front and back of the clothing items;
- On one side of the sketch there will be a future fold on the fabric, and on the other you need to draw an armhole;
- Now, along the downward fold line, set aside 51 cm for the front and 54 cm for the back, this will make a bag for the child’s legs;
- For the sleeve template, you need to indicate a width at the wrist of about 22 cm. Then, from the place where the sleeve is cut, you need to go down 10 cm and draw a straight line, making an indent of 15 cm from the bend - this is the widest side of the sleeve;
- Next, on the other side of the bend, you need to go down 15 cm and mark 19 cm down. The top point must be aligned with the point where the sleeve joins the armhole;
- Now mark the point of the back neck and front side of the overalls according to the pattern;
- For the hood template, you need to take another sheet of paper. Draw a rectangle on it with a height of 24 cm and a width of 15 cm and a central part measuring 15x54;
- It is necessary to cut 4 cm inward along the side, and lower it by 6 cm along the front cut and connect with a straight line;
- In order for the sketch of the hood to fit well with the rest of the patterns, you need to adjust the cut of the neckline and the bottom side of the product.
Light summer set
Construction of a demi-season model
This pattern will be universal for sewing a warm outdoor model, which is suitable for children from 1 to 7 years old. The overalls consist of two parts - a jacket and pants.
You might be interested in Creating an organizer for threads and sewing tools
Fleece-lined clothing
When starting modeling, you need to remember that a combined demi-season overalls for babies must be not only warm, but also comfortable and not hinder movement. When sewing pants, you need to take into account the direction of the threads. Here you need to know three basic measurements and only change the child’s growth rate, depending on age. There is a special table that shows the size of a baby’s clothes in proportion to his age.
Measurements for the pattern
To create a pattern for sewing overalls, you need to measure the baby’s height, adding a couple of cm, since the baby grows quite quickly in the first year of life. If a child is 52 cm tall, then in a couple of months he will grow by an average of 10 cm. Therefore, in order for the overalls to last for the winter for a baby from 0 to 4 months, it is advisable to take a height of 62 cm as a basis. For older children, add a value of 5 cm.
You might be interested in DIY sewing trousers with elastic bands for women
For an insulated product, measurements should be taken in the same way, but at the same time leaving space for fillers and lining. Using the measurements, you can do not only sewing, but also knitting a baby slip. You need to take measurements with a measuring tape or thick elastic thread. There is no need to squeeze the body.
Opened product
How to sew a jumpsuit for a child with your own hands: step-by-step instructions
This product is quite convenient and practical for children. The child can move and jump freely and nothing will interfere with him, and there is no need to constantly pull up his trousers and tuck in his T-shirt. It is strictly forbidden for clothes to be tight and squeeze the skin.
Hood with real fur
And such knitted items look quite cute on small children. The overalls can consist of shorts or pants and a top. It is not necessary to have seamstress skills to make such a product.
Cutting and preparation of materials
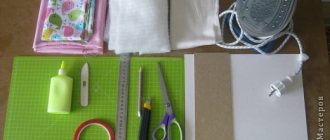
The choice of fabric depends entirely on the decision of the mother and child; if the baby already understands everything, he can choose his favorite color and print. When choosing fabric, you need to consider the following rules:
- the main material should be approximately 100 cm in size, the lining should be sewn from quilted fabric of the same size. For decoration you will need decorative material. This should not be difficult, because many people have old pieces of fabric at home;
- You also need an elastic band about 35 cm long, a cord of 70 cm, and a 20 cm zipper or fastener;
Home denim overalls
- The finished pattern can be found on the Internet. It needs to be printed on a printer in a 1:1 size, cut out, and then the canvas drawn from the paper sketch. When cutting material, allowances of 2 cm must be made.
Main part
Children's winter overalls are made according to the basic pattern. You need to cut out the parts for the outer jacket. Sew the side seams of these elements from the main fabric. Iron seam allowances. Secure the straps and frames with pins, folding them with the outer sides inward along the bottom edge.
Smooth out the allowances and cut at the rounding points. Turn the product inside out. Sew the top side of the product along the top edge and iron. Run a single stitch along the bottom edge.
You might be interested in this: Sewing baby vests for newborns: interesting patterns
Plush suit with ears
Hood
The pattern of a children's overalls with a hood is no different from a regular one without it. Since this is a separate part of the product.
The hood can be made either at the beginning of the work or at the end; it is not sewn together with the suit.
You need to prepare pieces of fabric for the hood. This article suggests sewing the lightest hood. The edge can be decorated with real fur.
Sew the main elements. The central segment should be with a reserve; after work it is cut off. Sew the seams in any direction in one direction. Iron the product.
Trousers
Turn the darts over onto the second leg and sew them on. Connect the lining elements with the parts of the main material along all cuts, making an indent of 1 cm. To avoid compaction in the leg area, darts on the insulation elements must be cut along the contour.
Children's summer overalls pattern
Now you need to sew the side seams, from the outer part and make double finishing seams.
Next, the lining is made. It is necessary to lay out the selected material on the table or floor along the edge with the outer sides inward. Lay out the elements of the pants on the canvas, circle with soap and cut. Now we have elements for the lining without side seams and darts, this will reduce the compaction in the pants. At the bottom of the lining material, add 1 cm (for allowances and looseness of fit).
Sewing a belt to trousers
Sew the waistband onto the pants, while pulling the elastic a little. It can be made from a contrasting color, but not very bright. So as not to damage the child's eyes.
Connection of bodice with trousers
Fold the side seams, the middle of the back with the central seam of the pants, sew the bodice with the pants using hand stitching.
Set with a hat for a girl
Open the cuffs
Cut two rectangles from the main material: length = circumference of the leg at the bottom + 1 cm (for allowances), width = about 10 cm (with allowances). Cut out the same rectangles from decorative fabric and padding, but a few cm smaller.
Processing the bottom of trousers with cuffs
Fold the hem of the lining to the bottom of the pants, matching the single seams on the lining and overalls. Next, insert the elastic along the hem of the cuffs. Connect the lining and pants along the top edge. Turn the pants inside out, through the hole near the fastener. Sew the lining along the center seam to the fastener, folding the edges inward.
You might be interested in Sewing fabric hair ties yourself
Use of cuffs in sleeves, legs and neck
From the front part, secure the lining with a finishing stitch along the fastener, bending the upper ends of the ribbon inward. Trim off excess threads.
Connection of cuffs with lining
Lay out the trouser legs of the main element of the overalls and the lining material, as well as the cuff, on a table or floor. Find the level of sewing the cuff to the lining. From the intended point, make a 1 cm seam allowance down. Cut the trouser leg along the seam allowance line and align the bottom of the lining material. Sew the cuff so that its cut is on the inside, between the elements of the trouser leg.
Children's denim overalls pattern
At the end of the work, you can decorate the product. Here you need to include all your imagination. Many mothers add fringe to the bottom of their pants. For girls, beads or sequins are often sewn on. For knitted clothing, satin or lace ribbon is sometimes used. You can embroider some kind of design on the shelves, for example, with fairy tale characters.
You should also remember that snowsuits need to be washed with care so as not to damage the filling or lining. Typically, padding polyester is used as a filler, and at high machine speeds it turns into pieces of cotton wool and is not evenly distributed inside. Therefore, in order not to spoil the item, it is recommended to follow the instructions for proper care. It is recommended to dry winter models in a straightened position on some surface. Otherwise, clothing may become severely deformed under the weight of water. Summer clothes made from cotton can be washed at any temperature.
Attention! For any children's clothing, you should use only delicate detergents that do not contain chlorine or bleaches. Regular powders can cause a rash on a child's skin.
Footer fabric
Any mother can handle the pattern of summer overalls for a girl or boy. This does not require special skills or talent. It is important to take the child’s measurements correctly. But even those who do not know how to draw can find overalls patterns on various handicraft sites. For example, one of these is Burda or Postila. There are many master classes for both beginning craftswomen and professionals. The overalls can be sewn from knitwear or knitted from wool yarn.
Cutting materials for overalls
Transferring the pattern to fabric
Correct placement of the fabric will ensure good cutting of the product. Necessary actions:
- Place the selected fabric on a flat floor or table. The pattern should not be placed on a soft surface, otherwise all the lines will be bent.
- Carefully distribute all the material on a sheet of paper to avoid running out of fabric. If you don’t have enough material, you can save it by making a jumpsuit belt from existing pieces of fabric sewn together; pockets and a hood can be made from large scraps.
- To prevent the fabric from moving, press it with something quite heavy, for example, a book.
- You can trace the part according to the template with a bar of soap if the fabric is dark.
- To transfer the part template onto white or light-colored fabric, you can use carbon paper; it is placed between the paper with the pattern and the wrong side of the fabric, ink side down.
- For cambric, transferring the template onto the canvas is best done using another method. It is necessary to attach the sketch to the fabric and sew a dotted line along the borders of the part using a hand basting tool.
Cutting fabric for sewing overalls
After you have transferred the template to the canvas, you must carefully cut them out with a seam allowance of 2 cm. You will get:
- back;
- front part, consisting of two halves;
- 2 sleeves;
- cuffs;
- hood;
- straps for fasteners, they can be immediately glued with non-woven fabric from the inside out.
This completes the cutting and you can start sewing the overalls.
