Self-hardening clay does not require baking and dries at normal room temperature in air. Naturally, such clay has its own characteristics, which you simply need to know about. Therefore, without delay, we suggest you figure out what kind of material this is and how to work with it. In this article we will try to tell you everything we know about self-hardening polymer clay.
Each master chooses for himself the plastic with which it is pleasant and convenient to work. You need to try, practice and determine the most optimal one. In one of the articles we described many types of clay (you can read and choose the appropriate polymer clay for modeling). However, the article is mainly about baked plastic. We decided to fill this gap and write what we know about self-hardening clay, since it is somewhat different from ordinary polymer.
Self-hardening polymer clay main differences
What is the key difference between self-hardening clay and baked plastic? The key difference is hidden in the name:
Self-hardening clay has a slightly different composition and does not need to be baked to harden it.
Below are some key comparisons between self-hardening clay and baked plastic.
Besides these differences, there are absolute similarities:
- variety of colors that are easy to mix
- Possibility of painting with acrylic and varnishing after complete drying
- self-hardening clay is non-toxic
- you can sculpt anything from clay
And based on this comparison, you can identify the main pros and cons
Which polymer clay to buy for beginners?
Currently, you can buy polymer clay from different manufacturers in stores. I will tell you about baked clays, since I don’t work with self-hardening clays.
Our online store sells Chinese polymer clay, it is cheap and easy to use. It does not require long-term softening, is baked at 130 degrees, does not change color, translucent colors are not too transparent, translucent white does not turn gray and remains whitish. This clay contains a lot of plasticizer, so it is very soft. But after baking it is flexible. For those who are used to sculpting from Fimo, this softness is, of course, a big minus. To get rid of excess plasticizer, you can roll out the clay and keep it on a white sheet of paper for a couple of days. Also, taking advantage of this property, I use this clay as a softener for other types of clay. For example, in this way you can soften old Fimo clay. You can also use this clay as a filling for large beads (to save material). It is very good for sculpting flowers, as the petals remain flexible. It requires some skill. On the other hand, when you get used to soft clay, you are too lazy to knead the denser one)))
Also, beginners can try the “Tsvetik” plastic, this is children’s clay, its texture is more grainy, it is more clay for training. It is sold in packages of 6-12 colors and is cheaper than its foreign analogues PREMO, SCULPEY, KATO, PARDO, FIMO. Russian polymer clay is more fragile after baking (those who sculpt from Russian materials may question my words, but I am now talking about my personal experience). Some colors behave like marshmallows when rolled through a pasta machine, crumbling even if they were fresh.
There is also Polish plastic, it is quite inexpensive, strong, it can be boiled rather than baked, it is suitable for sculpting flowers and other sculptures, but, unfortunately, it is not very good for sausages.
Pros and cons of self-hardening clay
Let's start with the benefits first.
The main advantages of self-hardening polymer clay
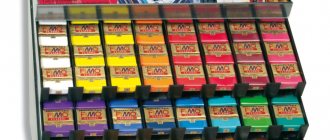
- A wide range of colors allows you to realize any creative idea. And the ability to mix clay of different colors will give the creator hundreds of more shades.
- Self-hardening clay does not collect dust particles and does not get dirty during storage and the creative process.
- No matter how soft it is, the clay does not stick to your hands.
- The hardness of the hardened clay allows further processing (grinding, polishing, drilling). Read on for some tips on post-baking polymer clay.
- If self-hardening clay becomes hard, you can add a little water to make it soft and fresh again.
- The benefit of self-hardening clay is the variety of skeletons and additional elements you can use. Since the piece doesn't go into the oven and get hot, you don't have to worry about the elements burning or melting.
There are undoubtedly advantages and there are many of them, but there are also disadvantages
Disadvantages of self-hardening clay
- Perhaps the main disadvantage of this clay is the need for a long wait for the clay to completely harden.
- Some brands of self-hardening polymer clay are only available in white. But this is rather a minus for the manufacturer, because... There is plenty to choose from (read on, we have described almost all brands)
- Difficulties may arise with storing self-hardening clay, because... it must be carefully packaged before being sent for storage. For this, a sealed bag and a tightly closed box will be enough.
- Probably another key problem with this type of polymer clay is a slight shrinkage upon drying. It is there and there is no escape from it. And in those works where detailed accuracy is required, for example a historical miniature, you will need to think about this in advance and test the chosen clay.
- Self-hardening masses do not have the same plasticity and strength after drying as baked plastic. And you need to come to terms with this.
- The disadvantage of sculpting using self-hardening clay is the fragility of the material. Delicate parts such as fingers, ears, and miniature weapons can easily break.
- Possible cracking when drying. Every 4-6 hours, check the clay for cracks or chips, and if any appear, rub the cracks with your fingers soaked in water.
If you start from the pros and don’t pay attention to the cons, or at least, knowing about them, prevent them, this material becomes not the worst for creativity. And given that the choice of clay is no less than that of baked options, it is worth thinking about the advisability of working with this material. But we will not advise anything, but will only tell you the maximum of what we know.
Basic materials for work
The main materials without which it is impossible to create products for polymer floristry are, of course, cold porcelain and baked polymer clay.
What difference there is between them can be found in the article “What is made from polymer clay.”
But both types of material, both self-hardening and baked polymer clay, can be either purchased in stores or made independently.
When purchasing material, it is better to choose popular brands, since the quality of their products has been tested. And then choose the variety that, according to its characteristics, will be more convenient to use.
Materials for making your own polymer clay
Many masters of ceramic floristry know that it is possible to independently prepare polymer clay.
And if you learn how to make it, then such clay in its properties will be in no way inferior to purchased clay. But it will cost less.
There are many recipes for preparing plastic mass, but among the main ingredients needed are the following:
- Corn starch;
- Potato starch;
- PVA glue;
- Petrolatum;
- Fat cream;
- Non-greasy cream;
- Soda;
- Flour;
- Baby oil;
- Baby liquid soap.
Depending on the recipe, these materials are mixed together. Color is given to clay using food coloring.
Painting materials
Both homemade polymer clay and some types of purchased polymer clay require coloring.
In addition to food dyes, craftsmen use the following materials to color crafts:
- Watercolor;
- Gouache;
- Oil paints;
- Rubbed pastel;
- Tempura.
How they behave when painting materials can be seen in the video:
In addition to painting materials, to complete the creation of crafts, sculpting masters use fittings for assembly and varnishes for coatings.
Materials for assembling products
In most cases, when assembling multi-piece crafts, many people use glue or wire.
If with wire, which differs only in rigidity, thickness and length, everything is quite clear.
But as for the glue, that’s a different question. After all, what kind of glue composition can be used depends on what the clay part will be glued with.
Therefore, among the types of materials that are used, there are:
- Liquid polymer gel - glue for plastic, which can be baked with products in the oven;
- Water-based latex adhesive - suitable for gluing fragments. It is initially white, but when it dries it becomes transparent and invisible on the craft;
- Epoxy adhesive compound - designed for working with jewelry and souvenirs. It has high transparency and good adhesion;
- Cyanoacrylate superglue - allows you to glue polymer parts to other surfaces, even metal ones. The only thing you need to do is glue it carefully, because once the parts are connected to each other it is impossible to re-glue them.
After choosing an adhesive, you should also not forget that you should work with this material with gloves in accordance with safety precautions.
Varnish for coating products
Varnish for polymer clay is used not only to improve the beauty of the product, but also to protect it from external factors.
However, not all varnishes are suitable for coating products in polymer floristry. Beginning craftsmen should avoid working with the following types of material:
- Nail polish;
- Hair fixation spray;
- Regular acrylic varnish.
The choice should be made only on specialized varnishes for polymer plastics, among which the most commonly used are:
- Water-based varnishes (glossy and matte);
- Varnishes with a mineral base (glossy and matte);
- Water-based polyurethane-acrylic varnishes (glossy, matte, semi-matte).
A correctly chosen varnish will not stick after drying, and the product will look good.
Features of storing self-hardening polymer clay
In a closed package, any self-hardening clay can be stored for quite a long time. However, due to the peculiarity of this type of clay, it is necessary to remember 3 important rules:
- For work, only the amount of clay that is required at the moment is taken. You should not take extra clay out of the bag. We put the material that is not needed now into a hermetically sealed bag.
- An open pack of self-hardening polymer clay must be stored in an airtight container. In addition to the film and the clay bag, it is worth placing it in some container with a tight-fitting lid.
- While working, always keep a damp cloth nearby (covering the clay with it) and a bowl of water to wet your fingers.
- It is worth remembering that the shelf life of self-hardening clay is limited - carefully read the instructions on the package.
How to protect products made from self-hardening clay?
Unfortunately, self-hardening clay is afraid of water. And even a finished product that seems to have dried out long ago and nothing can happen to it, sometimes loses its beauty only if it gets slightly wet.
To protect your creations made from self-hardening clay, it is recommended to coat the finished product with acrylic varnish:
- sculpted
- dried
- painted
- dried again
- varnished
- let the varnish dry
- applied another coat of varnish
What varnish should I use? After drying, matte will be absorbed into the clay and paint, strengthening it and becoming almost invisible. Gloss varnish will make the surface shine, giving brightness and visibility to the product. The choice is yours what result you want.
However, even applied varnish, even in several layers, does not guarantee the safety of the product when it gets into water. Take care of your masterpieces.
We hope that this review will help you choose the most suitable material for your creativity and that we could be of some help to you.
How to sculpt from polymer clay?
Remember that working with polymer clay, although creative, requires a certain talent. It is necessary that at least your arms are straight. If you have made good plasticine people since childhood, this does not mean that you have a rich imagination and great potential.
If you just want to be creative for yourself, then you don't have to try too hard and don't be afraid that everything will turn out badly. But for business you should create original products, and very high quality ones. To become successful at this, practice as much as possible. So if you see that you are doing better every time, then don’t stop and develop further.
The creation of figures is carried out in several stages and we will talk further about each of them.
Step 1. Modeling
First of all, to create a new masterpiece, you need to knead the clay in your hands so that it becomes softer and you can give it the appropriate shape. Start working with simple elements and slowly learn to perform complex ones.
For example, try making a leaf with a flower. For the leaf, first make an oval and press it down. Sculpt a sharp edge on one side and leave it as is on the other. Using a toothpick, squeeze out the veins on the leaf:
Leaflets
Start making the flower from the petals. First, roll out five balls on a flat surface. Make the edges rounded. After this, form a flower from the petals. It is worth noting that it is better to take them not with your hands, but with a spatula, so as not to spoil the shape. Arrange the petals in a circle so that the edges overlap each other.
Flower
Step 2: Baking
If the clay needs it, it needs to be baked. Heat the oven and place the product there. But it is better to wrap it in a food sleeve so that there are no foreign odors. The fact is that clay releases vapors that remain on the walls, and they will be very harmful and affect the quality of food in the future.
Depending on the clay, different times and temperatures are required. As a rule, this information is indicated on the packaging. You should also not keep the product for too long, because it will darken and emit a lot of smoke. In this case, ventilate the room as quickly as possible.
Stage 3. Degreasing
Fat can be removed with any detergent. Apply a little of it to a cotton pad and gently rub the figure.
Stage 4. Sanding
Sandpaper
Not all figures need sanding. It is carried out in the presence of uneven areas. If you are still a beginner, then it is unlikely that you will get an ideal surface right away. Polishing is also required if you are going to paint the figurine.
The procedure will require sandpaper and a piece of cloth. It is better to use jeans, corduroy or suede. Take some water and dilute the detergent in it. After that, dip the sandpaper into it and start working around the edges at the back. Use water to remove dust and particles from polishing. After completing the work, change the water and sand the figure again with fine paper. Polish the front carefully, otherwise you will ruin the appearance of the figurine.
At the very end, wash the figurine again and dry it. After this, rub it with a cloth.
Stage 5. Varnishing
Varnish for polymer clay
To coat the finished figurine, you need to use a special product. Some people do this with acrylic-based nail polishes or decoupage, but this is wrong. Yes, you can use them for yourself, but if you are planning to sell your creativity, then such means will not be suitable. Some products don't even require additional coating.
Remember that in direct contact with skin, clay can lead to allergies or other unwanted reactions. This happens infrequently, but it’s better not to risk it. So for work, use rubber gloves, or medical ones, as they are very thin. In addition, choose dishes from which you definitely will not eat, because they will become unsuitable for this.