Paper cutting for children
Cutting out shapes and shapes from paper helps young children develop fine motor skills in a fun way!
How to teach a child paper cutting?
- First of all, your baby’s hands should be ready to learn the skill of cutting. The best exercise for a baby is squeezing water out of a simple sponge; it trains the necessary muscles.
- Then show your child how fun it is to tear old newspapers and pieces of paper into pieces - this will teach him to hold the paper in his hands without dropping it.
- Now you can learn paper cutting using special materials for children! Start by cutting out straight and wavy lines, then teach your child to cut out shapes before introducing pictures to cut out.
Important! Remember to take breaks if your child is tired or bored. Be sure to encourage your child verbally, praise him, and try to interfere less with the cutting process itself.
Safety when cutting from paper
Before you begin, show your child how to hold scissors correctly and talk to him about using scissors safely. The child must clearly understand that:
- You need to cut in the direction away from the body and fingers.
- You can't play and fool around when you have scissors in your hands.
At what age should you start learning to carve?
All children develop differently. The age limits below should be used as a guide, taking into account individual children's interests, temperament and attention span.
2 years: Children at this age will enjoy tearing paper into small pieces and cutting things out, only by repeating what adults do;
3 years: at this age you can try to cut out any shapes with your child, sitting next to him and continuously observing the process;
4 years: the child is able to cut out simple lines and shapes on his own with a little help from an adult;
from 5 years and older: the child should easily cut out pictures and even glue them onto paper, making appliques.
children-online.com
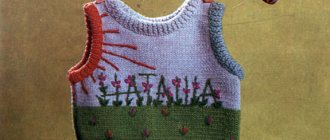
Paper leaves for school: 4th grade on the theme of autumn
Autumn is usually represented by either colorful leaves or an abundance of fruits and vegetables. We will also recreate it in the form of leaves. But they will be quite labor-intensive, but very beautiful.
Craft “Autumn leaf”
We will need:
- Need 5 squares 15*15 cm
- Rectangle 15*5 cm
- Double sided tape
- Scissors
- Stapler
1. Find the diagonal of the square by folding it in half, and then in half again.
2. We make 3 cuts on this triangle, leaving 3 mm from the fold.
We open the workpiece.
3. We begin to glue the corners into a tube. The first layer is to make the middle, using double-sided tape.
4. Turn over and glue the next corners.
5. And glue the remaining two corners, but alternately turning the leaf over.
This is the part of the leaf you will get. We make 4 more such leaves.
6. For the stem, simply twist a tube from a paper rectangle.
We connect the leaves with the stem, securing them with a stapler.
Watch the video on how to make these leaves.
Craft “Wreath of autumn leaves”
And here we will create a whole composition of autumn leaves, it looks very elegant and self-sufficient!
We need 10 squares 8*8 cm. Choose the color of the paper to match the colors of autumn.
Let's start making a yellow leaf.
1.Fold it in half, then fold each side into another half. You will get two large triangles.
2. Turn the leaf over and fold the remaining part to get two small triangles. As shown in the photo. We make 6 such blanks.
3. Now fold the next leaf in half again.
4. We wrap the two edges to make two large triangles and leave them.
5. Now we collect the leaf. We take the first two blanks and one with large triangles, coat the edges and glue it inside the first two blanks, as in the photo. It's like we'll put it inside.
6. Now you need to make a twig. To do this, turn the leaf over to the front side and place another leaf under it.
Glue it.
7. Turn it over to the wrong side and trim the leaf for the branch along the edges of the future leaf. This is necessary so that everything looks neat.
8. Now we wrap the cut edges inward and glue them.
We need at least 8 of these leaves.
Lay out a circle and glue them on top of each other to create a rounded shape for the wreath.
All leaves need to be connected to each other.
We make crafts from colored paper. Ideas for children 4-5 years old
The most common material for creating simple crafts is colored paper. Indeed, working with paper is not only easy, but also fun. Working with paper is also an excellent exercise for little ones' fingers. Considering all these advantages of paper, we decided to offer you crafts made from colored paper for kids. Here you can see the brightest ideas and try to have fun with your child.
Craft ideas made from colored paper
Chamomile.
Today there are a huge number of paper crafts for children. But we hasten to offer you only the best ideas. For example, all children love the daisy flower. Therefore, they will be happy to do it. To create a flower you will need:
- multi-colored paper and a sheet of cardboard,
- PVA glue and scissors.
Progress:
- Long strips are cut from sheets of white paper. To ensure that the stripes are even, lines are first drawn on a sheet of paper with a pencil and a ruler.
- After that, circles are cut out of yellow paper, which will be the middle of the chamomile.
- It is also worth cutting out 3 long strips of green paper and several leaves.
- You need to make petals from white stripes. White strips are glued together on both sides to create loops.
- Then all the elements are glued to the cardboard. (Please note the photo).
Paper goldfish.
All crafts made from colored paper that we list in this article are suitable for children 4-5 years old. To make a fish you should take:
- a sheet of thick cardboard and a round plate,
- ruler and scissors,
- colored paper and PVA glue,
- a simple pencil and elements for decorating the fish.
Progress:
- First we cut out the fish figurine. To do this, take a plastic plate, place it on cardboard and the child traces its contours. After which the resulting circle is cut out.
- Using a pencil, draw straight lines to the edges of the plate. In this case, you need to use a ruler so that a triangle is formed. Now the baby must cut out this triangle.
- The piece that was recently cut will be the tail of the fish. It is glued to the back of the cardboard circle.
- Now you need to draw an eye or cut it out of colored paper.
- That's it, the simple craft is ready. You can simply admire it or use it in children's games.
Original butterfly made from children's hands.
Very entertaining applications can be made from the contours of children's palms. In addition, such an activity can please your child and give him a lot of positive emotions.
On a note! Save this craft so that you can remember the size of your child’s hands in the future.
To make a craft, take:
- Colored paper and scissors,
- White sheets and glue stick,
- Elements for decoration.
Progress:
- The baby must first place his left palm and then his right palm on the sheets of paper. Using a pencil, an adult traces the contours of the palm. As a result, it is worth making 4 palms of different colors. They will be the wings of a butterfly.
- The palms are now glued onto a sheet of white cardboard. (Please note the photo).
- After which an oval is drawn on a colored sheet. It must become the body of a butterfly. The child must glue it between the wings and palms.
- Now you need to draw eyes and a smile with felt-tip pens.
- You can use completely different elements to decorate the wings. It could be sparkles or sequins. You can also apply ready-made stickers.
Beautiful paper applique.
In this article you can find simple crafts for kids made from colored paper. These items will be fun and easy to make. Invite your child to make an applique from colored paper. Surely he will enjoy this activity. To create an application you will need to prepare:
- a sheet of thick cardboard and a simple pencil,
- scissors and glue, colored paper.
Progress:
- For this craft, take a rectangular sheet of cardboard. It is worth drawing the outlines of some animal or fairy-tale character on it. The figures should have a lot of free space and not be complicated.
- Multi-colored sheets of paper are cut into strips, the width of which will be 2 cm. Then these strips are cut into squares and triangles. You can also cut out other shapes.
- Now you need to paste over the application with these geometric shapes and wait for it to dry completely.
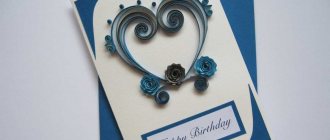
Heart "With love".
Crafts made from colored paper for kids must be bright. In this case, the process of creating them will definitely interest the child. To make the following craft you need to take:
- Thick sheet of cardboard and PVA glue,
- Corrugated paper of different colors and scissors.
Progress:
- Draw an even heart on a piece of cardboard. It should have a size of 20x20 cm. Cut out this heart.
- Colored corrugated paper is cut into 2x2 cm squares.
- These squares are glued as follows. A small area of the heart is coated with glue and a square is glued to it. Using a toothpick, the edges of this square are raised.
- This way you need to fill the entire space of the heart.
Cute caterpillar.
To make it fun and interesting for children to make crafts of various kinds, be sure to offer them only bright colored paper to work with.
To make a caterpillar, take: colored paper and glue.
Making a caterpillar is incredibly easy. The base cardboard is being prepared. Circles are cut from sheets of colored paper. Moreover, the circles should be of different sizes. The largest circle is the head. The circle with a smaller diameter is the tail. Glue all the parts onto cardboard.
On a large circle, use a black felt-tip pen to draw facial features and make hairs with horns from black paper.
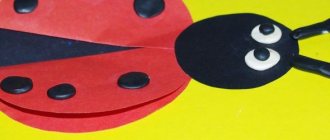
Ladybug.
Here we offer you simple crafts made from colored paper. Making a ladybug is very simple. Take cardboard and glue for this.
Progress:
- A circle is cut out of red cardboard. Circles and stripes are glued onto it.
- The legs and head are cut out separately from black cardboard. All these elements are glued to the red circle on the inside.
- Now all that remains is to glue on the eyes and antennae, which can also be made from colored cardboard.
Volume cat.
Making a voluminous cat is simple and very quick. To make a cat, take:
- A4 sheet of paper,
- Scissors and glue.
Progress:
- In order to make a cat you will need a template. It is downloaded and cut out.
- Make 4 cuts in the template. They are made along marked, solid lines.
- The neck bends like an accordion and the tail curls.
- The paws along the line also need to be bent and glued to a piece of cardboard.
Finally
Now you know what crafts to make with preschoolers from colored paper. We hope that the above ideas are wonderful for you and that you will be able to get creative with your child in the very near future.
www.svoimi-rukamy.com
Corrugated paper cone
Flowers and candy bouquets are usually made from corrugated paper, but we will make a cone. Because boys like to make flowers more, but all children, regardless of gender, can make a spruce branch with cones.
We will need:
- Corrugated paper: brown and blue (green)
- Scissors
- Thread
1. Take a brown roll and cut off one edge without unpacking.
2. Cut the fold to make two strips.
3. Bend the edge 1 cm along the entire length.
4. Now we wrap the tucks along this edge, as in the photo.
5. We begin to roll this ribbon into a cone, leaving only the openwork edge on top.
6. The end of the cone can be tied with a rope, then we wrap it with a strip of blue or green corrugated paper.
7. Now we make twigs from the green strip. We cut the edge wider than the middle.
8. And we roll these strips into pine needles and twist them lengthwise, like a cone.
And here is a detailed video on how to make a bump.
Montessori method: working with scissors
Montessori lesson: learning to use scissors
My daughters really love working with scissors. It happens that I go into a room, and there are all scraps of paper and happy girls! To deepen this activity, I decided to create special worksheets with marked lines for the girls to try to cut strips of paper. This is the second material on practicing working with scissors on our blog, the first was more colorful, but easier. Cutting curved lines is not at all easy, but having mastered this skill, a child can easily cut out complex shapes and shapes.
Download 13 templates for working with scissors | pdf
How to prepare a lesson?
- Print the worksheets on colored paper, cut them along the dotted lines, and stack the strips of the same size.
- Prepare a tray, scissors and a bowl for the scraps.
- Place several identical strips (or strips of the same size but with different lines) on a tray on the left side, a scrap bowl on the right, and scissors in the middle.
- Invite your child, show him how to cut the strip along the marked lines, and invite him to try it himself. Children usually love to work with scissors, because they often associate this activity with adulthood.
I hope that your children will enjoy this activity and will help them develop fine motor skills, coordination, attention and determination.
If you liked our Montessori material, share it with your friends on social networks, because working with scissors is a complex and useful skill that every child aged 3-6 years can master.
To regularly receive useful materials for activities and games with children, subscribe to the blog news “Grow Smart!”
We wish you exciting activities with your baby!
We have selected 5 more interesting articles for you:
grow-clever.com
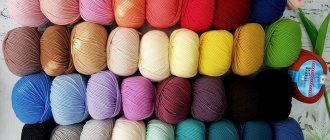
Crafts made from colored paper
Paper is a popular material for children's creativity. It easily lends itself to the most incredible transformations, thanks to which even the most inexperienced children can make crafts from colored paper with their own hands.
The main thing is to choose a task that is feasible for them.
crafts made from colored paper
Thus, for children 3-4 years old, crafts are available that do not require fine skill with scissors, the ability to handle glue especially carefully, and great perseverance.
Paper fish
You can make a fish out of cardboard and enliven it with cereal rings and voluminous eyes.
Breakfast cereal scales
Paper fish
Paper owl
Kids can glue an owl from ready-made templates.
Blanks for an owl
All that remains is to decorate her tummy with prints of bright paint, for which you can use any available means.
Drawing owl feathers
The “owl” applique is ready!
Owl applique
Paper plate cow
A cow craft made from a disposable plate is a good choice for working with ready-made templates. We cut out the cardboard parts in advance: the muzzle, ears, spots, and prepare the eyes.
Blanks for crafts “Cow”
All that remains is to show the child how to glue all these elements to the base.
Cow from a disposable plate
Paper birds in a nest
A bird in a nest craft is interesting for children. We make a nest from a paper cupcake tin and decorative shavings.
Cutting out the birds
All that remains is to glue the beak and eyes to the bird’s body template and place it in the nest.
Craft “Birds in the Nest”
Bird applique
You can make a bird applique without a nest. We cut out its body, legs, beak, eyes, wings and decorations for the chest in advance.
Cut according to the pattern
The child just has to glue these fragments.
Glue on the eyes, nose and paws
Application "Bird"
If you use this version of crafts made from colored paper for children 4-5 years old, then the children are asked to cut out all the details themselves. At this age, they can already cope with a similar task, as well as make many other interesting products.
Spider made of paper and yarn
For example, a funny spider made of black paper. You just need to cut out two fused parts of the head and abdomen, and glue the yarn paws between them.
Covered the yarn with paper
We add big eyes to the spider.
Paper spider
Mouse made of paper hearts
Or a mouse made of hearts. A large heart folded in half becomes her body, two hearts of different colors glued into one another become her ears.
Mouse blanks
Fold the heart and glue the tail
Fold the heart and glue the tail
All that remains is to glue on the fluffy nose made of small strips.
Mustache stripes
Glue on the ears and factory eyes to the mouse. Our mouse is ready!
Mouse made of hearts
Chicken and cockerel made of paper
The same principle is used to make a costume for a theatrical production - for example, Ryaba the chicken. The wings and crest of the chicken become the contours of the baby’s palm outlined on cardboard and cut out,
Cutting out handprints
We make the body in the form of a matryoshka silhouette.
Head and body of "Ryaba"
All that remains is to glue the beak, eyes and legs from the paper accordion.
Ryaba chicken mask
You can make a very cute cockerel with accordion legs from colored paper.
Cockerel made of colored paper
Paper penguin
It is convenient to use the contours of the palms to create a “baby penguin” applique - they become the paws of this cute bird.
Penguin applique
The craft will be complemented by toy eyes and a bright scarf cut from felt or drape.
Paper penguins
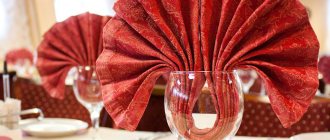
Volumetric paper craft “girl under an umbrella”
Accordion-folded paper can be used to create a “girl under an umbrella” craft.
Paper accordion
We form a fan out of it and glue it into the card above the image of the girl.
Gluing the fan
Glue the fan onto the folded sheet
Paper umbrella
Glue the girl figurine and draw rain
When the card is opened, the girl finds herself under an umbrella. Autumn paper craft is ready!
Autumn paper craft
Rainbow of colored stripes
The first option for making them is to use paper strips.
Paper strips
For example, stripes of different shades can easily turn into a voluminous rainbow.
Glue it on tape
Rainbow Bend
The sun and cloud will cover the tape and give the rainbow a festive look.
Paper rainbow craft
Apple made of red paper and cardboard roll
Red stripes and a cardboard roll will make a delicious apple. We cut bright scarlet paper into strips 1.5-2 cm wide. Glue them with tape to the inside of the cardboard roll at the top and bottom.
Glue them with tape to a cardboard roll
First, glue the four strips opposite each other.
Glue four strips
Then we glue one more between the strips. Glue the stem and leaf to the apple. Apple - ready! The craft looks even more impressive if you first paint the cardboard roll red.
Apple made of paper
Apple tree made of paper and cardboard roll
You can make a wonderful tree from colored paper and a cardboard roll. Cover the green paper with red spots.
Covering green paper with spots
We make cuts on the cardboard roll and straighten them.
Making cuts
We crumple the green paper with red spots and carefully glue it to the cardboard roll. We will get an apple tree with picturesque apples.
Craft from colored paper “apple tree”
You can make a very expressive craft from colored paper and cardboard - an “autumn tree.”
Autumn tree made of colored paper
Paper sun
And yellow stripes glued in a circle to a paper filter or disposable plate will make a bright sun.
Materials for the sun
Glued folded strips in a circle
We decorate the sun with lumps of crumpled colored paper, fixing them with PVA glue.
In the center there is crumpled paper
You can tie a string to the sun and hang it.
Paper sun
Paper balloon
A bright and cheerful paper craft - “Balloon”. To make it, we will need five blanks with a cut out balloon.
Cut out the outline of the balloon
We need to glue the folded pieces together around a string - this is the future balloon. Now let's make a basket. For it, we need to fold a strip of cardboard in a circle and glue small ropes to its edges.
Ball and basket
Glue the blanks around the rope
Decorate the basket with colored circles.
Paper balloon is ready
Frog made of cardboard and paper
An equally attractive frog will be made from two cells from an egg carton. We paint them and fasten them with tape, glue the tongue and eyes.
We color the cells, glue the eyes and tongue
We decorate the frog with a bow tie and a crown - and you get a real prince!
Paper Frog Prince
Crafts made from rolled paper
Crafts made from colored paper glued in the shape of cylinders look interesting. By connecting these cylinders with each other, you can get different characters - hares, ducklings, chicks.
Paper craft hare
Paper Cylinder Crafts
Paper cylinder chicken
Paper bird
From strips of paper you can make a very impressive cockerel pendant.
Paper cockerel
You can make a very beautiful rose out of paper. To do this, you will need to cut a circle out of red paper. Draw a spiral on the circle with a pencil. Cut out a circle in a spiral.
paper spiral
Then we begin to twist the spiral from the edge, forming a bud.
Paper rose
Volumetric multilayer paper hearts
You can make a charming heart pendant from red tissue paper. Cut out at least nine hearts from thin paper.
Cutting out hearts
We put the hearts together and stitch them on the machine.
We sew hearts
Let's straighten out the craft. Hearts made of colored paper - ready!
Hearts made of colored paper
Paper craft for February 23
You can make a very beautiful craft from colored paper for May 9 or Defender of the Fatherland Day. Cut the red paper into strips and fold it in half. We make cuts at the fold. We roll the blank into a roll - we get a beautiful flower. We wrap the lower part of the flower with green paper. We make three such flowers.
Three paper flowers
Make a star out of red paper.
Red paper star
On the round base we glue flowers, stems, St. George's ribbon and an asterisk in turn. Our craft is ready!
Paper craft for Victory Day or February 23
How to make a watch quickly and easily
And many more can remember how, carried away by the game, they remembered about the craft only for the coming sleep. There is simply no time to stretch out the process: the child has to go to school, and you have to go to work. We need to create something fast, cute and big.
Here is the next version of paper crafts just for this case. It's called "Clock". Depending on the chosen color and decor, this could be a New Year's watch, an autumn holiday, a decoration for a birthday, etc. You can continue the list yourself.
We will need:
- 4 sheets of A4 colored paper
- 4 circles with numbers
- Glue
- Scissors
- Strip 20-30 cm long
- A piece of black construction paper
The basis for the clock is a fan made from sheets folded into an accordion. Let's start making them.
1. We begin to make an accordion; to do this, we fold the sheet in half along the long side.
2. Now fold the fold line to the edge again and repeat again.
3. Unfold and fold the edge in half towards the first fold.
4. And we continue to bend the sheet of paper in this way until we get a smooth, beautiful accordion.
We also fold the remaining 3 sheets.
5. Fold each corrugation in half and find the middle.
6. Now we make a fan, to do this we coat the edge with glue and glue both parts.
This is what the preparation should look like. We form the remaining fans.
7. Now we assemble the clock, for this we glue the fans together.
8. Cut out arrows from black paper.
9. And glue them to the clock.
10. Cover the junction with decor, a circle, a snowflake.
11. Glue the numbers.
12. Glue a strip to hang the clock.
That's all the work!