Seeds in eggshell
A good way to recycle eggshells is to turn them into suitable containers for growing plants or seeds.
It's also a good choice for families, as you can give children the chance to act as mini-gardeners and learn how nature works.
To do this, you only need to break off the top, pour out the contents of the egg, wash the shell, being careful not to break it further, and then add the soil and seeds you want to grow. It is so simple!
To personalize the egg, you can paint a friendly face on the egg as shown in the eggshell craft photo, or decorate it to your liking!
We recommend reading:
Crafts from isolon - a manufacturing master class, nuances of working with the material and step-by-step instructions on how to make a craft (85 photos)- Crafts from saw cuts: stylish and beautiful options for decorating the garden and interior with your own hands (130 photos)
- Crafts from toothpicks - interesting ideas, manufacturing examples and the best crafts for children (120 photos)
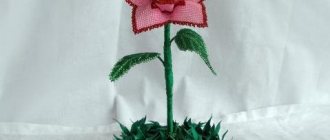
Simple flowers
For work you will need the following tools and materials:
- Simple sheet;
- Simple black pencil;
- Set of felt-tip pens;
- PVA glue;
- Finished egg shells;
- Watercolor paints;
- Set of brushes;
- Sippy cup;
- Wooden skewer.
The technology of work is as follows.
On a regular sheet we draw a sketch, in our case these are violet flowers.
After the drawing is completely ready, we move on to the technique itself. Lubricate the flower petal with glue, as shown in the photo.
Place eggshells on it. For this action it is better to use a whole shell. We lay it so that it covers the entire surface that was coated with glue.
With a little pressure, the shell cracks, thereby filling the pattern. Just be sure to make sure that the shell pieces break into more uniform pieces.
For a more even laying, you can use a wooden skewer.
We outline the finished petals with a bright felt-tip pen; we chose black. This is necessary so that the borders of the petals do not merge.
We do the same with other petals.
After the flower is completely ready, we outline it.
We do the whole drawing in exactly the same way.
Here, the picture is almost ready.
In a small small bowl, grind the eggshells into a fine powder.
We coat all the details of the drawing with glue, and sprinkle shell powder on top. In this way, we fill the empty spaces that formed during work.
Let the painting dry completely. Then we move on to painting. For this you will need brushes, paints and a sippy cup.
We color according to the sketch, which was originally transferred to a simple sheet of paper. Here it was like this: one of the colors was yellow, the second was blue (purple). Then let the painting dry completely. And we apply different shades to the petals themselves.
At the end, all that remains is to decorate the leaves of the almost finished composition. Remove until completely dry.
Article on the topic: Do-it-yourself compositions from natural materials with photos and videos
With this, MK came to an end. This work is perfect for children.
We also suggest that you watch video tutorials for a more detailed study of this technique.
Children's jewelry
Eggshells can also be used in your little ones' rooms. The eggshell shape is ideal for creating funny animals or characters.
They will be great in your child's room. The first thing to note is that you need to completely empty the egg.
To empty the egg without breaking it, you must make two small holes at each end using a thin pin.
Blow the contents of the egg into the cup. When everything is ready, all you need to do is clean it and paint it the way you want. This is the perfect eggshell craft for kids!
Eggshell candlestick
Another very creative way to recycle eggshells is to turn them into mini candle holders that will light up your home in a unique way.
To make this craft, simply melt a candle you have at home and when the wax is liquid, pour it inside the eggshell. To get the best effect, it is best to cut the shell about halfway.
We recommend reading:
Crafts from natural materials - a step-by-step master class on creating original crafts for children and adults (100 photos)Wood crafts - the best craft options, instructions for beginners and ideas for making wooden crafts (85 photos)
- Fabric crafts - the best ideas and the most practical crafts and toys made from various types of fabrics
It is also a good idea to paint the shell for a more original color.
Decorate the eggshell
At Easter, you can often see people decorating eggs in different ways to mark this special day in the Christian calendar. But besides Easter, you can also use eggshells to create beautiful decorations.
To make an eggshell craft, you must blow out its contents. Once everything is ready, you can paint the shell using a variety of paints and brushes, the design is entirely up to your personal taste.
Egg painting
For work you will need the following tools and materials:
- Egg shells;
- PVA glue;
- Brush;
- Cardboard (or any other surface, everything will depend on what exactly you want to do);
- Tweezers;
- Wooden stick;
- Varnish;
- Acrylic paints;
- Napkin for decoupage.
Step-by-step instructions for doing the job:
- First you need to make a template according to which the eggshells will be laid out. Draw it on a simple sheet of paper, or for those who don’t know how to do this, just take any drawing and print it out.
- You need to glue a sheet with a pattern onto a sheet of cardboard.
- Let's move on to applying the shell. We do it as follows: grease a small area of the picture with glue and place the shell on it. If the size of the shell is very large, then take a stick and press it on it. Because of this, it will crack and crumble into several small fragments. The distance between the shells should be the same.
- With this action we fill the entire drawing completely.
- We put it out of the reach of children and wait for it to dry completely.
- After the drawing is completely dry, decorate it with paints.
- At the end of the work it is necessary to coat it with varnish.
Article on the topic: Magazine “Irene” No. 5 2019
This concludes the master class.
Eggshell tulips
This DIY eggshell craft is suitable for older children or adults. Young children should use cardboard or Styrofoam egg cartons.
Color the egg shell halves with dye, making sure the shell is completely submerged so that the inside of the egg is also colored (you want to be sure the membrane inside the egg is removed).
Let dry, then make a hole in the bottom and carefully insert the straw. Place in a vase and you will have a beautiful arrangement of eggshell tulips.
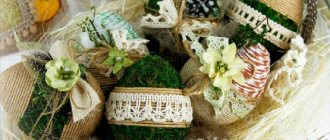
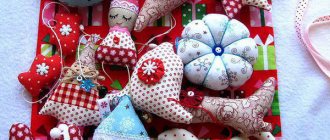
Easter decor and souvenirs
Many schools and even kindergartens hold Easter-themed craft competitions. Some families enjoy decorating their rooms with Easter decor. This holiday is a great opportunity to let your creative imagination run free. Handmade souvenirs will embody excitement and children's laughter, joy and surprise from discoveries, and will give you a real spring mood.
For a cute craft for kindergarten and school, it is absolutely not necessary to purchase expensive materials. It’s enough to look in a craft box, a school folder for creativity, check the kitchen and even audit the first aid kit. In short, we create from everything we see! And in the store all you have to do is buy a few little things for the final decor.
What can you offer for Easter creativity? Let's try to give general directions for implementation:
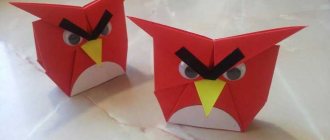
- origami;
- salt dough products with coloring;
- original Easter trees, on the branches of which you can place a lot of small Easter crafts;
- Easter cards;
- decorative baskets for eggs;
- all kinds of stands for eggs and Easter cakes;
- wood crafts;
- decorative eggs.
Some ideas deserve further consideration.
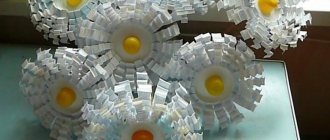
Eggshell chalk
Amazing, right? Use eggshells to make chalk. If you have curious kids, they can have fun too.
This chalk is very abrasive, so do not use it on the board. It is suitable for painting outdoors. Here is another master class on crafts made from eggshells.
Materials:
- Eggshells from 6 eggs;
- Wax paper;
- Rolling pin;
- Large plastic bag;
- Flour;
- Hot water;
- Food coloring;
- Small bowls;
- Silicone forms.
Stages of work:
- Wash and dry the shells;
- Grind the shells into a fine powder. Place the shells between two sheets of wax paper and use a rolling pin to crush them;
- Add 1 teaspoon flour, 1 teaspoon very hot tap water, and three drops food coloring to a small bowl;
- Stir them together to create a colored paste;
- Add 1 tablespoon eggshells. Mix all ingredients together. Then place the mixture into one of the silicone molds. Repeat this process until you run out of eggshell powder;
- If you don't have silicone molds, you can form the mixture into a chalk stick and then wrap it tightly in a paper towel to keep the shape and leave to dry for 3 days;
- If you are using silicone molds: Allow them to dry in the molds. Then, when the tops are dry, carefully remove them and turn them over so the bottoms dry too. Wait two more days (or until they are firm).
A fun souvenir of everything.
There are probably containers for Kinder surprises in the house. We choose yellow and white. We cut out beak triangles and paws from felt, and prepare tassels and bows from woolen threads. You can draw eyes with a marker or glue beads. These funny chickens will decorate a dish with Easter eggs, and you can also use them to make a fun Easter wreath.
If the options with bows and felt paws are still too complicated for the baby, you can limit yourself to plasticine. The youngest members of the family can do this. Place your adorable brood in a nest made of matting or strips of felt.
Disposable tableware will also come in handy. It will require colored cardboard and glue. Let's bend the plate in half, glue a comb to the fold, and just below the beak and beard. All that remains is to cut out the wings, glue them on and draw the eyes. The chicken is ready!
If you are creating Easter souvenirs with your children, invite them to make a composition in the form of a newly hatched chicken. Cut a white disposable plate in a zigzag pattern. A chicken is cut out of yellow cardboard. We glue the plate onto its head and bottom. We draw the eyes and beak. The cheerful Easter bunny looks no less cheerful.
Craft lovers always have leftover yarn. This is already enough for decoration. Lubricate the shell with glue and carefully, turn to turn, wrap the egg. It looks especially impressive if you take a thick thread. Can be decorated with buttons or ribbons.
If crocheting is familiar to you, try knitting a bright cover for an egg, decorating it with a button or bow. Knitting patterns for such a cover can be easily found on the Internet.
Make pompoms from threads. Let's add noses, paws, eyes and ears from felt. And here in front of us are cute fluffy chickens and bunnies.
Where should we put them? In the Easter basket, of course! It can be made from newspaper tubes, coloring them and making a wicker box.
Or you can use... pasta! Just spray paint them first and let them dry. Inflate the balloon, draw an oval on the side (this will be a hole), grease it with glue. Place the pasta, leaving the oval empty. Apply another 1-2 layers of PVA glue on top. When the glue dries, the ball can be blown off. We get an openwork basket. It is decorated with beads and shells. Inside we put decorative eggs, fluffy bunnies and pompom chickens, funny kinder chickens.
An Easter tree can become an original decoration for a room, especially if there are a lot of children and each of them wants to participate in the decoration. Finding a branch or two is not a problem even in the city. But it is better to use willow or willow. The branches are placed in a vase with water, tied at the base.
Advice! All prepared crafts are hung on the branches, trying to place them evenly. You can add pearl-like beads and bows.
A dry branch, successfully decorated and decorated, is also suitable for such a tree.
Funny chickens are made from colored cotton pads. With their help they create real paintings. Woolen threads and pieces of felt will help in creating a themed craft. This is a great option for working in a kindergarten.
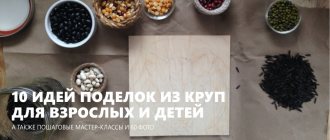
To make the eggs even more unusual, you can even use cereals by gluing rice, lentils, beans and peas onto the shell. Are there small smooth pebbles and shells brought from your vacation at the seaside? Great, they will come into play too! Sequins of all shapes, broken jewelry, designer parts - everything can be glued to the shell or made into an independent decoration.
But with all the riot of imagination, do not forget to explain to your child why an egg, a chicken and a bunny are the main symbols of the holiday, like a willow or palm tree branch.
Photos of crafts made from eggshells
0