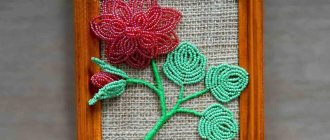
When talking about the eighth of March, all men inadvertently remember tulips, but why once again go to the store early in the morning to buy more tulips, if you can weave them from beads with your own hands the day before, spending a little time, patience and labor.
In principle, there is nothing complicated here, the basis lies in the work, which must take place according to certain simple and clear steps, then the flower will turn out just what you need.
Here, look at the photo of beaded tulips to understand that any girl will like such a gift more than natural flowers that are already boring from year to year, although you can also supplement your gift with them.
As usual with any handmade product, you cannot do without materials, which will be beads of yellow, red, green and black colors. If you use Czech material, then size should be 10, and if Chinese - 12.
You also cannot avoid three wire options, the diameters of which are 0.3 mm, 0.4 mm and 1.8 mm. To prevent the stem from appearing like a thin wire, you will have to buy additional floristry tape, which is used to twist the stem.
And in order to plant this whole thing, and not hold it in your hands, you need a small vase that will perfectly hold this miracle. Next, consider a diagram for weaving tulips with your own hands.
Petals
The entire technique for constructing tulip petals from beads is based on French weaving, for which you take 70 cm of wire and 9 cm of axle, on which about 3-4 cm of red beads are strung, and then you need to make arcs in the same way, wrapping them directly in the opposite direction side as soon as a certain amount of beads is collected.
The whole point lies in the place where the arc bends, that is, when it goes back. Let's call it a column, so the height of each column should be different in height, look at a real tulip petal and you will understand what we are talking about here now.
Note! We make wall decorations with our own hands - the best crafts for the interior. 150 photos of ideas that add comfort and beauty to your home
Do not forget that the arc at the bottom of the bud must be secured, otherwise the entire petal will fall apart without having time to come together.
In this way, when it seems to you that the petal has reached the optimal size, you can move on to another, and we will need about 6 such elements per flower.
Manufacturing
Before making tulips from beads, it is advisable to familiarize yourself with the basics of this type of needlework. Bead making is a fun activity that allows you to brighten up your free time while simultaneously making interesting and useful products.
Using your own imagination, you can fill your entire house with everlasting flowers with iridescent petals.
Before you make tulips from beads, you need to visit a craft store and purchase:
Wire. You can remove it yourself from old equipment or purchase it in a store. Depending on the required rigidity, you can choose different section thicknesses. The most popular and frequently used is 0.3 mm.
Set of beads. Usually several dozen flowers are sold at once. However, sometimes you can find shops where the material is sold by weight. It is advisable to use different colors and shapes to create interesting ideas.
Glue. Regular PVA will do.
Threads. This is an excellent material for adding color and texture to a future product. In order to create the natural color of the tulip stem, green is suitable.
Pistil and stamen
What instructions on how to properly make a tulip for beginners would be complete without describing the creation of the stamen and pistil - almost the most important parts of the plant.
The stamen is made in a very easy way. Take a wire, put about 15 black beads on it, and then at the top the wire is threaded back through them, but so that they do not fly out when turning the flower over, that is, they must be secured at the top.
Let's return to the reverse stringing of beads with the second row of wire in the opposite direction. When you reach the 14th bead, do not rush to thread the 15th bead, as you need to make a branch and start making the second stamen in the same way. There should be 6 such “sticks”.
The pestle is made using the loop technique, that is, take a long piece of wire, string 6 yellow beads to the middle, and then twist them to make a loop.
We will need about 3-4 such loops, and when they are ready, we can string 15 beads on the remaining ends of the wire, which are subsequently bunched together.
Now you need to collect the pistils and stamens together. To do this, open the stamens, place the pistil in the center, carefully connect them and twist them so that not a single part dangles just like that.
Herald of Spring
Usually in ancient times, craftswomen did not use patterns; they created, so to speak, from the heart. But now there are many opportunities to create amazing crafts, they require special assistants. Of course, this is more necessary for beginners.
Weaving is called parallel; it creates leaves on plants and trees. It is considered the simplest technique that allows you to master the basics of beading.
First, let's look at the diagram:
Selecting materials:
- beads No. 10. Choose the color of your bud yourself. You will need green, black (inner), yellow for pistils and stamens;
- green floral tape for the stem;
- wire for beads (diameter 0.3 ml);
- scissors.
Using this pattern, you can make a variety of tulips. You can choose any beads to create a real masterpiece. You choose the color scheme yourself, coming up with new combinations. Start weaving from bottom to top. We string beads onto the wire for two rows, use a stencil. We thread the ends to each other, as in the diagram. Pull the weave tightly so that the rows are even. Follow the stages of work, this is important especially for beginners.
Related article: Crochet basket: diagram and description of a do-it-yourself twine product
We make the core - stamens and pistil. String six pieces of black, making a ring. Next, string the yellow color, insert the ends into the black ring. Make the stamen according to the required size. Knit like this throughout the middle. Figure No. 7 shows the weaving of a pestle. Then weave all the ends together. We make foliage according to picture No. 8. Then we collect flowers. Take the middle, stamens, pistils, add them gradually into three petals, and then three large ones. We wrap the stem with floral tape, securing large leaves.
Leaves
No beautiful beaded tulip idea would be complete without petals. The technique of weaving a petal is very simple and it is done using parallel weaving technology. To do this, first, two beads are strung on a wire, an arc is made and three beads are strung, and so on until you have the optimal size petal. In this way, only half of the petal is assembled, we make the second and now, the real tulip petal is ready.
Industrial vacuum pumpDIY stencils of beautiful snowflakes from A4 paper
- DIY paper crown: ideas, templates and tips on how to make a real crown (video + 130 photos)
DIY miracle
Beautiful ideas for beaded tulips can be gleaned from the Internet or special magazines. Then you need to stock up on the necessary material: beads of appropriate colors (dark pink, green yellow, black, pearl), thin wire 0.3 mm and slightly thicker 0.5 mm (colored can be used), rigid wire 2 mm thick (for the stem), glue, green thread or floral tape, scissors, ruler.
The process of creating a craft is very simple, but you still can’t do without the appropriate patterns for weaving tulips with your own hands. In addition, you will need to be patient and persevering. The main elements of a beaded tulip are the stem, leaves, petals and core. The step-by-step order of weaving the elements is as follows...
Assembly
The last stage occurs using the thickest wire to ensure reliability and tight fixation. Everything is clear here, you just need to carefully and secretly connect all the parts of the tulip in an open form with wire.
If some petals fall off, you can fill them with special super glue, which sets in a minute, but it is extremely important to do this carefully so that no traces of glue are visible.
And at the end we wrap the stem with a floral ribbon, secure it and our tulip is ready.
Other options
There are many more solutions for creating beautiful products. For example, the following master class.
To work you will need:
- beading wire;
- green and red beads;
- floral ribbon or green satin ribbon.
- We create the petals in this way: the wire is 75 cm long. Measure 10 cm, twist the loop. We get an axis, put 11 beads on it.
- We string beads onto the end and make 6 turns.
- Read more about revolutions. Let's measure out the same number of beads as on the base. Let's bring the working one under the base, bend it - we end up in the same place.
- Measure out the required number of beads at the end and bend the bottom of the base. Let's repeat the previous steps. We make the required sheet size.
- We follow the movements, they should be on the same sides. This way we form the back and front sides. Just 6 turns, remove the protruding axle. Then bend the sixth rim, tighten it tightly and remove the unnecessary edge. There are only 6 petals for the product.
- Let's make the middle. For it you will need a wire of 20 cm. Fill 10 cm with beads, fold it in half and make a loop.
- Let's make two loops of 10 beads each.
- We twist the rest into a spiral and turn the loops. It is better to use yellow, orange or dark beads.
- We create green leaves from 2.20 cm wire. It should be quite rigid, we use it to give it shape. We make a curl of 11 cm and fill it with beads. Let's make 7 turns at the end. We put one bead on top to sharpen the end.
Related article: DIY autumn ekibans made from leaves for school with photos
- At the base we go around the axis with the end over the top, and at the edge we make the opposite movements. If you look at the sheet, you can see the front and back sides.
- Give shape using a glass. For the next sheet we take 2.40 cm wire. We fill the curl by 10 cm, making 8 turns.
- We assemble and twist the product. Let's take a wire (thick) 23-25 cm. Tip - if you don't have a thick one, then take a thin one, but wrap it three times. We cut the edges to 1 cm and screw the core to them.
- Add 6 red leaves, twist the edges carefully. Do not forget that the wrong side should look inward, and not in the opposite direction. Let's create a form. Then we wrap a 12 cm cutting, gradually adding green leaves. There will be 7 revolutions in total. We fix the edge of the thread with tape or Moment glue so that it holds tightly.
Photos of beautiful beaded tulips
How to make a three-dimensional paper house: step-by-step master class and instructions for making a doll and toy house (155 photos + video)Making peony flowers from corrugated paper - a guide for beginners and a step-by-step master class on how to make a flower with your own hands
How to make a beautiful tree of happiness with your own hands: step-by-step master class for beginners (100 photos + video tutorials)
How to make a beautiful lampshade with your own hands: simple ideas for table and floor lamps (125 photos + video)How to make polymer clay at home: DIY master class (125 photos + video)
How to make a paper hat with your own hands - templates, design ideas and tips for those who are making a hat for the first time
Tools and materials for work
Beading is a rather difficult but fascinating process that requires certain knowledge and skills. Making flowers is ideal for beginners in this type of needlework. To create all the main elements, the French (parallel) weaving technique is used, which is considered the easiest to work with bugles.
What is needed to make flowers?
First of all, you will need a good mood, a positive attitude and patience. It doesn’t always work out right the first time, but with some effort you can quickly master the technique of making tulips from small glass beads.
The main material for work is beads. To create flowers, small or medium-sized rings are used. It is also necessary to take into account the size of its internal hole, since two wires must pass through it.
To weave crafts from beads, thin wire 0.3 - 0.4 mm is used. A thicker metal thread (0.8 - 1 mm) is used to make the bases of petals, pistils, stamens and leaves. A stem is made from a wire or stick 2 mm in diameter.
In addition to beads and wire of different sizes, you need to prepare the following materials:
- paper and transparent tape;
- green tape or thread;
- scissors;
- wire cutters;
- pliers.
The design of a bouquet of beaded tulips depends on the author’s imagination. Vases, pots for indoor plants, transparent film, and satin ribbons are used to decorate flowers.

