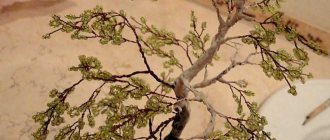
Creating various products from beads can rightfully be called an entire art, whose name is beadwork. Some crafts, and there are a lot of them, can be called masterpieces. And all because the right technique was chosen to create them, of which there are quite a lot in this skill.
You can master these techniques if you have perseverance, patience and a great desire to make beautiful products. If you still decide to try your skills , and in the future develop them, then let's get acquainted with the interesting and rather simple technique of parallel weaving.
What is parallel weaving?
Flat parallel bead weaving is a simple technique that resembles a fabric made from rows of beads. Each row is firmly connected to the previous one, so the product is dense and even.
Bead patterns with parallel weaving involve passing the fishing line towards each other. Due to the different number of beads in the rows, figures of the desired shape are obtained. Having mastered this method, you can proceed to more complex products.
Parallel weaving with beads according to the pattern in the photo master class
Creating various products from beads can rightfully be called an entire art, whose name is beadwork. Some crafts, and there are a lot of them, can be called masterpieces. And all because the right technique was chosen to create them, of which there are quite a lot in this skill.
You can master these techniques if you have perseverance, patience and a great desire to make beautiful products. If you still decide to try your skills, and further develop them, then let’s get acquainted with the interesting and rather simple technique of parallel weaving.
How to read patterns and weave with parallel weaving
In this section you will be presented with the whole essence of parallel weaving. You need to take the wire and put beads on it for the first and second row, in the amount of three pieces. Once you have done this, take one edge of the base material and pass it through the two beads, towards the other edge. During the weaving process, the edges of the wire should be directed towards each other. When you do this, you need to take the two ends and tighten them on both sides. They should be approximately the same length, as shown in the second diagram.
When you have tightened, you need to take one end of the base material and put four pieces of glass on it. Pass the other side of the wire through these four elements, and tighten again. Repeat similar manipulations as many times as necessary until you reach the desired size for your product. When the beading process comes to an end, you should tightly twist the edges of the wire in the last row so that in the future all the beads do not fall off. So you have become familiar with the basics of this skill, and have managed to make sure that mastering it is not at all difficult, but on the contrary, it is easy.
Parallel rose beadwork
Let's look at how the parallel weaving method will take place using the example of a leaf. Its implementation will occur from top to bottom using the presented diagram.
Take a piece of wire twenty centimeters long. String three beads on it, and leave the edges of the same length on both sides. After that, take either end and thread it through the two elements, heading towards the opposite side of the wire. As a result, you will get the 1st and 2nd rows. String the beads again, but in the amount of four pieces on one side, and pull the other through these collected beads, also towards the opposite side. Pull the base so that the strips are pressed tightly together. Since if you do not make them stretched, the leaf will not hold its shape well and will turn out a little skewed.
In the same way, weave all the other bead strips, which should be located in parallel. To prevent the petal from unraveling and the beads from falling off, you need to twist the edges of the material at the very end.
This technique is used if you need to weave foliage, petals for different flowers, as well as berries, butterfly wings and much more. If you can master this particular method described above, which is called parallel, then you can quickly move on to learning more complex techniques, such as French, loop or needle. And then you will fully experience the beauty of beadwork when you can make another masterpiece with your own hands.
Patterns for weaving leaves and petals with parallel weaving
Video: Parallel bead weaving lessons for beginners
rukodelnichaem.ru
How to read patterns and weave with parallel weaving?
Bead weaving is created according to patterns; parallel weaving has very simple patterns.
They are most often written in numbers, which indicate the number of beads in each row. The figure also shows the number of beads in the rows.
To start weaving with this technique, practice a little:
- take the fishing line;
- add 1 bead to it for the first row;
- two beads for the second row, they should be located in the middle of the fishing line;
- take the end of the wire and pass it through the beads of the second row;
- Pull both ends of the line to tighten;
- then collect 4 beads on one end;
- pass the second end through these beads;
- tighten the line;
- All rows are woven in the same way.
Parallel bead weaving master class
Parallel beadwork
Parallel bead weaving is considered one of the simplest weaving methods. Lately, this kind of bead weaving is gaining more and more popularity.
Having learned to weave various beauties from beads, any craftswoman will be able to master volumetric parallel weaving from beads.
Handicraftsmen create unique products from glass beads:
- handbags;
- phone cases;
- collars;
- souvenirs;
- flower arrangements, etc.
All the items described are created using various weaving techniques. There are a huge number of techniques invented by craftswomen, but there are few basic ones. One of these methods is parallel weaving with beads. In today's article we will talk about how to master the technique of parallel beading.
Advantages of parallel weaving with beads
Parallel bead weaving has its advantages over other techniques:
- The diagram is very easy to read.
- The product is woven quickly.
- Even a beginner can do the job.
- Different sizes and classes of beads are used.
From the above it is clear that the technique is simple and novice needlewomen will be able to fully master it. This activity is fun and exciting, requiring perseverance and a desire to create.
I suggest you familiarize yourself with a detailed step-by-step master class on the parallel weaving method.
Master class on parallel beading
Cut a piece of wire measuring thirty centimeters and divide it in half.
Step 1
We string beads in two rows at once onto a wire: one and two beads (Fig. 1).
Step 2
Then we pass the free tip of the wire through two beads of the second row towards the right tip (Fig. 2). Next, take both ends and carefully tighten the beads into the middle.
Step 3
Next, we string four beads onto one end of the wire, and thread the other in the opposite direction through the collected beads and tighten (Fig. 3). Subsequent rows are woven in the same way.
In the parallel weaving method, when pulled up, the rows lie parallel to each other in space. The wrong side of the work is equal to the front (Fig. 4).
Sometimes the beads are laid parallel in space - then a three-dimensional product is obtained (Fig. 5).
Recommendation
If it is necessary to lengthen the wire, the ends are tucked behind the completed rows, returning three rows back. Wire is added in the required place (Fig. 6).
Having finished weaving, the ends are twisted under the beads or the ends are passed three rows in the opposite direction, after which the edges of the wire are cut with scissors.
To create the first product using this technique, needlewomen recommend that beginning craftswomen start trying from a flower. Flower plants are varied, with leaves of different shapes, require little material, and develop fantasy and imagination well. The flower is chosen based on the number of beads available.
Parallel weave rose
We will weave an unusual rosette using the parallel weaving technique.
Material necessary for creativity
In the process of creative work we will need:
- beads, size No. 8, desired colors for petals;
- green beads of the same size;
- three millimeter wire;
- floral tape;
- scissors.
Having prepared all the required material, you can begin to create.
Master class on creating a rose
I propose to study a detailed master class on creating the most beautiful representative of the flora - the royal rose.
- Before starting work, we cut the wire measuring forty-five centimeters. Divide it in half and string three beads. We move one bead, and through two we pass the tip in the opposite direction. Holding both ends, we tighten the beads - they should be exactly in the middle.
2. The next creative stage consists of collecting four pieces of glass, pulling the free edge through them and tightening the segments.
3. Next we string six beads and do the same manipulations as before.
4. The next step is to collect eight pieces of glass, thread a loose wire through them and carefully tighten the ends to align them.
5. Next, we put on eleven beads and do the same as before.
6. It remains to weave the last row, consisting of fourteen beads. We collect the required number of beads, pass through them with the free tip and carefully tighten the wire. Next we need to form beautiful sides on the petal.
7. To do this, we put six beads on the left end and push the edge through the first piece of glass.
8. We perform similar actions with the right edge of the wire. At the end, twist the wire well. You need to weave twelve such petals.
9. Next we will create the leaves located near the bowl of the flower. We cut off eighteen centimeters of wire and put on six beads.
10. We move one piece of glass, and through the five collected beads we pass the free end of the wire, tightening it well.
11. Next, string six beads onto each end of the wire.
12. We twist the ends of the wire and get this floral element.
13. We need five of these leaves per flower.
Flower assembly
Having prepared all the necessary elements required to form a rose, we will begin step-by-step assembly.
Stage 1
We take three petals and alternately twist them together.
Stage 2
Using our fingers, we shape the bud and align it.
Stage 3
The second row consists of four petals. We twist all the petals one by one. Next, we use our fingers to shape the desired flower, pressing it closer to the bud.
Stage 4
The next row is formed from five petals, twisting alternately. Twist the petals and form a bowl using your fingers. The first flower is ready.
Stage 5
Now you need to attach the sepals to the rose. We attach them exactly like the previous petals, carefully wrapping them with wire. It turned out to be a gorgeous flower.
Stage 6
We decorate the stem with floral ribbon, carefully hiding the gaps. Using the same principle, a smaller rose and a bud are made.
As you can see, by allocating a little free time, adding a great desire and a flight of imagination, you can make a unique product. From the roses you make, you can form a bouquet and use it to decorate your own home interior, attracting the attention of guests. Don't be afraid to experiment - create, make the world more beautiful!
Parallel bead weaving and weaving techniques can be learned from the video:
podelkiruchkami.ru
Step-by-step instructions and master class for beginners
Let's look at weaving using a specific example.
Most often, craftswomen create petals and leaves using this technique, so let’s look at an example of a jagged leaf made from bugles:
- collect 2 beads on the fishing line;
- pass one end through the second bead;
- tighten the line;
- for the third row add 3 beads;
- pass the second end of the wire through the beads in the third row in the opposite direction;
- follow the diagram.

