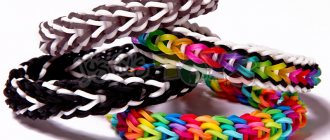
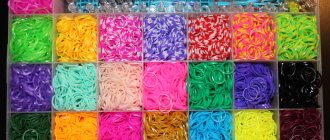
Everyone has probably already heard about Rainbow Loom silicone rubber bracelets. The number of fans of this jewelry is growing every day. Some people buy ready-made products in specialized stores or on the Internet, while others weave them themselves, having studied many master classes. There is a great amount of similar information in various formats of photos, videos and articles on the Internet, and all this is freely available. Our article on how to weave a stylish bracelet from small rubber bands was no exception. We offer several options for creating a bracelet using the popular “Dragon Scale” weaving technique, including using improvised tools, such as a fork. Weaving patterns and video tutorials will help us fully explore this topic.
Decoration on one fork
Well, in this article we will try to weave one of the most beautiful and original types of bracelets on one fork - “Dragon Scales”.
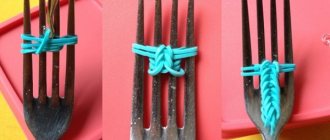
Take the rubber band, fold it in half, and then twist it into a figure eight shape. Then carefully place the resulting mixture on the two middle tines of a fork. Now, in the same way (as shown a little above), twist another elastic band and put it on the outer teeth of the cutlery.
The same must be done on the other side.
Next, we take the next iris and fold it in half and, without twisting, put it on the two middle teeth. With our fingers we grab the bottom elastic band that we put on earlier and throw it to the top. We perform the same manipulation on the other side.
Similarly, using this technique, we weave our entire bracelet, while we no longer twist the elastic bands into a figure eight.
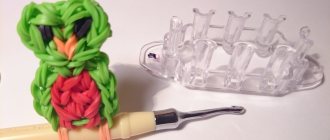
If you are uncomfortable working with your fingers, you can use a hook, and if you don’t have one at home, take a regular toothpick. To make the bracelet original and unique, alternate a combination of different colors.
In order to complete our weaving, we transfer the rubber bands from the outer tines of the fork to the inner ones on both sides. Next, we take the new iris and twist it in half, putting it on the middle tines of our fork. Now, through the upper elastic band, we throw the lower, previously twisted elastic bands to the top.
Related article: Deer made of cones and plasticine: master class with photos and videos
We take a new iris, fold it in half and throw it over the two middle teeth. Now we throw the bottom elastic band over this elastic band from each tooth.
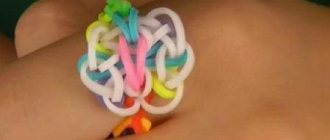
We transfer the remaining elastic bands to one tooth of our fork and the last step is to put on the clasp. Our bracelet is ready!
As you can see, it's quite easy. Weaving with forks takes a little longer and requires more patience than, for example, working with a loom or slingshot. But you must admit, people will be pleasantly surprised when they find out how and what you used to weave it. After all, a person who does not understand this will really begin to consider you a professional in some way.
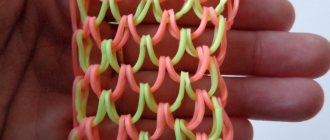
Also look at a couple of photos on this topic, you will understand how everything looks step by step.
The weaving patterns for this bracelet are completely simple. They are shown in the photos above and below. In fact, the mesh weaving pattern is simple and in most photos it is the same.
As you already understood, the “Dragon Scales” bracelet or, as it is also called, “mesh” can be woven without a machine, using only the most popular equipment - a fork (one or two, depending on how wide you want to make the bracelet) or you can do it on a hook or slingshot. If you don't believe me, check out the lessons below.
In order to weave a wide bracelet, use two forks at once, initially securing them together. Real professionals from YouTube will tell you exactly how to weave such a decoration, who will really tell you and show you a lot of useful information. So watch and weave at the same time!
Bracelet made of rubber bands “Fish tail”
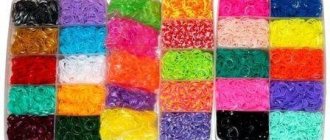
You will need: rubber bands, a dinner fork, a crochet hook or toothpick, and fasteners.
Master Class
- Take a fork with four teeth and put on 3 rubber bands in this way: the bottom rubber band is on the 3 teeth on the left, then twist it in a figure eight and put on the right 3 teeth of the fork.
- Place the second rubber band on the 4 tines of the fork, then twist it in a figure eight and place it on the 2 middle tines of the fork. Put on the third rubber band in the same way.
- Hook the hook and lift one piece of the bottom elastic, then secure at the top between the two middle tines of the fork. Repeat this weaving process with the other part of the bottom elastic.
- Place one rubber band on the fork one at a time, just like the first time.
- Slip off the bottom loops with your hook, then secure them at the top between the middle tines of a fork.
- In this way, weave a bracelet of the desired size.
- Periodically remove the bracelet from the fork using the hook. To do this, pick up the upper elastic bands and move the hook up the teeth. Attach the outer rubber bands to the tines of the fork.
- Attach the clasp by connecting the 2 ends of the bracelet.
The fishtail rubber band bracelet is ready! I recommend watching the video master class!
How to weave bracelets from rubber bands without a fork loom. Fishtail bracelet.
Weaving patterns
There are several different types of weaving, most often the fishtail pattern is used. Bracelets made using this technique can become more complex, for example, “double” or “triple fishtail”. But we will show you a simple fishtail pattern made from rubber bands on a fork:
No less common is the “dragon scales” bracelet pattern. The bracelet according to this pattern is very wide and looks great on the hand. Watch how to do this in this video:
Now that you have become familiar with the basic methods of weaving rubber bands on a fork, you can safely begin this exciting activity. With a little practice, you can create beautiful jewelry not only for yourself and your loved ones. Good luck!
How to weave bracelets from rubber bands on your fingers
The existing technique of weaving bracelets from rubber bands without a machine involves the following sequence of actions:
- The first elastic band is placed in a figure eight pattern over the middle and index fingers. The next two elastic bands, without twisting them, are thrown over the “eight”.
- Having removed the edge of the lower elastic band, it is transferred and thrown on top 2 and 3. The second edge of the elastic band is done in a similar way. As a result, a pattern is formed between the fingers.
- Another elastic band is put on the fingers. The bottom loop is removed and moved to the top in the same way as the previous step.
- Weaving continues until a bracelet large enough to wrap around a hand is ready.
- The two unused elastic bands are removed, and a special “S”-shaped fastener is attached to the third, which forms a loop. On the opposite side, the end of the bracelet is fixed in a similar way.
In this way, using the technique of weaving bracelets from rubber bands on your hands without a machine, you can create a real decoration on your own.
Bracelet made of rubber bands “Dragon Scales” on two forks
You will need: rubber bands, 2 table forks, tape, fastener.
Master Class
- Secure the fork handles with tape.
- Place an elastic band twisted in a figure eight on each pair of teeth.
- Place the rubber band over the center prongs in the middle of the forks.
- Place the bottom row of the post on the top, fastening 2 and 3, 4 and 5, 6 and 7 teeth.
- Repeat this process for 2 rows, stringing 1 and 2, 3 and 4, 5 and 6, 7 and 8 prongs.
- Repeat steps 3 and 4 of this master class until you reach the desired bracelet size.
- Finish weaving the bracelet in this way: put an elastic band on all the tines of a fork, twisting between each tine, transfer the bottom rows to the top ones, and the outer ones to the middle ones.
- Thread double posts from each fork onto the clasp, you should get 4 half clasps, then attach the other side of the bracelet.
The rubber band bracelet “Dragon Scales” is ready! I recommend watching the video master class!
How to make a bracelet from rubber bands No. 27. Dragon Scales. Rainbow loom bracelet. Dragon scale.
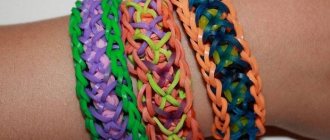
You can weave a plain bracelet, or you can use rubber bands of 2, 3, 5, 7 colors. It all depends on your imagination, the main thing is to calculate the colors while weaving. Follow the step-by-step master classes and video lessons and, of course, everything will work out!
Two-color bracelet made of rubber bands
You will need: rubber bands of 2 colors, a dinner fork, a crochet hook or toothpick, fasteners.
Master Class
- Place a rubber band folded in half and twisted into a figure eight over the middle tines of a fork.
- Place rubber bands folded in half and twisted in a figure eight on the 2 outer tines of a fork on both sides.
- Grab the bottom loops from the middle teeth with your hook, bring them up and release.
- Place the elastic bands on both sides without twisting and lift the bottom loops up.
- Carry out the weaving process according to this pattern: 1 elastic band in the center and 2 along the edges. Alternate colors every 2 rows.
- Weave a bracelet of the desired size.
- Complete the weaving in this way: remove the loops from the outer teeth to the middle ones, and from the lower ones to the top. Place the last elastic on the middle teeth and remove all the loops.
- Attach the clasp by connecting the 2 ends of the bracelet.
The two-color rubber band bracelet is ready! I recommend watching the video master class!
How to make a bracelet from rubber bands using a Dragon Scale Iris fork