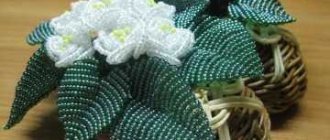
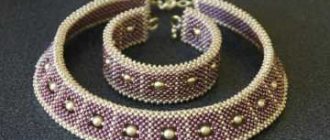
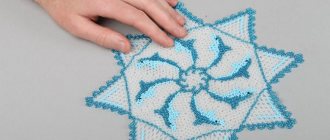
Recently, beaded items have become in demand among fashionistas. Needlewomen create clothing, haberdashery, souvenirs and jewelry. Weaving occurs using various techniques that the craftswoman knows. In this article we will talk about an interesting and unique beading technique - mosaic weaving. The canvas or product made using the mosaic technique has good density. You can use several types of mosaic weaving in one product. For this technique, craftswomen have developed many extraordinary and colorful sketches.
The process of working with beads is quite painstaking and requires attention and concentration. Beginners may encounter some difficulties that can be easily overcome if they move forward with purpose. Having become familiar with the step-by-step technique of mosaic beading, novice needlewomen will be able to create their first masterpieces. Usually, beginners begin to weave jewelry or souvenirs using this technique. Famous needlewomen create toy animals, paintings, panels, and colorful flower plants.
Master class on flat weaving with mosaic plait
I suggest that you familiarize yourself with a detailed description of the implementation of flat mosaic weaving. To do this, string the required amount of beads onto a thread.
I would like to draw your attention to the fact that there should be an odd number of beads. Having collected the beads, insert the needle and thread into the third bead from the edge.
Next, string one bead onto a thread (it’s red in the picture) and thread a needle into the hole of the first element.
Then we continue weaving the mosaic using the same technique, adding new beads one by one.
Having learned the basics, there will be no problems with creating products. Using the technique described above, you can weave a bracelet that will attract attention with its uniqueness and shimmering glass. You can also weave strands from beads, which are used as decorations on the neck or to decorate handles. Let's consider how the process of creating such products occurs.
Working material
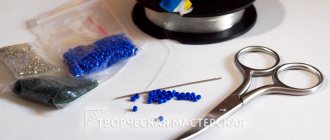
Before you start creating, you need to prepare all the material necessary for work:
- pliers;
- lighter;
- thick white thread;
- scissors;
- accessories;
- tweezers;
- needle;
- fishing line;
- blue and blue beads.
Let's begin the first steps of weaving in a circle. Let's look carefully at the diagrams below.
This technique is suitable for beginners as it is considered simple. This weaving looks voluminous and beautiful. Thus, toy crafts are created.
Workflow Description
We string two blue, one blue and four blue beads onto the prepared fishing line.
We stretch the thread again through the resulting row.
Gently tighten the thread, forming a small beaded ring. Be sure to leave ten centimeters of free end of the thread.
We weave the second row, pulling the thread through the first bead and threading another blue bead onto the needle. We lower the bead down to the ring.
We use the theory of mosaic weaving. Therefore, we thread the needle into the hole of the blue bead and string one blue bead. Tighten the thread.
Next we skip one bead, thread a needle through the next one and put on a blue bead. We tighten the fiber.
Using the described technique, weave to the end of the row. At the end we thread the thread through the last bead of the initial row. We continue to form the third row. We string beads of the desired color, pull the needle through the protruding bead of the underlying tier, string another bead, etc. In the same spirit, we weave a strand of the length we need.
Having learned how to make a simple flagellum, in the future you will be able to create jewelry. By adding accessories and a pendant to the harness, we get a wonderful neck decoration.
Beaded baubles
Pin It
Every girl wants to have exclusive jewelry. Beaded baubles are a beautiful youth accessory. He is known to many people around the world. Initially, the bauble as an ornament flourished in popularity during the period of hippies and perestroika, when new fashion trends burst into people’s everyday lives.
A mixture of beading and weaving allows you to make bracelets and beads of various styles, both more discreet and elegant
So are children’s ones - with various bunnies, flags, inscriptions, hearts.
We will learn how to weave a beaded bauble easily and simply, and master classes and patterns will help us.
What materials will you need
To work, you need to purchase certain tools and materials: it will be difficult for you to do without them. But a video or step-by-step tutorial will tell you how to weave beaded baubles for beginners.
The work requires:
- Beads. This material must be calibrated and of proper quality. After all, in such a miniature product as a bracelet, small flaws will be immediately visible.
example of using quality material - Beads, pebbles, glass beads - everything that is provided for in the diagram or your imagination.
- Fishing line, waxed thread, floss - what you will string the beads on.
- Beading needle with a thin eye.
- Scissors.
- Clasps or rings for fixing the product on the hand.
Fastenings can be very different
The designs for beaded baubles are varied. If you are just starting your journey into the world of needlework, choose simpler items and weaving techniques. You can start weaving on specialized machines. If you don’t have one, you can make a homemade one. To do this, you will need a hardcover book or cardboard box.
Weaving machine Homemade machine out of the box
Simple weaving methods and patterns for beginners
On the Internet there are many patterns for weaving various animals, emoticons, mosaics, letters, flowers and other shapes. Step-by-step master class lessons will help you master weaving baubles from beads.
Photos of all the baubles from the section
“Cross” weaving technique and its varieties
Let's learn how to weave beautiful beaded baubles using this technique. It is very common and simple. The Cross technique is suitable for beginners.
If you weave in a single row, the product turns out narrow. But if you wish, you can make more massive and wider products. For this:
- weave several baubles of the same length and width, connect them together;
- increase the amount of material. For example, take not 4 beads, but 6 or 8. But keep in mind that you will have to take a longer thread;
- weave beads, stones, glass beads into the bracelet;
- weave in turning rows
Scheme of weaving option Options for using beads
Weaving baubles “Cross stitch”
The algorithm for making a bracelet is as follows:
- We take two threads. We attach a needle to each one.
- We string 4 beads onto the right needle and push them to the middle of the thread.
- We pass the needle and left thread through the last (fourth) bead. Make it crosswise. In this case, your two needles have swapped places. To avoid confusion, you can lightly tint the edges with nail polish in contrasting colors.
- Place 1 bead on the left needle and two on the right needle.
- Pass the left needle crosswise through the last (seventh) bead.
- Weave the bracelet to the length you need.
Video lessons
Bauble with a cross
Wide bauble with a cross
Schemes of drawings for baubles
Weaving technique "Fabric". Hand weaving or tapestry weaving
This technique allows you to obtain a uniform canvas. It can be either plain or with various patterns, inscriptions and names. Even a beginner who sees beads and a pattern for the first time will get beautiful beaded baubles. Weaving patterns of this type are carried out according to the following algorithm:
- Measure the thread to the required length.
- String 10 beads on the thread one by one.
- Pass the needle through the third one from the edge.
- Next, place a bead on the thread, and insert the needle into the fifth bead from the edge. At the end of the row the thread is pulled together.
Personalized beaded baubles
If you want to make a personalized product, first find its diagram. If you don’t have one, draw it yourself on a sheet of paper in a box. Each cell is one bead. Mark where the colored beads - letters - will be located.
Patterns for weaving personalized beaded baubles involve working using the “Canvas” technique. This way you can achieve the optimal width of the product, weave in not only the name, but also various decorative elements - beads, stones.
Video lesson
Personalized bracelets can also be woven on a loom; more on this later in the article.
Weaving technique "Flower"
A bracelet made using this technique is suitable for girls or young girls. And if you use materials skillfully, then even for a business woman. After all, a delicate openwork decoration in milky-golden shades can refresh a spring look or an evening dress.
The technique is:
- On the thread, place the number of beads corresponding to the flower petals (6-10), in our case - 8.
- Close them in one circle and go inside again so that the thread comes out in the outermost bead (8th).
- Place a bead of a different color on the thread; this will be our leaf or the beginning of another flower. Place the needle at the beginning of the bracelet (at the 4th bead).
- Collect 8 beads, close them into a ring after 5-6 of the previous flower. Go around the circle to come out with the needle opposite the 5th bead.
- Take beads of a different color and repeat the algorithm as necessary.
Video lessons:
-
-
Openwork bauble with a floral pattern
This product can be given as a gift to a friend or you can safely wear it with various outfits. Depending on the color of the materials, the decoration can be matched to a business suit, jeans, or dress.
Openwork baubles are made using large beads and stones. This combination with ordinary beads allows you to achieve an unexpected effect.
They can be woven on one or two threads. Let's consider the last option.
For work you will need large white, blue and lilac beads and small matte beads of blue or pale blue color.
- On two fishing lines, collect 6-10 beads.
- Thread a large white bead through both fishing lines (this will be the petal of our flower).
- Now put lilac and blue beads on the left and right fishing line.
- Now thread both lines through the white bead. Unfold the lines back and turn out the petals. String 2 lilac beads on both fishing lines, pass them through the white one. The first link is ready, use the same algorithm to make the next flowers.
- Place a lock on the fishing line.
Options for openwork beaded baubles
Master class on weaving a braided bauble
Jewelry in this style can be made from single-color or multi-colored beads. The simplest braided bauble is woven in this way:
- Take 3 pieces of fishing line and secure them in a lock.
- For each fishing line, collect a chain of beads (25-35 pieces).
- Braid the braids from the fishing line and secure the second part of the lock.
If desired, you can use this technique to make beads, belts and chic massive bracelets. To do this, take beads of different sizes, glass beads and a larger number of threads.
Weaving technique "Mosaic"
The mosaic technique is similar to the “Canvas” technique that we described above, but it is somewhat more complex.
- Collect 9 beads (or any number, the main thing is that it should be odd).
- Thread the line through the fifth bead.
- Place a bead on the fishing line and thread the end through the sixth from the end.
- Add another bead and thread the line through the very first one. Tighten the thread.
- In the third row, string a bead onto the fishing line and insert the fishing line into the first protruding bead.
- By analogy, weave the following rows.
Video lesson
This technique requires skill, but with time everything will work out!
Weaving baubles on a machine
If you are a professional beader or weaver, you will need a loom. When there is a large flow of products, it is convenient to make bracelets and linens on it.
We attach the clasp to our craft
Using a thick thread, we fix the thread of the product and thread the resulting loop with a pin.
We will need a lighter to melt unnecessary tails. Next, we put a jewelry cap on the pin.
Having shortened the length of the pin, use pliers to form a small loop from its tip. We attach half of the magnetic fastener to the resulting loop.
The second end of the harness is processed similarly to the first. Having finished the creative process, we can be satisfied with ourselves - we have created a beautiful necklace.
Master class on mosaic beading
Here is another mosaic weaving method (peyote) that I have mastered. I want to share with you the information I acquired.
For creative work you will need:
- large beads;
- needle;
- a thread;
- a piece of wire.
Detailed description
At a distance of ten centimeters from the edge of the yarn we attach a stop bead.
We string twenty-four beads.
We take a prepared piece of wire measuring 0.3 mm.
We string beads onto the wire through one bead and the other.
As a result of the actions taken, the entire first row ended up on the wire.
We carefully tighten the thread, all the beads are lined up in an even row. The first row is fixed on a wire, the second is above it, in the air.
We weave the third row, weaving the beads to the beads hanging above the wire. We do not touch the initial row placed on the wire. The main thing is to pull the thread well.
We continue to weave with the same technique.
The way the beads lie evenly and weave beautifully is very pleasant. Using this technique you can weave a wonderful bracelet onto your hand.
Openwork weaving with beads (mesh)
Openwork weaving (or mesh) is suitable even for the most novice needlewomen; technically it is not difficult, and the products look very beautiful - airy and graceful.
Openwork weaving is based on the mosaic technique, the only difference is in the combination of the number of beads. Openwork fabric can be woven lengthwise (straight) and widthwise (transverse), depending on the product; for example, belts can be conveniently woven widthwise, adjusting the length in the process. If you follow the weaving technique, you get triangles and rhombuses, from which the pattern is formed; it is convenient to use them to calculate the width and height of the product.
Technique for weaving openwork fabric with beads:
1. We secure the edge with a stop bead, string 24 beads onto a thread, for convenience, the first and after it every third bead of a different color, they are called key beads, the remaining beads are working (Fig. 1)
2. Pass the needle through key bead No. 13 from bottom to top (Fig. 2)
3. We string 5 working beads and insert the needle into bead No. 7, then another 5 working beads and bring the needle through bead No. 1 - we have three identical cells (Fig. 3)
4. Move to the next row. Cast on 6 working beads (No. 4 - a different color), insert the needle into the middle bead of the previous loop (Fig. 4)
5. We string 5 working beads (the middle one is of a different color), insert the needle into the middle bead of the next loop. We make another loop through the next middle (Fig. 5)
6. Move on to the next row - cast on 6 working beads, insert the needle into the middle bead of the last loop of the previous row and bring it up through 4 beads (Fig. 6)
7. Continue the next row, then weave to the length we need.
The pattern of our canvas consists of rhombuses with a side of 4 beads. You can also weave a semicircular ; to do this, when going down to the next row, cast on not 6, but 8 beads, then it will soon begin to take the shape of a semicircle.
This weaving is called a “three-diamond mesh.” You can change the number of beads in the rhombuses and the number of rhombuses, then the weaving will take a different shape. Along the edges of the weaving you can add loose beads, beads, glass beads, then you will get a fabric with sharp teeth.
Narrowing the openwork fabric is done very simply - the thread is threaded in the opposite direction without adding new beads. To smoothly narrow the fabric, do it at intervals of regular weaving across the entire width of the product. For a sharp narrowing (for example, when turning the blade), it is necessary to make several narrowings in a row. Extensions can also be made both along the edge and in the middle of the weave.
You can choose the bead colors that suit you for beading using the Openwork Weaving technique in our store.
You can buy beads in the Preciosa Beads section of the catalog.
Bead paintings
Bead paintings created by noble needlewomen have been valued throughout the centuries. In such works of art, craftsmen leave the warmth of their souls and a positive attitude. Looking at handmade masterpieces is a pleasure.
Above are illustrations of paintings created by beaded craftswomen. You can create paintings by gluing, embroidering and weaving. Which creative method you choose is up to you. You can try to create a small picture of a tiger using the mosaic weaving technique.
Working material
Before we start weaving, let's prepare the necessary working material:
- fishing line;
- scissors;
- bead needle;
- schematic drawing;
- white, gray, anthracite, black, beige beads;
- blue, two shades of blue, red, pink beads.
Having prepared all the necessary material, we will study the diagram. We begin the creative and exciting process. We put the specified number of beads on the thread, according to the pattern. We pass the needle through the third bead from the end and begin the next tier.
We put an additional bead on the thread and draw the needle further, through one bead.
We act according to the scheme. Having finished one tier, we weave the second.
When working on a unique painting, we independently select the desired colors of beads and follow the schematic image. You can weave a picture using the method described earlier, using additional wire. It will be easier for beginners.
Once you finish weaving a beaded picture, you will amaze all your family and friends with your skills, who will truly appreciate your work. I bring to your attention several mosaic weaving patterns.
Start of weaving.
For the warp, we collect the required number of threads on the machine - we stretch it like strings. The number of these threads must correspond to the number of beads along the width of the product + 1 thread. There are 15 beads in our bracelet, which means we collect 16 threads. They are located at a width sufficient for convenient placement of the beads.
Now we thread a long thread or fishing line into the needle. At the end of the thread we attach a temporary bead with a knot, which must then be removed. We place it on the side of the outer warp thread.
According to the drawing diagram, we put on the needle the required number of beads for the first row of weaving, move them to the temporary beads and press them under the stretched warp threads from below so that each bead falls between two threads (Fig. 1).
We unfold the needle and pass it through all the beads so that the needle passes over the warp threads (that is, from above). Now let's tighten the thread, but not too much (Fig. 2).
Thus, two threads, below and above, will hold the beads on the warp threads. Fastening the first row is the most difficult moment in loom weaving. After finishing the first row, trim it so that all the beads are aligned horizontally.
Read also: Installation of an electricity metering panel with your own hands
Then thread beads for the second row. Pass it under the warp threads from below. Press the beads into the spaces between the threads (Fig. 3).
Pass the needle through the beads in the opposite direction, over the warp threads (Fig. 4). Weave in the same way until the end of the product.
Mosaic weaving patterns
I suggest you look at the most popular patterns among needlewomen:
- fungus;
- tiger;
- rose;
- penguin;
- "Hello Kitty"
Whatever scheme you choose, it is important not to be afraid to try something unknown and scary. The more you experiment, the greater your chances of success. Create - and you will succeed!
Mosaic weaving using circular techniques and other techniques
Let's take a look at the detailed description of mosaic weaving provided. The mosaic method is unique in that fragments of adjacent elements of the product lie loosely against each other, being slightly spaced, as in a regular mosaic. Therefore, for ease of weaving, two rows of beads are collected at once. We string six beads - three for the initial level and three for the next tier, which are placed in one strip (Fig. 1b). We begin to form the third tier (Fig. 1c) by stringing beads over the first row, connecting them with glass pieces of the second level. The remaining, subsequent rows are formed according to the same principle, to the desired size of the product. Thus, you can create a bracelet on your wrist that will become your indispensable decoration.
To create smooth edges, you need to lay out the beads in an even line (Fig. 2). Smooth edges begin to form when creating the third row (Fig. 2a) precisely at the time when the beginning bead of the row falls above the closing bead of the first level. Thus, smooth edges are formed by laying out fragments of even levels on one side and odd levels on the other. To create an even fabric, you must initially collect an even number of beads.
When the edges of the product are aligned with either even or odd bead tiers, the straight edges of the fabric are created using a different technique. Therefore, the set of beads must be odd. The first edge of the craft is created as shown in schematic Figure 2, and when weaving the second, an alternation of stages should occur.
When fixing the third bead in the third row, you need to insert the needle into the initial glass of the first row, since there is nowhere to hook the desired fragment on the third level.
To continue weaving the fourth row, the needle is brought out towards the beginning of the tier. Carefully follow the diagram provided below (Fig. 3).
Scheme
for weaving, the same ones are used as for cross stitch, but the distortion of the pattern must be taken into account. The fact is that when embroidering, the beads are evenly distributed in the squares of the canvas. And when weaving, all the beads turn out to be turned on one side and flattened to each other. Due to the fact that the beads are not round, but oval in shape, the proportions of the pattern are disrupted and it becomes elongated.
For loom weaving, choose a long, thin beading needle and thread or fishing line, as for regular beading.
Recommendations for adding and subtracting beads in a product
When creating products from beads, craftswomen have to either add or subtract beads at the time of weaving at the beginning or end of the next tier. To add one piece of glass at the beginning of the row, you need to add an element, focusing on the second option. You need to make sure that the threaded needle, coming out of the last bead, goes to the edge of the row. To do this, we fix the last bead in the previous row, and insert the needle again into the same bead. To understand in more detail, follow the schematic representation of Figure No. 5. Next, string the bead and insert the needle into the last bead of the previous level. Thus, a bead increase occurs. Then we repeat the steps already taken earlier. If, when adding elements of a product, smooth edges are provided, then we perform it, focusing on the tips of the first method.
If you have already completed a smooth edge using technique No. 1, you can add fragments at the very end (Fig. 6). Fixing the outermost bead, which protrudes beyond the edge, occurs by stringing it on a thread and pulling the needle back into the initial bead of the previous tier. This is how the addition is performed. A smooth edge after such an addition must be created, focusing on the second option.
An addition of two pieces of glass is performed if you need to increase the number of elements at once at the end and beginning of two rows. Therefore, one bead for this row and one for the next are strung on a thread. After which the needle is inserted into the first collected piece of glass (Fig. 7). When creating entire beaded fabrics, there are times when you need to reduce the number of beads.
Any decrease is performed using virtually the same technique. This process occurs by passing the required number of beads. When the fragment is reduced at the end of the tier, the thread is passed into the final bead of the previous row and from this moment further weaving of the beaded fabric continues.
If it is necessary to reduce the required number of beads, we insert the needle into the glass of the underlying tier and continue the creative process further, focusing on the knowledge already acquired. If the decrease occurs inside the tier, then the thread passes through the finished product.
Securing the warp threads in the finished product
In loom weaving, two methods are used to secure warp threads in a woven product. The first of them - pulling the warp threads and tightening them - is suitable for small decorations (used when the product is removed from the loom without cutting the threads). We will have to use a more labor-intensive method. We cut the warp threads, leaving tails of approximately 10 cm.
You can thread the threads one by one into adjacent beads and pass them through the weaving (through the beads). We will simplify this long and complex process by grouping the warp threads into bundles of 4 pieces. So, we pass 4 warp threads through the beads, trying to join them at one point.
Read also: How many explosive cartridges do you need for a garage door?
We tie a knot and thread all 4 threads into the needle. Now we hide them in the weaving, passing the needle between the rows of beads.
Cut off the remaining ends with wire cutters.
Technique for increasing and decreasing the number of beads in the middle of a craft
Increasing the number of glass beads in the right place in the middle of the craft is done by weaving two beads from one point. And in the next row, another element will be added between these pieces of glass. This technique makes it possible to increase the row by one bead.
Reduction of beads in a beaded fabric occurs if all actions are performed in the opposite order. This action is performed by grabbing two beads at once. In the next tier, only one piece of glass will be formed above them.
Additions and decreases are not allowed alone in the same row.
Circular mosaic weaving
Mosaic circular weaving is used by needlewomen in products with strict adherence to symmetry and following a schematic pattern. The beads are laid out in clear, even, vertically directed rows that do not move in any direction. Such a motif is created if the bead circle is closed.
When weaving work from a specific place, which is considered the beginning of the process, you need to string the beads of the initial row and connect them into a ring. After which you can continue to create a unique bead ornament.
When starting creative work from the central part of the craft, weaving can also be done in a flat version. You need to ensure a clear set of beads. For voluminous products, needlewomen recommend starting to weave either with a narrow or wide part of the craft.
Having become familiar with the above mosaic weaving techniques, you can begin to create your first unique crafts. The circular mosaic weaving technique is suitable for making jewelry, such as extraordinary earrings, for a new outfit. Straight weaving is used to weave bracelets or chic pictures. Having a great desire and developed imagination, you can produce interesting things that will delight others with their unsurpassed beauty.
Beginning of weaving bead fabric on a machine
We make a set of warp threads on the machine based on the number of beads in the product + 1 thread. There are 38 beads in our bracelet, which means we collect 39 threads. They are located at a width sufficient for convenient placement of the beads.
Read also: Application of ne555 microcircuit circuit
Now you can start weaving. For weaving wide products, it is better to use a special needle - long and thin. We thread a long monofilament thread into the needle. At the end of the thread we secure a temporary bead with a knot and place it on the side of the outer warp thread.
According to the pattern, we put on the needle the required number of beads for one row of weaving, move them to the temporary beads and pass them under the stretched warp threads from below.
Using your fingers, press the beads between the warp threads.
We unfold the needle and pass it through all the beads so that the needle passes over the warp threads (that is, from above). It remains to tighten the thread (but not too much).
It is worth noting that attaching the beads of the first row is the most difficult moment in our work. We weave the remaining rows according to the proposed algorithm according to the drawing diagram.
We collect beads for the second row, draw them low under the warp threads, press the beads between the threads and secure them, moving from above in the opposite direction. We also weave the third and subsequent rows until we finish the product or reach the place where it is necessary to make holes for the buttons.

