New Year is a wonderful family holiday that brings back warm memories on cold winter days.
And of course, what could bring more joy than New Year's decorations? Bright lights and beautiful New Year's balls hang on the tree in a wide variety of color motifs and patterns, and today we offer handicraftsmen original ideas for decorating this New Year's decor. Let's look at the basic ideas and techniques of reverse decoupage on Christmas tree decorations and New Year's balls.
Reverse New Year's decoupage
It should be said that the reverse decoupage technique is one of the most popular for those involved in design and decoration. This technique is easy and pleasant to work with, and most importantly, it is simple enough that even a child can handle it.
For you, we have collected the main tips of the best decoupage masters and invite you to familiarize yourself with original ideas and decoration techniques that will allow you to create amazing works.
The technology for making New Year's toys using the reverse decoupage technique consists of using a thin sheet of paper with an image printed on it. Most often, a picture printed on a laser printer is used, since this paint “does not flow” then under the influence of applying glue and water.
New Year's decor is wrapped in this paper, or the part with the pattern is soaked in water and the sheet is fixed to the surface using PVA glue. It is noteworthy that the “reverse” decoupage technique is quite simple to work with and it is almost impossible to make a mistake. It's all about the technology of application and drying of the drawing.
When the design dries, the contours of the paper can be easily “erased” or “rolled” after re-soaking. Then, as a result, we get a thin outline of paper flowing onto the surface.
To make such an image, you just need to have a printout on hand and then, to protect the image, cover it with a thin layer of varnish.
Some craftsmen do not varnish their products, since PVA glue itself fixes and protects the design well. However, if you want to bring the work to perfection, it is better to cover the work with varnish and carry out “technical” work to hide the transitional contour of the paper and the product. You can learn more about the technique of reverse decoupage of New Year's balls in a video master class.
The further essence of the process is as follows. To “hide” the unevenness or seams of the product, you should apply a three-dimensional frame or use additional decorative elements that will hide the transition point. In addition, decoupage artists often use patterns with paints, add rhinestones and other decorative materials to their work. Thus, the New Year's decoration looks original, and most importantly, memorable.
What is the decoupage technique?
Decor in the style of decoupage involves gluing thin paper with a pattern onto the surface of a New Year's ball. To do this, use PVA glue, which tightly fixes the material to the surface of the decoration. It is diluted with warm water in a ratio of 2/1. Once completely dry, it leaves virtually no traces. The image located under the layer of adhesive composition is not erased or deformed.
The following additional decorations are used: beads, small sparkles and beads. They are fixed with stronger glue. The result can be secured with a paint coating.
To do this, you will need furniture varnish that does not have a strong odor. It dries quickly and creates a dense shell on the surface of the jewelry. Thanks to this, the product can be wiped with a damp cloth if any dirt appears.
As for beginners, we bring to your attention step-by-step instructions for beginning needlewomen. During the work process, it is recommended to follow the order of actions.
Before you start decorating the surface of a New Year's toy, you need to prepare the following tools and materials. For this you will need:
- Christmas decorations. The diameter of the balls must be more than 6 cm;
- thin paper with a pattern. Experienced needlewomen recommend using napkins. They quickly dissolve under the influence of the adhesive composition;
- set of acrylic paints;
- furniture varnish with a glossy finish;
- thin brush;
- bamboo sticks 3 pcs.;
- semolina. It helps create a textured surface;
- sponge;
- ceramic container for glue;
- flat varnish brush.
Why is reverse decoupage so popular?
The thing is that the New Year theme involves decorating the New Year tree with a certain motif. It’s much more interesting to look not just at the multi-colored balls on the Christmas tree, it’s interesting to look at the fairy-tale motif that will tell its own story.
So usually in the reverse decoupage technique they use decorating balloons on the same theme, but with different patterns. For example, on one ball there may be New Year's characters, on another, a picture in the same style with bullfinches, on another, children playing snowballs, and thus a composition even of three balls in the same design style tells us the story of winter. Next, we invite you to familiarize yourself with the main ideas that will be made using the reverse decoupage technique and will allow your New Year's Christmas tree decorations to look not only original, but also memorable.
Ideas for decorating New Year's toys
Making decoupage New Year's balls with your own hands is not difficult, the main thing is to have the necessary materials, ideas and time on hand.
Materials for production:
- Pictures on A4 sheet or cuttings of images that will be used in the reverse decoupage technique.
- Images must be printed with a laser printer or water-resistant inks.
- Scissors.
- Pencil.
- Decorative sparkles.
- Paints.
- Rhinestones.
- PVA glue.
- Varnish.
- And other auxiliary materials.
Set up your workplace comfortably and get to work.
To decorate New Year's balls, foam blanks or plastic (dense, hollow inside) balls for New Year's toys are perfect.
Photos on balloons
On New Year's Day, it is so important to warm yourself with warm memories, recharge with their energy, and enter the New Year with warm emotions in your soul.
The idea of applying a black and white or gray image to a New Year's toy with motives of a photo of your family is very original. This way you can create something like a photo collage, but on a Christmas tree. The balls will look the same in the same style, but will tell their own story.
Fairy tale
The theme of New Year's fairy tales is very original and is already considered a tradition. If you have a favorite fairy tale, you can tell it on New Year's balls. Print out the desired images and, through subsequent decoration, place them on the tree in the order of the story. This approach to decorating a Christmas tree will especially appeal to children, who will be interested in listening to a New Year's fairy tale while decorating.
Who can be portrayed:
- Squirrel,
- Snowman,
- Bullfinch,
- Father Frost,
- Snow Maiden,
- Bear,
- Snowflakes,
- Rowan,
- Khutor
- New Year's miniature.
As you can see, topics and ideas can be collected in a wide variety of ways. There are no restrictions on actions, so you can fully express your imagination!
DIY Christmas plastic balls using decoupage technique
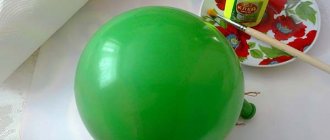
You can decorate a plastic product from a store very beautifully; I recommend taking one-color ones, without patterns or ornaments. And create beauty at home using simple objects. As a rule, needlewomen have everything they need at home, all that remains is to find the time and get down to business.
As decoration we use cones, berries, twigs, beads and other little things that will decorate and make it shine in a new way. They will add decoration to the interior of your home or room.
What you will need:
- Plastic balls
- PVA glue
- Napkins
- Soft brush
- Acrylic paint
- Sponge
You need to cut or tear napkins with beautiful designs. We apply a little glue to the ball, apply a napkin, and paint with glue, from the center to the edges, or rather, we don’t paint, but glue it.
A very important rule is to glue it like this, put a point with a brush in the center, and apply it by extending the brush to the edge, and so, from the center to the edges, the pattern with this method of applying glue does not wrinkle, and we release all the air under the napkin, there are no bumps or irregularities.
You can dilute the glue with water, 1:1, or, if it is very thick, then 1:2, or not dilute it.
You can also cover the entire ball with napkins, then paint over it, leaving only one pattern. Let the paint dry, and use white paint to highlight the relief that is obtained using a brush or sponge.
I usually cut off a piece from the sponge I use to wash dishes, then throw it away as the paint dries and hardens. Mine is acrylic.
When the product is dry, you can glue beads or sequins in a circle, you can use half beads, or use other decorative elements.
Then let the paint dry and coat it with varnish in 1-2 layers, and let it dry again. They can be decorated, if desired, using cones, twigs and decorative berries, gluing them to the ball.
To make the pattern better saturated and set, it is recommended to dilute the glue with water, but not too much, literally 1 part water and 2 parts glue; if you add a lot of water, the patterns will tear when applied.
New Year films"
We all know that on New Year's Day, every year, films with the same New Year's theme are shown on the TV screen. Why not immortalize this on New Year's toys?
Just imagine the originality of this movie idea for New Year's balls.
Balls in the design of a specific film by cutting the most popular frames or simply assembling a variety of recognizable fragments. Home Alone, The Irony of Fate or Enjoy Your Bath and other films can be just some of the examples with a diverse direction in this topic. Thus, you can make a New Year's selection with your favorite cartoon or movie characters. The balls will be different, but among themselves they support the same theme, which overall creates an unforgettable visual picture of perception.
You can make DIY decoupage Christmas balls with your children. This will allow children to show their imagination, have an interesting time and get vivid memories for life.
So, many families begin to develop a “tradition” when every New Year a child makes one memorable ball, which over time can not only be passed down through generations, but also preserve memorable memories within the family circle.
https://youtu.be/vSE2_YFeG2Yhttps://youtu.be/N56M8fD8nuI
_
Decoupage of New Year's balls with volumetric elements
For this craft you need ordinary round balls, which are sold in any store, only plain ones, without a pattern, you can take plastic or glass. But we work with glass with extreme caution, remembering that it can break.
What do you need:
- Plastic balls
- Glitter
- Tassels
- Napkins
- Semolina
- PVA glue
We take the ball and cover it with white paint, using a piece of washcloth for this. We do the work using driving movements, we get a loose, beautiful surface.
You can cover it tightly, or you can cover it so that the color of the ball itself is visible. Next, the product must dry for at least 1 hour.
Next, we cut out the parts we like from the napkins, and separate them until the very last layer, usually they are three-layer or four-layer. There are special napkins for these purposes with bright and colorful designs.
I cut these out with nail scissors; they allow me to work out all the lines and make the design best.
Then we apply the pattern to the workpiece, and start gluing it, dip the brush in the glue, and move from the center to the edges. We do it quickly, but carefully, keep in mind that the drawing may tear, we do it as carefully as possible.
Glue drips can be carefully blotted with a cotton pad, but it is better to not put too much of it on the brush so as not to fill the design.
To make the product voluminous, mix acrylic paint with semolina to make a thick paste, you can make it on a piece of thick cardboard, or use a palette, it will be more convenient with it.
Apply this mixture to the elements that you want to highlight to give them volume and beauty. Let it dry well, and then cover these places with varnish and immediately sprinkle with glitter.
Ordinary plastic balls can be bought in any store, but they are boring and of the same type, to give them a fabulous look, I suggest making something like this beauty, you will only be happy with the design.
If you have time, you can watch a video on how to create a toy; everything is explained in the most detail, so that everyone can repeat it.
This is a great gift for the Christmas tree, you can make them for yourself, or give them to your family, you know, I’ll probably say, you can sell them. On the eve of the New Year, they are selling very well.
