Wedding money chests: types, photos
Wedding treasury is made from different materials. Any material is welcome (cardboard, wood, plastic and even glass). The form of production can be different, again it all depends on the flight of your imagination. Let's look at what types of these cute chests there are:
- Products in the form of a festive multi-tiered cake
Treasury for money in the form of a birthday cake,
decorated with blue ribbons
- Delicate heart-shaped money chests
White chest for wedding money in the shape of a heart, made of cardboard
- Caskets in the form of a house
Money chest made in the shape of a house
- Chests in old Russian, rustic style Rustic Wedding
Chest for a wedding in style – Rustic Wedding
- Original wooden chests made of natural wood
Wooden chest
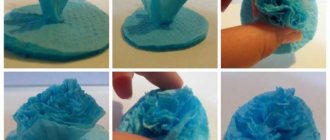
- Money treasury covered with crepe paper
Wedding chest decorated with crepe paper and ribbons
IMPORTANT: Select decoration material for the wedding treasury that matches the overall design of the hall.
DIY wedding chests and envelopes
It is doubly pleasant to receive a gift if it is beautifully decorated and carefully sealed. Often on the wedding day, the couple is given money so that the newlyweds themselves can buy what they want; for the aesthetics and safety of the bills, they are stored in special boxes or envelopes. And it is not at all necessary to purchase gift wrapping in a store; you can make it yourself.
Beautiful envelope
To do this, you need to take a paper envelope, preferably a delicate color, place a piece of lace fabric in its central part, and decorate the edges with flowers. You can cut out any decorative element on top of the lace; a heart would be appropriate for a wedding, and glue it on top. To ensure that the decoration is securely fixed, it can be additionally sewn on using beautiful buttons or beads. Add rhinestones throughout the envelope and you won't find better gift wrapping anywhere.
It is also noteworthy that such envelopes can be used not only for weddings, but also for any other celebration.
Envelope using scrapbooking technique - original and soulful
Heart-shaped box
Marriage is a union of two hearts. What other packaging can you come up with if not a heart? To make it you will need several sheets of cardboard, which must be both thick and thin. A long strip with a beautiful ornament, a fabric that has a bright or variegated pattern, a lace ribbon. In addition to the materials listed, stock up on glue for paper, fabric, scissors, a brush and a simple pencil.
This is interesting
! See gift ideas for a 26 year old guy on his birthday.
Cut out two heart templates from thick cardboard, it is important that one of the parts is two millimeters smaller than the other. Now you already have the bottom and lid of the future box. The next step is to glue the sides to the base. To do this, measure and cut a strip of cardboard, bend it in half and cut the teeth. This will make the strip flexible, and will make it possible to glue the sides of the box without tears. Don’t forget to attach the lid; this is done using the same cardboard that is attached to the sides of the product.
Now you can move on to decorating and decorate the box with colored paper or fabric. The base of the product can be compacted by placing another heart template made of cardboard on it. You can put lace along the contour, fixing it with glue, and the work will be completed, and the box for wedding gifts will be ready.
The box looks great in the shape of a wedding house
Box for money in the form of a cake
Unexpectedly, when instead of a sweet treat there is a surprise in the box. No one is stopping you from making it for your loved ones. To do this you will need: three boxes of the same shape but different sizes, paint, preferably acrylic and aerosol, cardboard, scissors, pencil and ruler, brush. And certainly different decorative elements.
First of all, take a medium-sized box, cut out the top and bottom, leaving 3 cm around the edges, so that it is convenient to glue. In the box at the bottom, only the top part is cut out and, accordingly, in the top one the bottom is cut off and a slot is made for bills and envelopes.
When the “tower” is securely fixed, it can be painted or covered with paper. You can place a figurine of the bride and groom at the very top, and decorate the rest of the body with rhinestones, flowers and hearts. There are no restrictions in accessories, as well as in the color scheme, although it is advisable to give preference to delicate tones. Both you and the newlyweds will be satisfied with the result of your work.
Box in the form of a cake
DIY wedding chest
It was customary to keep money and valuables in boxes. The next option for a wedding gift box will be a chest. To make it yourself. stock up on a shoebox, sheets of white paper, strips of paper for ornaments, glue, a brush, scissors, a pencil, and various decorative items that you would like to see in your work.
Will come in handy
! Read the article about what flowers to give a girl on a date or just because.
And so, the first step will be a slot in the lid, designed for guests to place their envelopes in the future chest. At the second stage, you should cover the box with colored paper; it is important to use not variegated coloring, but ivory color or a small pattern. And it’s even better if the box matches the overall color scheme of the room’s decoration. Check that the paper lies smoothly, without wrinkles or bubbles. After drying, you can start decorating the box. For this purpose, it is preferable to use satin ribbons and lace, so that the material is securely fixed, use a glue gun. The more exquisite the chest is, the more attention of guests it will be able to win and the more money the young couple will collect.
Wedding chest - handmade
In this case, beads, crystals and bows would be appropriate as decoration. To prevent the contents of the chest from falling apart, it is tied with a ribbon or a decorative lock is made, the kind you can find in special stores. But then the key is solemnly presented to the husband and wife.
Money chest in the form of a cake
As mentioned above, there are many models of caskets for wedding celebrations. If you have cardboard boxes of different sizes, round or rectangular, you can make an unusual chest in the form of a multi-tiered cake. To do this, you will need to remember your labor lessons at school and use your imagination.
- Start simple - glue the boxes together with tape. Make the base for the treasury.
- Carefully cut a thin strip at the top. It should be slightly longer than banknotes.
- When you are sure that everything is securely fastened, start decorating the product. For this process you can use (fabrics, ribbons, lace, beads, pebbles, shells, artificial flowers).
- You need to glue the “cake” with a special quick-drying glue. Don't forget to process our cut for banknotes at the top. The base (cardboard) should not be visible through the hole.
Delicate money box in the form of a three-tier round cake
Where to begin?
To make a chest with your own hands, you will need your own imagination and some free time. Such an attribute must be done carefully and with love, as it will become the central element of the celebration and will symbolize the future treasury of the newlyweds. By putting your whole soul and good intentions into its production, you can attract financial well-being to the family.
Before you start making a money chest, you need to determine:
- The shape of the future wedding chest: square, rectangular, barrel-shaped, heart-shaped, etc.
- Product color and size.
- What materials will be needed to make this holiday attribute with your own hands?
- Related decor.
Money chest in the shape of a heart
Wedding caskets in the shape of a heart look cute. For such products, chocolate candy packaging of the appropriate shape is well suited. Of course, if you don’t have one, you can make a treasury of this configuration yourself from thick cardboard.
Beautiful casket for a wedding procession in the shape of a heart, decorated with blue satin
IMPORTANT: It is more convenient to make a cut for envelopes with money in this wedding box either on the top or on the side of the product.
Making a chest from a box
You can make a wedding chest from an ordinary box:
- First you need to make a beautiful lid for the future box. To do this, use a utility knife to mark longitudinal grooves. This must be done very carefully so as not to cut through the cardboard. The resulting markings will allow you to bend the cardboard.
- The semicircular lid is secured with tape on each side of the box.
- There are holes left on the sides that should be closed. To do this, you need to cut out blanks of the required size and shape from another box or cardboard.
- The resulting parts should be attached to the gaps with tape or a stapler.
- Now cut a hole in the lid of the resulting casket. First, it is advisable to mark its location with a pencil. The hole should be wide enough for any gift envelope or card to fit through.
- Now you need to measure the sides of the box and cut pieces of fabric to the appropriate size.
- The resulting pieces of fabric are used to cover the box completely, and the cut area for the banknotes must be carefully decorated. This can be done using cute ribbons, lace borders, etc.
- When all stages have been completed, you can start decorating. The newlyweds decide how to decorate their wedding chest based on the theme of their wedding. If the whole celebration is planned in a nautical style, then the festive casket can be made in blue and add decor from shells.
The same original and simple version of a chest for a wedding can be made from a shoe box. But in this case, the top will be flat and not round. In any case, the final result will depend on how the product is decorated.
Money chest in rustic style
If you are planning a wedding in a Rustic style, then the money treasury should match the overall rustic flavor. The chest should be decorated with charming, cute, simple details and attributes. For decoration you can use linen, burlap, linen fabric with a creamy tint. Or a casket made of natural wood will suit the country style perfectly.
Wooden money chest, made in Rustic style
This style differs from others in a certain carelessness. When decorating a celebration with this decor, keep in mind that the interior should not contain any pretentiousness, pomp, and especially luxury. Also, to please your guests with an unusual decoration of the room, use the following recommendations:
- To make decorative elements, in particular a chest for money, take only simple, natural materials
- It is advisable to create the decor yourself
- A little negligence (not to be confused with sloppiness) is welcome
- Natural colors are suitable for this style, without any bright spots.
- To decorate a wedding casket, use soft ribbons, lace, ropes, bows
Beautiful treasury for money for a wedding celebration in a rustic style
Master class on making a box
You can make a ring box for your wedding with your own hands, with a little imagination and effort.
The result will be an exclusive accessory that will attract the attention of guests and remain a long-lasting memory for the newlyweds.
What materials will be needed for work:
- two sheets of thick A4 cardboard;
- any glue (“Moment”, PVA);
- scissors;
- satin, lace;
- decor (beads, seed beads, artificial flowers);
- foam rubber
When everything you need is prepared, you can start making the wedding box:
- Apply the template of the future box to the cardboard, having previously printed it from the Internet. The bottom will be square (6 cm on each side), the walls will be 4 cm. Leave an allowance of one and a half centimeters.
- Make a lid template in the form of a square (6.3 cm on each side), height – 2 cm.
- Cut out the blanks, bend along the lines, forming a box.
- Glue the base, then the lid of the product.
- Cover all sides and the lid with satin fabric, decorate the box with beads, flowers, beads or any other suitable decor.
- Finally, beautifully lay out the material from the inside. Typically, foam rollers wrapped in satin fabric are placed in the box, where the wedding rings will be placed.
We offer another master class on making a wedding box from a wooden blank.
What you will need:
- preparing a future wooden box;
- acrylic varnish and paint (brown and ivory);
- bitumen varnish;
- a piece of linen and cotton fabric;
- lace;
- decorative tag with flowers.
How to make a wooden box:
- First, remove all metal parts of the workpiece.
- We cover the sanded product with paint so that it looks as if it is dirty. The brush should be directed along the grain of the wood.
- After complete drying, rub the places where you “dirty” the box with wax (you can use a regular candle).
- Paint all parts with ivory paint and let dry.
- Use sandpaper to go over the box from all sides to achieve the effect of artificial aging of the item.
- Cover the box with varnish, wait until it dries, repeat several more times.
- Screw all metal parts back.
- Glue a decorative tag to the lid as decoration (you can purchase this from a craft store).
- All that remains is to sew a pillow for the rings, which needs to be filled with filler and decorated with lace. Place the cushion inside the box.
To make a round box for wedding rings, prepare the following materials:
- preparing a wooden box;
- white and silver paint;
- white satin;
- padding polyester;
- ribbons;
- artificial flowers.
Step-by-step instructions for making an elegant wedding box:
- Paint the base of the workpiece white and the lid silver. After drying, apply another layer of paint.
- Sew a pillow from satin fabric to the size of the bottom of the box, stuff it with synthetic padding or any other filling.
- Coat the bottom of the accessory with glue, carefully insert the pad, and press firmly.
- Glue artificial flowers onto the lid to create an elegant arrangement. You can add a ribbon bow, beads, beads or any other decorations.
Wooden money chest for wedding
In order to make a wooden chest for money, you need to be able to hold a woodworking tool in your hands. This can only be done by wood craftsmen. Ordinary imagination is not enough. After all, one awkward movement of your hands can ruin the whole job.
Below are examples of the artists' work:
Original chest for a wedding ceremony made of wood
Crafts Fair - treasury for newlyweds (handmade)
Openwork casket for newlyweds made of wood
How to make an envelope for money with your own hands
Buying a gift envelope for money is not difficult. But it does not carry the positive energy and emotions that are inherent in things made with your own hands.
To make an envelope you will need paper. Paper for scrapbooking is very popular. It has sufficient density, has different patterns and embossing. For envelopes, double-sided paper or regular thick paper is ideal.
To make a gift envelope, you will need to stock up on tape, a pencil, scissors, plain paper and patterned paper for the lining. Procedure:
- Print the envelope template.
- Cut it out and trace it on colored paper.
- Fold the sides of the envelope.
- Place the resulting envelope on paper intended for lining, trace it with a pencil, and cut it out along the contour.
- Open the envelope and insert the lining into it. Protruding edges must be trimmed.
- Attach the lining using double-sided tape.
- The money envelope is ready!
How to make a money chest for a wedding: diagram
To make a treasury, you will first need to decide what material you will make it from, what shape it will be, and how to decorate it.
Beautiful casket for a wedding made of cardboard with lace
We will look at how to make a regular cardboard chest with a rounded lid.
Tools, materials:
- Scissors, glue, tape, knife, ruler
- Thread, needle, glue gun, pencil
- Fabric, lace for decoration, organza
- Ribbons, flowers, beads
Material for wedding treasury
How to make a wedding money box?
- Draw a diagram of the chest of the required size on hard cardboard. If the length or width of the material is not enough, then glue the cardboard parts with tape.
- It is better to make a slot for money right away, because when the treasury is glued together, cutting an even strip while hanging will be inconvenient.
- Make sure once again that you have made the pattern correctly and cut out the design from cardboard using a knife or scissors.
- See the design diagram below in the figure. When the cardboard is cut in the right places, start gluing the structure. If you are comfortable gluing parts with glue, then use this method. And if it’s easier to secure the casket with tape, then please use this option.
- Now all that remains is to cover the chest with fabric. To do this, use threads, a needle, glue, and double-sided tape. Make sure everything is done neatly and evenly.
- An important point is the finishing. It is more convenient to glue jewelry for the treasury with glue using a special gun. In addition, with ribbons and lace you can cover up some of the flaws in your work, if they exist.
Delicate wedding chest decorated with butterflies
Wedding treasury diagram:
How to cut out a wedding chest on cardboard?
Pattern and diagram of the chest
The pattern for the future money house is made using a shoebox.
Here are some recommendations:
- The back of the product should be higher than the front.
- The lid should be shaped and have a handle so that the groom’s or witness’s hand can grip it comfortably.
- The length of the product should be equal to the sum of the width of the box and the height of its front part.
Making a casket from sheets of cardboard is a little more difficult.
But with a little patience, you can achieve your goal:
- To prevent the bottom of the chest from falling out, its length should be about 70 ml.
- The slot for envelopes with banknotes is made before assembling the product: directly on the pattern. If you cut the required hole on a finished chest, you can damage the product.
The pattern of the chest is shown in the figure:
Decoration using an unusual technique
You can decorate a finished chest not only with fabric and paints. You can use the decoupage technique. This option is better suited for boxes made of wood. The idea is to apply multiple layers of paint.
- First you need to cover the product with the main color, most often these are light shades.
- Then you can put any other color on the brush, for example, purple. The brush should be wet enough for the paint to apply translucently.
- You should choose a third color, for example pink, and apply it on top of the previous layer. This creates a very beautiful shade.
- Then you can put the picture on the chest. To do this, you need to find a napkin with any beautiful image, separate the top layer from it, place it face down on a document file and moisten it with water.
- You should get rid of excess liquid. The chest must be smeared with glue in the place where the image is planned and the file with the image must be placed there.
- We remove the transparent file and coat the image with PVA glue.
- The final stage of work will be treating the finished product with transparent varnish.
This option is ideal for a shabby chic wedding, as it implies a certain echo of retro styling.


