What types of handicrafts have not been invented by craftswomen and craftsmen all over the world! Some of them are complex and require professional skills and special tools, while others are simple and accessible even to beginners. One of these simple, but very bright and expressive types is carpet embroidery. Not to be confused with carpet weaving!
Today, both venerable couturiers and home-grown needlewomen use carpet embroidery in their works. Having mastered this technique, you can make soft and cozy pillows, blankets, rugs, and decorate clothes. In general, create unique, inimitable things.
Types of embroidery
Each of these techniques is easy to learn even for beginners. And the work is done quite quickly and in the evening you can create a small exclusive product that will become an interior decoration or an excellent gift for loved ones. There are two types of carpet embroidery, which will be discussed below.
Looping - performed using a special needle. On the front side of this work there will be even loops of yarn. And on the reverse side there will be smooth embroidery. Another name for this technique is “non-woven tapestry”.
Knotted - performed using a special or regular crochet hook. During the process, short pieces of thread are tied with knots to the base fabric.
Types of carpet equipment
There are two carpet embroidery techniques. They have their own characteristics and allow you to get work that is completely different in appearance.
- Nodular or tugging . The work is done not with a needle, but with a crochet hook. For this you need to use a special tool, and not the usual knitting tool. Create a carpet from the edges to the center, separately tying each piece of thread to the base. This process is not difficult, but due to its labor intensity it takes a lot of time.
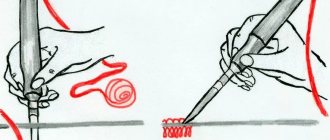
- Looped . Another name is non-woven or printed tapestry. The work is carried out with a special needle for carpet equipment. It will not be possible to replace it with another tool. The entire process is carried out on the wrong side of the work. If high density is required, the loops are made as close to each other as possible. Using this technique, you can perform work with full coverage of the fabric and partial, when only the contours of the image or some of its elements are made voluminous. To create a printed tapestry, not a mesh, but a dense fabric is used as a base.
Nodular (pulling)
Looped
Embroidery kits are produced for both techniques. You can also find patterns for carpet-style needlework. In this case, all materials will need to be purchased separately.
Which carpet technique do you like best?
LoopedKnot
Carpet embroidery
To work with this technique you will need a special needle; you cannot do without it. They are sold in handicraft stores. The set includes a handle, removable needles of different diameters for different thread thicknesses and a thread puller. Needles for carpet embroidery are distinguished by the fact that their points are hollow and beveled at the bottom. The instructions describe how to thread correctly.
The work is done on thick fabric. The thicker the needle, the denser the fabric, otherwise there will be unattractive holes in the fabric.
Any yarn will do, but in one project it is advisable to select threads of the same thickness and structure. In the process, you can use both specially purchased yarn and leftovers that knitters have in stock. You can also use threads obtained from unraveling woolen products that have served their age. Waste-free technology.
A hoop, scissors, and a pencil will also come in handy. You can start creating a masterpiece.
Selecting materials
To complete your first job, it is recommended to purchase a ready-made kit. It is better to choose a small image. You should not start getting acquainted with technology with large, large-scale paintings. This can lead to the materials being spoiled along with the mood.
The set will contain everything you need: a base with a printed pattern, threads sorted by color, a special needle. A small image will help you leisurely study the technology of embroidery in carpet technology.
In order for the finished image to be beautiful, it is necessary to select a special hard fabric or canvas for the base. You can also use a special mesh that retains its shape very well.
Remember! To work, you must use a frame or hoop. This is necessary to obtain better warp tension.
The work can be done with woolen threads; they will add volume and fluffiness to the product. Such products look very noble. You can also use acrylic threads. As mentioned earlier, to create the first product it is better to select small and large images. It's good when there are clear contours. If the drawing in the set is not transferred to the base, then you need to do it yourself.
The best option would be to do a small job with very few or no small elements. This is due to the fact that at the initial stage of training it will be difficult to complete such details, since they require certain experience.
Related article: DIY ships made of paper and salt dough with photos and videos
With the help of a master class, anyone can master the basic techniques of carpet embroidery.
Work process
This type of needlework, like carpet embroidery, is very suitable for beginners, because you can master it in a short time. Initially, you need to choose a drawing for work. You can draw the diagram yourself or choose a picture you like. It is important that there are no small parts on it, because they complicate the work process and are difficult to see on the finished product.
Draw a design on the wrong side of the fabric with a pencil, keeping in mind that the front side will have a mirror image.
Place the fabric in the hoop and stretch it well so that there is no sagging. It is advisable to choose a hoop size such that the entire picture fits.
Thread the thread of the desired color into the needle. When working, the fabric breaks through, the work is held with the wrong side up. You need to hold the needle strictly perpendicular to the surface, inserting the tool until it stops. The length of the pile is adjusted by a limiter on the handle and depends on the wishes of the master.
In carpet embroidery with a needle (information for beginners), it does not matter which side the work starts from. Insert the thread into the needle, leaving an end of at least 3 cm. It is important that first the outline of the selected fragment is made, which is best done in a contrasting color (black), and then the space inside is filled with the main color. You can make stitches along the contour, filling the fragment from the periphery to the center, or go through straight rows. The choice depends on the performer.
Then, with a gentle upward movement, the carpet embroidery needle is pulled out and rearranged 2-3 mm from the original puncture. You don't need to raise it too high, otherwise the loops will unravel or be uneven. Before you start, you need to practice on a small area of fabric. The front row rarely looks perfect, but that's no reason to panic. The result will be visible when a fragment of the drawing is completed.
Periodically you need to turn the work over to the front side for control. The finished loops are bent in the direction opposite to the needle so that they do not intertwine, which will make the work sloppy.
To change the colors of the yarn, just cut the thread of the used color, leaving a small tail, thread a new color into the needle and continue working.
The process is fun and quite fast, the video demonstrates this.
How to thread a needle for carpet embroidery and rules for working with it
Threading the needle is done as follows:
- hook wire is threaded through the nose of the needle in the direction of the handle .
- A thread clings to it so that it does not jump out while it is being pulled.
- With a reverse movement, the thread is pulled out through the spout .
- The end of the thread is pulled through the hole on the point of the needle.
The thread is threaded - you can start working. You should pay attention to the rules for working with a needle:
- a short end of the thread remains . Securing the underside of carpet embroidery with a needle is not necessary, since the unraveling of the seam is done on the other side, if such a need arises.
- After piercing and pulling, the needle does not need to be raised high so that the seam from the inside is tight, as when sewing.
- The needle is inserted to the entire adjusted length - then the loops will be the same height.
Even if you need to make 1 - 2 stitches to the side before turning, the needle is still turned in the direction of movement.
It is important that the thread lies freely on the table and does not stretch while working. It should not be pressed with the hand that holds the needle.
The second hand, usually the left, is not involved in the work. It holds a hoop or frame with stretched material.
The pattern that will be embroidered is applied with a felt-tip pen to the wrong side so that you can see how to make the seam. The distance between stripes of stitches depends on the width of the thread or its hairiness. The fluffier the thread, the greater the distance allowed. It is important that the base fabric does not show through on the front side. To determine this nuance, it is recommended to take a small piece of canvas and try different distances between the seams.
Stitch length - the distance between punctures - also varies. If the thread is thin, 1–2 mm, thick - up to 5 mm.
Editorial Voice
Matryona
Fan of embroidery and sewing
Ask a Question
Embroidering with a needle is very simple, but you must follow the rule: the cut of the needle should always face the direction of movement . For example, if you start at the top and work your way down, the cut will face the stitcher. When turning the seam in the opposite direction, the needle is also turned: the cut will be rotated 180 degrees.
End of work
In carpet needle embroidery, it is important for beginning craftsmen to finish the work correctly so that the product retains its shape for a long time.
Remove the finished embroidery from the hoop. Carefully inspect the front side. If some loops turn out to be longer than the neighboring ones, you can carefully tuck them in with tweezers, picking them up from the reverse side. If the loops turn out to be shorter than others, then using a needle or hook you can slightly pull them up.
From the wrong side, trim off the excess threads, leaving 2 cm tails, which need to be secured by passing them under adjacent stitches.
Coat the wrong side of the work with PVA glue diluted in a 1:1 ratio. This should be done with a soft brush and so that the glue does not get on the front side. This technique will secure the yarn and prevent the loops from unraveling. If you do not dilute the glue, then after drying the work will be hard, and when bent the product will crunch.
Cover the work coated with glue with film and leave overnight. Then remove the cellophane, lay the product on a flat surface and leave until completely dry. This smoothes the surface well.
Iron the embroidery from the wrong side and glue it with non-woven fabric. You can go over the adhesive solution again. After such manipulations during operation of the product, nothing is scary anymore. All threads are securely fixed.
All that remains is to hem the lining, if it is a rug, if it is a pillowcase - the second wall, if it is a picture - insert it into the frame.
Operating procedure
When getting started, the first thing you need to do is pull the selected fabric onto the hoop. In the process you need to follow some recommendations:
- the position of the needle should be perpendicular to the fabric;
- To avoid tangling of knots, it is necessary that the thread that comes out of the holder is located behind the hand.
- you need to lift and thread the needle very carefully until the tip of the needle is visible;
- the distance between the previous and the present stitch must be at least 1 mm;
- after 7-8 stitches, if the thread gets in the way, it needs to be cut off;
You may be interested in What is cross stitch canvas: tips for choosing
Important! From the drawing you can understand whether everything is being done correctly. If the stitches are visible on the wrong side, and a pattern is obtained on the front side, then the work is being done correctly.
When choosing a complex textured pattern, you must first frame it. Then, taking the desired yarn, fill in the satin stitch of the pattern. It can be filled using a linear or circular method. Or you can combine these two methods.
Needle embroidery for beginners is not difficult to perform, but in order to avoid mistakes, you must follow the following rules:
- The stitches should be placed at the same distance from each other, not too close and not too far;
- In order for the boundaries to be clearly traced, you need to apply stitches on the inside of the pattern;
- To change the direction of movement of the needle, it does not need to be removed from the fabric. It is the canvas itself that turns, not the needle;
- make sure that no knots appear on the thread, so that you don’t have to unravel the work done;
- Constantly pay attention to the front side of the design to see whether the design is applied evenly. For beginning craftsmen, the first rows may turn out uneven, but there is nothing to worry about.
Drawing on the track
Having finished embroidering the canvas, you need to carry out the finishing work. The fabric needs to be washed by diluting the shampoo in warm water, then allowed to dry, having first laid it out on a flat surface. If, as a result of drying, the product becomes wrinkled, you can iron it a little.
Knot embroidery
The design must be applied on a special fabric - Stramin. Stramin is a dense tissue with large cells.
The first step is to draw squares consisting of 10 cells on the fabric. Prepare the yarn by first cutting it into pieces of a certain length. To make the pile longer, you need to take a long thread.
It is necessary to apply the design and embroider on the wrong side. The work is carried out in several stages:
- Fold a piece of yarn in half. Pull the resulting loop through the mesh using a hook;
- The ends of the thread are held with a finger, and then hooked and pulled through the net;
- The knots should be tightened tightly so that they are securely held on the mesh;
- Fill out the entire drawing using the same method;
- When the drawing is completed, turn the fabric over to the right side and trim off any irregularities.
Beginners may think that carpet embroidery is very difficult, but this is not so. There are basic seams that are very easy to make: half-cross, cross, long oblique tapestry, oblique tapestry and elongated cross.
To make it easier for a beginner, you can start with a simple drawing. You can buy it in a store or download it from the Internet. There are forums for craftswomen who often post their work there.
For beginning craftsmen, there are special ready-made kits. The main task for a beginner will be to choose a good canvas.
You might be interested in this: Patterns for wedding cross stitch embroidery
But it is worth remembering that the first works may not always turn out perfect, but over time, experience will come and the work will become much better.
Little tricks
First, the small details of the drawing are completed, then the larger ones. The last step is to fill in the background.
The length of the loop can be changed during operation. This will create relief and volume. But the entire fragment must have the same loop height. For example, the grass at the foot of the mountains in the picture, or the ears of a puppy.
If there are missing loops in some areas, you can insert a thread into the needle and always come back and refine the gaps.
It is advisable to make a contour or straight lines in two parallel rows. This way they will look clearer and won’t get lost in the general background.
Master class on carpet embroidery
To work, you will need a special dense canvas with large cells, called stramin. This material is sold in craft stores and construction departments.
You also need a special hook, but if you don’t have one, you can get by with a regular crochet hook. To work, you need yarn, which needs to be cut into equal pieces. Their length depends on the desired length of the pile, from 3 to 10 cm. To simplify the task, it is recommended to wind the yarn onto a ruler of the desired size and cut it on one side. So all the segments will be even. Any yarn available is used.
A master class on carpet embroidery will help you complete work of any level of complexity. But it's better to start with something simple.
The picture should not contain small details, they will complicate the work and will not be visible on the finished product. The canvas is divided into 10 x 10 squares to simplify the process. Apply the image to the front side. If you plan to use several colors, you can use a pencil or felt-tip pen to highlight these zones.
It is important to remember that you need to retreat 2-3 cm from the edge of the canvas in order to subsequently continue working with the workpiece.
In the knotting technique, work begins from the lower or upper corner, and the knots are tied sequentially into each cell, row by row.
Fold a piece of thread of the desired color in half. Pass the hook under the cell of the canvas, grab the thread at the bend point and pull it under the base. Thread both tails into the resulting loop and tighten the knot. Each knot must match the color of the selected pattern. When everything is ready, you need to trim the ends of the threads with sharp scissors so that the product takes on a finished look.
This is how simple and uncomplicated it is to create a beautiful, exclusive item.
Ideas for such embroidery with patterns
We would like to offer you a selection of patterns for embroidering carpets with a needle or crochet, with which you can make small rugs for your home with your own hands.
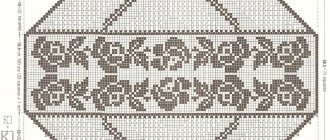
- This pattern will allow you to embroider a beautiful rug that will decorate the bathroom, porch and area near the dressing table or chest of drawers. Calculate the scale based on the fiber size of the canvas on which you will embroider.
- Another option for a rug that can be made using a type of embroidery with a needle or crochet. You can also experiment with color by choosing your own threads.
- This carpet pattern will look great in your home, and you can choose the shades to match the furniture, or, conversely, focus on contrast. You can also adjust the length of the pile to get a fluffier and softer carpet, or vice versa, a thinner one. A rug like this, embroidered with small loops, would look good.
- This pattern is definitely better to use for the crochet embroidery technique and focus on the length of the pile. Don't forget, the larger the canvas structure, the larger your finished carpet will be. Try to do the markings in advance, and not “by eye”.
- This is a rather complex multi-color pattern that will help you make a cute bedside rug for your child's room. You can also use this pattern for embroidery on clothing or textile interior items.
- This cute dog will look great on your front door rug and lift your spirits. In this case, we recommend choosing not wool, but synthetic threads for embroidery, because they are more wear-resistant. This pattern can also be used for embroidery on knitted items, for example, to decorate a knitted blanket.
- This shepherd can decorate not only a rug, but also a sofa cushion, and choose the background based on the shades of the interior.
- Little children will enjoy playing on a soft rug with such a wonderful bear, and it is better to embroider it with thick woolen threads using the crochet technique.
- This pattern can be an idea for creating a bedside rug in a baby’s nursery or for a wall panel. You can take similar patterns from cross stitch kits and use them for carpet embroidery on pillows.
- This delicate pattern on a handmade rug will decorate your bedroom or bathroom. It can also be used as a basis for embroidering other interior items or home clothing. For example, a homemade robe with hand-made embroidery will look very nice.
Where to get the diagrams
Any designs can be used for carpet embroidery. You can draw a diagram yourself or use children's coloring books. Cross stitch patterns, where each cell corresponds to a loop or knot, are very suitable for this purpose. It is best to select pictures without small details.
Abstract geometric shapes or simple patterns look good. Even the stripes look beautiful, because they gain volume and softness.
Carpet embroidery for beginners is an opportunity to spend time profitably, use thread trimmings and create a unique thing that will decorate your interior.
