Accessories are an invariable attribute of any event. School holidays, matinees in kindergarten, student parties - all this is accompanied by costumes.
Today, a fashionable accessory are ears attached to the headband. Teenage girls take photographs with such ears and use them as an accessory for various holidays.
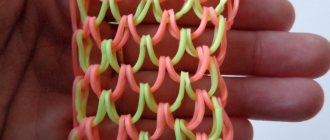
Making ears with your own hands is not difficult. There are many ways to make an accessory. Anything can be used: from cardboard and wire, to homemade knitted parts and purchased blanks.
To make a beautiful accessory, and not a clumsy children’s craft, you need to make an effort; each action must be performed strictly according to the instructions, clearly and evenly.
Particular attention is paid to the little things: contours, details, trim.
Volumetric ears crocheted or knitted: patterns for knitting hats for women with descriptions
A fashionable headdress is a hat with ears. An ideal option to emphasize coquetry, playful mood and capricious character.
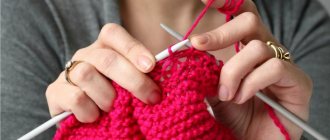
It is enough to simply knit such a hat yourself. For this you will need yarn. It is better to choose wool. Knitting needles No. 3, elastic band, thread with a needle.
Knitting pattern for a hat with ears:
- For an adult girl's head you will need 96 loops.
- We knit 4 rows of elastic.
- Next comes the knitting pattern.
- Rapport is added twice in each row.
- When the height of the hat is connected, close the loops.
- We turn out the ears in the upper corners.
Important! The pattern is chosen according to taste; there are quite a few options for knitting patterns. The crochet pattern is not much different from the one described above.
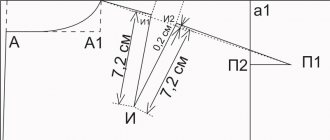
Crochet:
- We cast on 88 loops and knit 57 rows.
- When finishing the 57th row, we put the designations of the descent lines on each 22 loop.
- We fasten by knitting the first two loops into one, grabbing the top yarn.
- We do the same for the front loops, excluding the three extreme ones.
- We tie the loops tightly.
- In the 59th row the loops are not decreased.
- Knitting continues according to the pattern: every even row we decrease the loops according to the pattern described above.
- Each odd row is knitted unchanged.
- Upon completion, the thread is separated, leaving a small section of it.
- It is threaded through the loops that remain.
- Tighten and secure on the wrong side.
- On the tenth loop from the top point, they begin to knit the eyelet.
- The ears turn out better if you choose knitting needles of smaller thickness.
- The first two rows are knitted in the round, forming the ear.
- Subsequent ones - decrease every second loop.
- Knitting is carried out with tightening.
- We remove extra loops when there are no more than three left.
- The thread is cut, tightened and fixed. Ready!
- The second eye is knitted according to the same pattern.
Ears for adults
For a long time now, elements of children's costumes have been used for adult events. Like, for example, these ears.
Photos with bunny hoops are very popular online.
Making such an accessory is quite easy, you just need to follow the following scheme.
The first step is to form an ear shape from a wire that bends well and holds its shape, as shown in the photo. And also make sure that the wire is long enough to secure it to the rim.
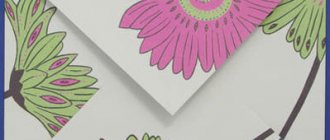
Next, in the likeness of the contours formed from the wire, you need to cut out 4 parts from lace. They are sewn face to face, then carefully turned inside out and smoothed with an iron.
Now the parts are ready to be fixed to the frame. But before that, wrap the frame with satin ribbon so that the wire is decorated.
Let's start to consolidate.
You get such intriguing ears.
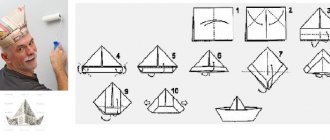
Children's headband made of paper and cardboard
To make a simple children's accessory - ears with your child, you will need materials: cardboard, paper, glue, scissors, hairpins.
Making a simple headband with ears - a children's version:
| № | Actions | Notes |
| 1 | Cut a strip of cardboard 1-2 cm wide | This is a headband. It should be attached to the hair or hat using hairpins or bobby pins. Choose cardboard in color so that it matches the suit |
| 2 | We cut out the triangles according to a single template. Each ear is in duplicate | In other words, 4 triangles of colored paper are cut out and glued together so that the colored side faces outward. When gluing, leave a 5 mm strip at the bottom on both sides |
| 3 | The strips left at the bottom of the triangles are divided and bent in different directions | They are coated with glue at the bottom and glued to the rim at the same distance. The headband must be bent, otherwise the ears will fall off when bent. To be sure, you can wrap it with transparent tape |
| 4 | Place the headband aside for 15 minutes to allow the glue to dry. | The accessory is ready! If desired, decorate it with sparkles, rhinestones, cover it with shiny varnish or paint it with felt-tip pens |
Video lesson
DIY cat ears are a very bright and interesting addition to the carnival image of a cat. In childhood, almost all children love to transform into various animals, but it is the image of a cat that is most in demand and loved. Therefore, if your child wants to become this mysterious animal for the New Year or just came up with a fantastic role-playing game with the image of a cat, give him cat ears on a headband or on an elastic bandage, we are sure that the child will be absolutely delighted.
Cat ears made from hair using hairpins
For a girl with medium-length hair, this option would be ideal. It is done simply and quickly: just have a comb, elastic bands and hairpins on hand.
Hairstyle diagram - cat ears:
- Comb your hair and make two high ponytails on the top of your head.
- Each tail is tightly wrapped around an elastic band, forming a cocoon.
- The ends of the ponytails are discreetly secured with hairpins or bobby pins. You can decorate them with bows.
Another version of the same hairstyle is done using braids. Make two high ponytails and braid hair. They are wrapped around an elastic band and the ends are secured.
This option is more reliable - it rarely falls apart even if you take off or put on the hat.
But if the hair ears are part of a costume for an event, it is better to spray them with hairspray and put thin elastic bands on top.
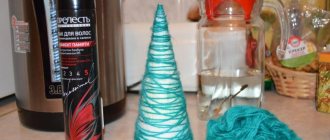
How else can you do it at home?
If you happen to have an unnecessary headband lying around at home, you can make beautiful ears yourself.
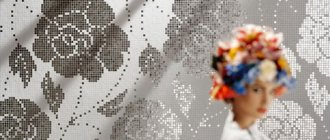
We cut out the triangles themselves from thick cardboard and cover them with fabric. It is better to use velvet, it looks beautiful. Decorate the fabric with rhinestones or buttons.
Sheathing does not require special skill. Templates are cut out larger than the triangles cut out of cardboard. The sides are sewn together on the inside.
In order for the figurine to stand, you should place two cardboard triangles inside and separate them with cloth at the bottom. The bottom is sewn up and attached to the headband.
If the surface of the headband is fabric, use thread and a needle. They can be used to wrap a headband and sew ears to it.
To keep them in good shape, use wire instead of cardboard. To do this, make wire blanks: triangles, and cover them with material. It is more convenient to fasten if you leave the ends of the wire at the bottom.
Important! In order for the ears to lie tightly on the surface, the bottom of the triangles should be rounded. Then it will sit tightly on the rim.
You can attach the products to the headband using hairpins, tape or even a stapler, if the material of manufacture allows it.
Show your imagination and perseverance, and you will create the perfect accessory for your holiday costume.
Baby ears
For work we will need the following materials:
- Faux fur or, if desired, you can take natural fur, with a pile length of about a centimeter, we will make the ears white.
- Fleece, pink looks the most delicate, if you take something other than fleece, check that the edge of the fabric does not require processing.
- Regular headband, white.
- Threads, scissors, needle, cardboard.
Let's start with cutting. We take the fur, fold it in half, draw the shape of the ears by hand or using a printed template, and leave a seam allowance.
You need to start cutting gradually, first cutting off the top layer without touching the base.
So, make small half-centimeter cuts to the end.
Next, work on the second layer, and in the end you will get two separate ready-made forms.
If you have the opportunity, use not office scissors, but scissors specifically for sewing, tailors, they are sharper.
Now two insides for the ear are cut out of the prepared fleece. For these parts you can use the same template, but reduce them by about two centimeters and then use them. It is important that the cut out internal part looks like the photo below. That is, it was located on the white segment and was smaller than it.
Related article: How to clean pots from heavy carbon deposits inside and outside
Using pins, we pin the fleece joint to joint to the very edge of the fur.
And we sew, we sew almost flush to the edge, as far as possible.
Next, we chop two materials close to the second edge in exactly the same way.
To understand whether you did everything correctly, pay attention to the fact that the fur should have curved in a semicircle.
We also sew the second side, we do the same with the second eye, first we pin one side - we sew it, then the second.
The two ears look like this:
Now carefully turn the ears right sides out, to do this, use a switched off pen or a pen without a rod, or a broken pencil.
If the fur and fabric are very soft and the tip of the ear does not hold, insert cardboard cut to shape, it will hold the desired shape.
We take the hoop and sew each ear to it in turn.
You can sew them close together, or you can leave them at a distance from each other.
In addition to the master class on ears, we will tell you how to make a ponytail that is suitable for suits for boys and girls.
It is very simple to make, just take a small piece of fur.
And it is sewn tightly into a ball with white thread.
Now the accessories for the bunny costume are ready.