Why is the owl toy so popular?
A knitted owl will not only be a wonderful and safe toy for a child, but also an interior decoration. Depending on the chosen pattern, the product may have a practical purpose. For example, to be a pillow or an oven mitt.
Of all the animals and birds, the owl is always loved. This bird is a symbol of wisdom and curiosity. Therefore, it can be given to people who are engaged in scientific or educational activities. A crocheted owl can be made to look like a real bird or a fantasy character.
Knitted amigurumi
The most popular cartoon characters are those from Winnie the Pooh and Smeshariki. Children will be happy to receive a unique toy as a gift that others will not have. Also, over time, it will not lose its relevance, but can become an interior decoration - after all, knitted items make the atmosphere cozy.
Note! A knitted owl toy can be given to very young children if natural hypoallergenic materials were used to create it.
Also, such products are quite durable and difficult to damage. A bright, big-eyed owl with funny tufted ears will delight both children and adults.
Owl rug - another interesting idea
How to knit an owl keychain: a master class with a step-by-step description
The keychain is attached to your bag or keys – it’s such a small accessory. The owl is one of the most popular images, which can be seen not only on backpacks, but also on clothes. You can make such a product using a crochet hook. The keychain should be small in size so that it can be easily attached to things.
To knit an owl keychain you will need the following materials:
- yarn of one or more colors;
- hook;
- light-colored felt;
- black beads;
- needle;
- orange thread;
- ribbon or chain.
Colored yarn for an owl
The product can be flat or voluminous - it all depends on the skill level of the needlewoman. The threads should not be too thick so that it is more convenient to crochet and the keychain looks neat. The owl consists of a head, which is also the body of the bird. You need to knit with a single crochet, making decreases and increases if necessary.
You should work in a bottom-up direction. The knitting pattern for an owl keychain is as follows:
- Row 1 is a chain of single crochets (6 loops), which must be connected into an amigurumi ring;
- 2nd row - having knitted single crochets, you should make an increase - 6 loops;
- to create 3 rows, you must also knit a single crochet and increase by 6 loops;
- for 4 rubles you need to make 2 single crochet stitches and an increase (for each stitch - 6 loops);
- to create the 5th row, the number of single crochets must be increased by 1 and an increase of 6 loops must be made;
- for row 6, the needlewoman needs to knit 30 single crochets;
- 7th row - having created 3 single crochets, you should make a decrease of 6 loops;
- from rows 8 to 10 you need to knit 24 single crochets without increasing or decreasing;
- for the 11th row you need to make 2 single crochets, decreasing by 6 loops;
- The 12th row consists of single crochets, which must be reduced by 6 loops.
You might be interested in this: How to sew a Tilda bunny yourself
To make the product voluminous, amigurumi are stuffed with filler. The edges of the keychain are sewn together with a connecting seam. After this, you can move on to decorating the owl. Felt is needed to create eyes: neat small circles are cut out of it. Then they are sewn to the knitted figure, followed by beads. The beak is embroidered with orange thread. Then a ribbon or chain is attached and the keychain is ready.
Knitted toy keychain
Important! It is better to sew all decorative elements rather than glue them: this way the product will be durable and the beads will remain in place.
If there is no suitable filler, you can make a flat owl keychain. The knitting technique is practically no different from the one described above:
- Row 1 consists of 2 simple air loops and 2 single crochets;
- for row 2 you also need a single crochet and an increase is made for each;
- Row 3 is knitted similarly to row 2;
- Row 4 consists of 8 single crochets.
The knitting technique of the 5th row is more complex and follows the following pattern: first make a simple air loop, then a single crochet. The next stitch is knitted like this: single crochet, double crochet, double crochet. Next is 1 half double crochet, connecting the double crochet and half double crochet. This is followed by another complex aerial loop similar to the one described above. At the end - a single crochet.
Amigurumi knitting pattern
To make the toy look neat, tie it around all edges of the product. Eyes for an owl can be made not only from felt, but also by crochet. To do this, knit 2 chain stitches and 6 single crochets. Felt is suitable for the pupils. The beak is embroidered with orange thread. The fastening is made of a chain or ribbon.
You can complicate the pendant by making it from separate elements: you need to tie two wings, a tail, and then sew them to the body. When making the eyes of an owl, you should not forget about the proportions. If the pendant is small, then they should not occupy most of the body.
Most often, when creating such toys, the eyes are also knitted, but this method is not suitable for a keychain. The reason is that this piece turns out to be small and crocheting it is inconvenient. That's why they are made from felt and beads.
Beautiful crochet toy for keychain
Knitting a pillow with an owl
A crocheted owl adds coziness to your home. Making it is not as difficult as it might seem. To make it, you need to prepare a diagram.
Important! This diagram should indicate which color should be used for which row. Any pattern can be adjusted to the desired size of the product. The easiest option is to make a round pillow.
To make an owl pillow you will need the following materials:
- crochet yarn in different colors;
- hook;
- filler.
The owl's body consists of two circles, the edges of which are connected and stuffed with filler. You can choose any other shape for the base. Separately, you need to knit the ears, wings and beak of the bird.
Owl ears can be triangular or semi-oval in shape. The knitting technique for this part is simple - single crochets with a gradual decrease. For each ear you need to make a front and back side, the edges of which are connected using a hook.
The wings for this pillow can be made non-standard, openwork. To create “feathers” you need to knit arches from air loops with double crochets.
The body is also easy to make. It is based on a standard amigurumi ring. Next, you should knit single crochets, adding and decreasing loops. Then the circles need to be connected, leaving one free to fill the pillow with filler.
You might be interested in How to make your own toy owl - ideas for work
The eyes are knitted similarly to the body, only smaller in size. The beak is embroidered with orange thread.
Next, all the parts need to be connected together. It turns out to be a beautiful cute owl pillow. The proposed master class is suitable for beginner needlewomen.
Note! Some craftswomen make tassels on owl ears, which can be easily made by knitting simple chains of air loops.
Knitting a pillow in the shape of a cute owl is also accessible to beginning needlewomen
You can knit an owl that is close in appearance to a real bird. This pillow consists of the following parts:
- torso;
- paws;
- wings - 2 pieces;
- tail;
- eyes.
To create the product you will need colored yarn, but before you start knitting you should prepare a pattern for ease of work.
Body Knitting Guide:
- You need to knit a chain of 15 loops, then a double crochet.
- In a similar way, you need to knit up to the 8th row. At the end of each row, increase by 2-3 loops.
- The 8th row should be knitted according to this pattern - 5 single crochets, increase, then 17 - single crochet and increase by 3 loops. Next come 16 stitches, loops must be added to the last 4.
- According to the above pattern, you need to knit 9 rows.
- From the 18th row they work like this - 5 sbn, then you should make a decrease. Next 17 sc, and on the last 5 - decrease in 3 loops. Then you need to repeat it again, only decreasing by 2 loops.
- 4 rows should be knitted in this manner.
- The 23rd row begins with the creation of 4 sc, then decrease. Then go another 16 sc, then decrease by 3 loops on the last 4 stitches. You need to knit the same number of stitches, but decreasing them by 2 loops.
- According to the above scheme, you need to knit 4 more rows.
Knitting pattern for a pillow
But the knitting of the body is not finished yet. After the 27th row you need to change the color of the yarn and you can work with the part further:
- 2 rows should be knitted according to the last pattern;
- Next you need to make single crochets with decrease on the last 3 columns;
- Thus, you need to make 9 more rows.
Important! After this, you can fill the product with filler, leaving the edges of the part unfilled - you will be able to form ears.
The body of the bird is ready - all that remains is to fold the edges together and sew them. You can begin making the next element of the pillow.
Making owl eyes is very simple:
- First you need to make a circle of amigurumi.
- Next - 6 sc with an increase on each column.
- In a similar way, you need to link 30 columns.
There is no need to knit the beak separately: it should be embroidered with orange thread. Next, you can start creating a pair of paws - it will consist of two fingers:
- This detail is based on an amigurumi ring;
- then you need to make 5 stbn with an increase to each column;
- Using the same technique, you need to knit 3 more rows;
- You need to make the second finger in a similar way.
Then they need to be connected using a hook. Then you can start knitting the next element of the owl pillow - the wings. The wing will consist of 3 feathers:
- The short feather begins with an amigurumi ring. 6 sc are required with an increase on each column.
- In a similar way, you should knit 2 rows.
- After this, you can proceed to knitting the second feather. The technique for working on it is exactly the same, only they do one more row.
- The third feather is knitted according to the pattern described above, increasing it by another row.
You might be interested in How to make a Maslenitsa doll yourself
Three feathers should be crocheted by tying single crochets. And the last detail of this pillow is the tail:
- they start it with an amigurumi ring, knitting a sc with an increase for each;
- 7 more rows are knitted in the same way;
- 3 rows - without adding or decreasing loops;
- then sc with decrease;
- 2 rows - without changing the number of loops.
After all the parts have been connected, you should sew them to the body. You will get a beautiful crochet owl pillow.
DIY owl applique
In this master class we will crochet an owl applique. It can be attached not only to clothes, but also to a child’s backpack.
For knitting we need:
- Yarn in pink, light green, orange, black and white colors;
- Hook 1.75 mm;
- Scissors;
- Needle.
Leftover yarn is very suitable for making such an applique.
We will knit according to the amigurumi principle, only not sc, but dc.
Use pink yarn to form a slip stitch. Then immediately perform 3 lifting loops. Now you need to knit 11 dc into a slip stitch. Lifting loops will replace 1 dc.
When all 11 dc are worked, work 1 sl in the 3rd instep stitch of this row. Now we tighten the sliding loop by the protruding tail. We tighten it as tightly as possible so that there is no hole.
Next, we start a new row with 3 lifting loops. Now we will perform 2 dc in each of the loops. We also connect the rows by performing 1 ss in the 3rd lifting loop. Lifting loops in each row replace 1 dc.
Again 3 lifting loops and another 1 row of dc. We knit the increase through the loop.
And in the next row we make only 1 loop for the rise, since we will then knit sc. Add every 2 stitches. We connect the row by knitting 1 sl in the row lifting loop.
Now we place the resulting circle in front of us and mark the middle loop on top. We count the same number of loops on both sides of it. In this case 9.
We mark these loops with a marker. Here we will knit the wings. If you don’t have a marker, you can replace it with threads of a different color, which we don’t use in knitting.
Join with light green yarn and make 4 ch. Then we knit 1 dc2n into a new loop, then 1 dc into a new loop, then 1 pdc and into the new 2 loops we make 1 sc.
We do the same on the second side. Now we turn the part over.
Now we embroider the beak with orange floss threads.
To knit the eyes we need white yarn. We make 2 ch from it and in the 2nd loop from the hook we make 6 sc. In the next row we increase their number to 12, adding them to each loop. And we will perform 1 more row with an increase through the loop.
We embroider closed eyelids and eyelashes with black thread. 3 for each eye.
Now we will make the tassels on the ears. To do this, we need to cut the pink and light green thread into short strips. Now we will take 2 at a time and insert them into the loops.
We do the same on the second side. Crochet owl applique is ready!
Large applique – stand “OWL”
How to knit a Scops Owl: description, knitting patterns
The Scops Owl will be an excellent gift for a child or a beautiful interior decoration. The eyes need to be knitted as in the pattern described above. Beads or small felt circles are also added to them. The head and body are a single piece that should be made using the amigurumi technique:
- first you need to tie the ring;
- further - 18 rows with sc with the addition of additional loops.
Then the needlewoman needs to choose a different color to knit the clothes for the bird. The knitting technique remains unchanged until the 35th row. Then you need to take the original yarn and continue creating the toy. The technique is the same, only instead of adding loops you need to reduce their number. Having completed 40 stitches, you need to stuff the scops owl with filler and knit 3 more rows, decreasing the number of loops.
The amigurumi technique is used to create wings. They consist of only one feather. On half of it you need to change the color of the yarn to knit the sleeves. The paws are created according to the MK described above. When all parts of the toy are ready, they are attached to the body of the bird.
Scops Owl
Video tutorials on how to tie an owl
Owl looks cute not only as a toy, but also as a keychain, rug, or handbag. It can be knitted from threads, rags, rubber bands. The main thing is to follow the instructions and follow all the steps described in the diagram.
Share with your friends!
- 44
- 2
- 19
- 65
Shared
Subscribe to our Yandex.Zen channel or Yandex.Messenger
Knitting an owl from plush yarn: patterns for beginners
Toys made from plush yarn are especially pleasant to the tactile sensation, which is why it is often used to make gifts for children. However, when working with this material, you need to take into account some of its features:
- You won't be able to knit an amigurumi ring from plush threads. The circle will not come out even, the loops will be too stretched, and the thread itself will fray while knitting it.
- Experienced needlewomen advise cauterizing the tip of the thread. This is necessary so that the yarn does not fray during operation.
- There is no need to pull the thread to unravel the loops, otherwise the entire row will unravel.
- For crocheting, it is better to use a simple knitting technique: double crochet and single crochet, because complex openwork patterns will be difficult to complete and they will not look as beautiful as with other types of yarn.
Plush toys are hypoallergenic, so this material is often chosen for knitting. The peculiarity of the work is that the body is not knitted according to the amigurumi type. You can knit two separate parts, the edges of which are then sewn together, stuffed with filler, and the plush toy is ready.
An owl with wings is an easy model for beginners
The pattern and description of crocheting an owl from plush yarn are similar to those described above. You can diversify it by knitting clothes for the bird. Or instead of ears with tassels, make them in the form of a hairstyle - two tails of spirals. To make the product original, you can sew or glue an applique. Some complement them with sneakers or a hat.
The image of an owl is very popular now. Therefore, it is not surprising that there are many schemes on how to make a cute toy or an original pendant. If the needlewoman has “grass” threads, she will get a wonderful panel with the image of this bird.
Owl knitting patterns: simple and original
If you want to crochet an owl, arm yourself with a convenient tool and high-quality threads (you can take cotton, viscose, acrylic, wool or soft mohair, but not synthetics).
If this is your first knitting experience, it is recommended to choose a simple pattern. For experienced craftswomen, complex options using multi-colored threads and several hooks are suitable.
See also...
✅ I want to make money by knitting, where to start: an honest opinion from a needlewoman
✅ How to knit a sweater for a woman with knitting needles: step-by-step description
✅ Knitting patterns and patterns: detailed description
✅ Crochet napkins: patterns with descriptions
Owl amigurumi
Amigurumi is the Japanese art of crocheting and knitting small toys. It has won the hearts of millions of people from all over the world, as it gives the opportunity to fantasize and come up with rainbow toys for boys and girls. Children are delighted with such surprises, so we suggest you immediately start making the owl.
To perform this work, arm yourself with a hook No. 3, yarn - 100 g, buttons for the eyes, filler, needle and thread.
Abbreviations:
- VP - air loop,
- RLS - single crochet,
- Dc - double crochet.
Take a thread of the main color, crochet 4 VPs, close it into a ring.
1st row: knit 6 sc, then divide the circle into 6 wedges and in subsequent rows add 6 sc evenly (Diagram 1.). So we knit 9 rows. In the 10th row you should get a circle of 54 stitches. From the 10th to 17th row: we do not increase, we continue to knit 54 stitches.
Row 18: decrease stitches evenly every 7 sc. We knit up to 22 rows without decreases.
Sew the eyes to the toy. They should be located approximately between rows 8 and 17 of the body. We continue to knit the main fabric.
Row 22: decrease 6 times every 6 stitches. We should have 42 columns left. Rows 23 to 29: knit without decreasing. Row 29: make 6 decreases evenly, that is, every 5 stitches. Row 30: make 6 decreases evenly, every 4 stitches.
We fill the owl with filler.
From 31 to 32 rows: we knit without decreasing. From 33 to 36 rows: we make 6 decreases evenly in each row.
We cut the working thread and carefully sew the hole.
This simple method will be the beginning for further creativity.
Mobile phone case “wise owl”
The phone case is knitted quickly and easily. Knitting will take a maximum of 30 minutes, so you can knit covers of all colors and shades. And the most important thing is that the finished result is an original decoration that only you will have!
To crochet owls, select leftover yarn in a variety of interesting shades (purple, brown, yellow, pink). I will use pebbles instead of eyes, and a long button will do for the beak.
- Color A is the main color of the thread.
- Colors B - the color of the head and wings.
- Color C – contrasting colors.
- Knitting density: 14 p.*14 r. = 10*10 cm.
Diagram and description: cast on thread A 11 in/p.
1st row: 3 tbsp. b/n in the 2nd st. from the hook, art. b/n in the next 8 p., 3 tbsp. b/n in the last loop (turn the work over and knit in the opposite direction along the cast-on chain), st. b/n in the next 8 p., conn. Art. = 22 tbsp. b/n
2nd row: st. b/n in the first paragraph, 2 tbsp. b/n in the next p., art. b/n in the next 10 p., 2 tbsp. b/n in the next p., art. b/n in the next 9 p., conn. Art. = 24 p.
3rd row: st. b/n in each P.
Repeat the 3rd row until the height is 12.7 cm. Finish the work.
Beak: go to thread B
1st row: art. b/n in the next 12 p., turn.
2nd row: 1 v/p., skip the first st., st. s/n in next 11 p., turn.
3rd row: 1 chain stitch, skip first stitch, 2 stitches. b/n together (reduced art.), art. b/n in the next 8 p., turn.
4th row: 1 chain stitch, skip first stitch, 2 stitches. b/n together, art. b/n in the next 6 p., turn.
5th row: 1 chain stitch, skip first stitch, 2 stitches. b/n together, art. b/n in the next 4 p., turn.
6th row: 1 chain stitch, skip first stitch, 2 stitches. b/n together, art. b/n in the next 2 p., turn.
7th row: 1 ch, skip first stitch, 2 stitches. b/n together, turn.
Tying: knit with connecting stitches along the side of the piece to the first row of the head/beak, turn, 3 tbsp. s/n in the loop of the first row, knit st. s/n back along the side of the part to the 7th row, st. s/n in the 7th row, 5 in/p., st. s/n in the 7th row, knit st. b/n along the second side, 3 tbsp. s/n in the loop of the first row. Finish work.
Paws: turn the body part over, join yarn C to the central 8 sts.
First leg:
1st row: 1 v/p., st. b/n in the same paragraph, art. b/n with trace 2 p., turn.
2nd row: *(st. s/n, conn. st.) in the first st., 1 v/p., repeat from * again, (st. s/n, conn. st.) – to the last loop. Skip 2 body loops, repeat for the second leg.
Eyes: with yarn C, cast on 1 st, join into a ring.
1st row: 1 v/p., 6 tbsp. s/n in the ring, conn. Art.
2nd row: 2 tbsp. s/n in each n., conn. Art. Finish work. Using black thread, sew a star onto the eyes and glue a pebble.
Wings: with yarn B, cast on 1 ch, join into a ring.
1st row: 1 v/p., 6 tbsp. b/n in the ring, conn. Art.
2nd row: 2 tbsp. s/n in each n., conn. Art.
3-5 row: st. b/n in each loop, add 6 tbsp. along each row, conn. Art. Finish work.
Assembly: sew on the eyes and wings, sew on the beak-button between the eyes.
An ideal creation for a girl and even a boy!
Knitted owl pillow from motifs
Knitting a pillow is a little more complicated, as it is made from small multi-colored 6- and 5-gonal motifs (mini napkin, so to speak).
Hexagonal motif
Video "how to knit an African hexagon"
5-corner motif
Video “how to knit an African pentagon flower”
If you want a large pillow, take thick threads, but we will weave an owl from thin yarn, so I take a 1.15 hook . The base is a white thread, then you can fantasize and choose shades as desired.
The result is such a bright hexagonal circle, approximately 7 cm in diameter.
You should end up with 10 pentagons, 17 hexagons and 2 hexagons per eye. A pentagon above the eyes (forehead), below the eyes (where the beak is), between the ears at the back, and 7 pieces side-down-side. You can make a beak and small wings (but this is at your discretion).
When all the details are ready, carefully sew all the motifs together, fill them with filler and enjoy your handmade work. This pillow is suitable for a bedroom, a nursery and even a living room.
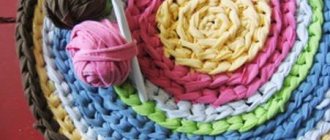
Crochet owl rug
This rug will look elegant in your bathroom, and you can knit it in an evening. The author advises taking grass yarn and regular woolen yarn (cotton is also possible). If desired, create a set for the toilet (a rug, a mat under the toilet and on the lid).
The scheme is quite simple.
Beautiful owl handbag
A multi-colored crocheted owl bag for stylish and daring girls is crocheted quickly and easily. The size is easily adjusted (take thicker threads or just add a couple of extra rows at the end).
Scheme and description of the work
Crochet openwork owl napkin (panel)
An experienced needlewoman can weave such an owl. The main pattern is pineapple (they like to decorate knitted items with pineapples, so we decided to focus on it).
Take the smallest hook and a white iris.