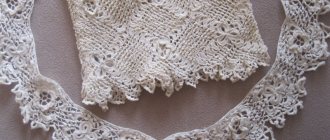
Crazy patchwork stitches
I remember as a child, during home economics lessons at school, we were taught the basic types of stitches for embroidery. An intelligent, kind and far-sighted teacher strongly recommended that we collect samples in one large book. My mother had one of these, but it was lost, like so many other touching and necessary things, the value of which was somehow not thought of at that time.
So if you don’t have such a book, and you want to start embroidering crazy patchwork, I also strongly recommend getting it and not losing it under any circumstances.
Firstly, you can look there and figure out what type of stitches will suit you best, and secondly, it is unknown what type of needlework you will be interested in in the future and perhaps such a book will acquire a completely different and even greater value for you or your daughter.
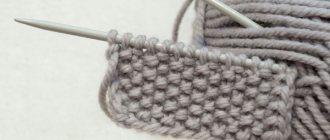
Make samples of several types of stitches on one page, then a few more stitches on another page - at the same time, remember how they are embroidered or learn how to do them if you didn’t know how before. Although the stitches themselves are not difficult, your hands still have to remember or master them.
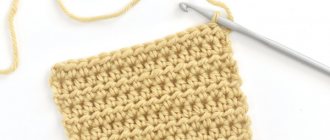
The most popular stitch is the regular goat stitch. You can watch how to embroider it, how to embroider a few more simple stitches in a good video in a master class for beginners.
Let me remind you that any video on YouTube can be sped up. At the bottom right, click on the wheel and select the “speed” position, there you can either increase or slow down the speed.
Using patches in clothing
The introduction of a crazy quilt into clothing can be either a full-fledged tailoring of the product or the addition of a patchwork fragment to an already finished item. For example, to update an old faded T-shirt, you can make a decorative patchwork composition in the middle. To create a simple patchwork picture, you can take fabric of three types and colors, which you can cut into fragments using self-made or purchased templates like these:
After stitching the fragments together, the patchwork picture can be decorated by embroidering the seams with beads or embroidery threads, the seam options for which are presented below:
Patchwork fabric can also be used over the entire surface of clothing; for it, you need to measure the required size of the facing fabric using the patterns, which will reflect the size of the required fabric using the crazy quilt technique.
Flaps in clothes can be either in a chaotic order or linear, especially for clothes that should emphasize slimness. An example of this use of flaps is shown in the photo:
The idea of using a crazy quilt using vintage photographs in clothing is very interesting. Such photographs can be selected online and ordered for printing at certain service points. The main thing is not to use two or more photos for one thing, as this will be too much, even for a crazy quilt.
Article on the topic: Summer openwork blouses knitted from cotton: patterns with descriptions
The use of patches in clothing should also be consistent. For example, on trousers, patchwork fragments are used either strictly in the upper part, or on the lower parts of the legs, or on one of the sides of the trousers.
One must be sensitive to the line between using technology in clothing in a tasteful manner and unfavorably exaggerating it.
Master class for beginners
My friend shared with me her experience of how she became interested in crazy patchwork and where she started:
When a few years ago, being a seasoned master of individual tailoring, I came to class to learn patchwork. Doubting my abilities, I discovered the simplicity and ease of the crazy technique. I looked at the complex panels of patchwork and was frightened by the clear geometry and mathematical calculation of this process.
Since I have always disliked ripping and altering, I try to accurately measure and double-check patterns. And the fact that all the blanks are very small in size, and an error in the calculations would lead to irreversible, as it seemed to me, consequences - scared me away from patchwork sewing for a long time. It turned out that all fears were in vain.
The lesson on crazy patchwork always comes first in such courses. They ask you to bring ANY leftovers. You can choose them by color at home, or you can change with your fellow students, choosing colors during the lesson. Even someone who has never sewn on a machine before can also come to a crazy patchwork lesson. And the fact that the process itself is fascinating and meditatively relaxing will be experienced by any beginner from the first minutes of sewing. So, in order.
Any scraps need to be prepared. Different materials can also be used, which is impossible in geometric (classical) patchwork. It is necessary that all segments be carefully ironed, this is necessary for the quality of work. Usually, in order to understand how to work in this technique, the course usually starts with making potholders.
It can be of any shape, but for potholders, the main thing is that the product, which is constantly in contact with hot dishes, does not allow heat to pass through. Therefore, it is better to line the potholder in the middle with a thick material, and for the surface use non-melting materials - cotton fabrics, for example.
The first flap can be round, square, or any shape. All others should be oblong. That is, we cut the remaining fabrics into strips 3-4 cm wide in advance. The length of the stripes is not important. Thrifty housewives understand that in this way they can recycle all sewing residues. And indeed it is!
Place the next strip at an angle to the first, wrong side up. We sew at the same distance from the edge and turn it inside out. And so we continue with all the other strips.
It turns out that we are gradually outlining a polygon from the first fabric in the middle. And the stripes can be from a fabric of a different color. The next circle can be laid in a different color. The main thing is to move in the same direction in a circle. And when you go to the second round, you should take longer strips so that they cover the two joints of the previous row, otherwise the untreated fabric will be visible.
Having thus reached the edge of the tack, iron the product and turn it over to the left side, where the first backing fabric is visible, cut off all excess. This way we will get the front part of the potholder, but to complete it we need to sew on the second (wrong) part. It can be done using the same technique or take an equal piece of fabric of a matching color. It is best to additionally lay thick fabric between the two squares and sew the potholder with bias tape.
Everything is very simple and I am sure that the process will captivate you! Good luck.
How my friend sews a potholder - see the article Cockerel potholder master class
For those who do not have a sewing machine, a master class in which you can see how a block for embroidery is assembled by hand will be a pleasant discovery.
Original patchwork bag
A master class with step-by-step photos will help you make a stylish exclusive bag.
You need to prepare beautiful pieces of fabric. It is better to take a thick fabric for the base, for example, linen. You will also need threads, scissors, a needle, paper, a pencil and decorative elements to decorate the product.
In the center of the bag there will be a flap with the most beautiful image. You can also make the central piece monochromatic and decorate it with a large sparkling stone, a massive brooch, a flower made of ribbons, or embroidery.
First, let's make a paper pattern. A piece of unnecessary wallpaper will do.
Let's transfer it to the base fabric. Cut out two parts. Don't forget to leave seam allowances.
We cut out suitable pieces of fabric and form the surface of the bag from them, as if we were putting together a mosaic.
Then we begin to sew the flaps one by one. Place the scrap piece face down on the center piece. We sew one edge as shown in the example photo.
Related article: Openwork patterns with knitting needles: diagrams and descriptions of simple patterns for original blouses with photos and videos
We bend the flap. To ensure that the shreds lie evenly, you can iron them.
Place the next piece of fabric next to it and sew it on in the same way.
Bend over the sewn piece. We sew all the other patches using the same principle.
After all the flaps are sewn, we begin to decorate the joints between the pieces with decorative seams, lace, and braid. If desired, we decorate the pieces of fabric themselves with beads, embroidery, ribbon flowers, pieces of guipure, sequins, and beads.
You can sew a lining for the bag. The pattern is the same as for the bag. But seam allowances are not taken into account, since the lining must be smaller than the bag. Sew the two parts of the pattern and insert a zipper as in the example below.
Sew the lining to the bag.
This makes a wonderful stylish handbag. The advantage of such an accessory is that it is exclusive and no one else will have the same handbag.
Crazy quilt and crazy patchwork
As you already know, patchwork is the art of sewing scraps together, and quilting is the art of quilting these sewn pieces.
By and large, a quilt is the same as patchwork, but with quilting.
In crazy patchwork or quilting, different types of stitches take on the role of stitches. In the master class in the video you saw that Gella doesn’t even use the machine. This is especially good for quiet, meditative crafting. You can sit quietly in a cozy place, lay out button, patchwork, and beaded treasures near you and enjoy the birth of beauty.
Technique using the example of a product
You can start getting acquainted with crazy quilting with your first product, for example, with a bag. The set of materials and tools is as follows:
- flaps, edges, fabric trims, embroidery, knitting;
- ribbons, laces, lace;
- buttons, beads, beads, brooches;
- sewing machine or thread (different) with a needle;
- ruler, pencil, chalk or soap for drawing;
- leather strap for handles;
- zipper;
- fabric for lining;
- face fabric.
You can start with a canvas using the crazy quilt technique, the size of which will be used as a basis for the size of the bag. By laying out the flaps and other accessories of the canvas in front of you without stitching, you can outline how and where each fragment will be located. First you need to sew fabric flaps, and then apply fragments of ribbons, lace, and other blanks to them. The last ones will be buttons, embroidery with threads or beads.
It should be noted that the seams between different flaps can also be made using different techniques. We should not forget that before work, all flaps must be well aligned with an iron.
If you don’t have any ideas on which mosaic to sew the patches in, you can use the sketching method. On a sheet of paper, using a ruler and a pencil, you can draw various geometric shapes with broken lines, thus drawing the entire sheet, and then figure out which of the patches will suit which fragment of the sketch. An example of such a sketch is presented below:
The resulting fabric must be brought into an even rectangular shape, after which, according to its dimensions, you need to make one pattern from the front fabric and two patterns from the lining fabric. For patterns, you can also use the following diagram:
Related article: Spikelet - a pattern for knitting a baby blanket
First you need to sew the straps measured for the handles to the patchwork and facing fabric. To do this, the strap is applied in an arc to the front part of each fabric and sewn at a distance of 1-1.5 cm from the top edge. It will look as if the handle is adjacent to the canvas in an arc. After this, the edges of both canvases are folded 1.5 cm along with the handles, then stitched. Now we have two parts with handles along the top edge. Next, we connect both fabrics with a zipper, the front part of which is sewn to each part from the inner edge at a distance of 1 cm from the top. The lining fabric is sewn together in a U-shape. The main part is sewn together, the zipper is first unzipped, after which the lining is sewn inside the bag. The bag is ready. Patchwork bags may look like this:
Crazy patchwork schemes
Once you move from beginner to intermediate level, you will most likely want to take a more responsible approach to choosing patterns. Many people are starting to look for crazy patchwork patterns, and a number of magazines can offer them to you.
If you want to see such a magazine, look at this link https://www.liveinternet.ru/users/tata53/post294437967/
Crazy Patchwork magazine is posted there in its entirety.