Drawings on pebbles with acrylic paints are becoming a popular form of creativity both among professional artists and among painting enthusiasts. Professionals paint the surface so that it looks like a living stone. But even without great artistic abilities, you can create a beautiful, bright and interesting drawing or pattern.
Learn how to paint on pebbles with acrylic paints.
Tips for Beginning Artists
There are many themes and types of painting, ranging from geometric patterns, silhouettes and figures to still life, landscape or depictions of everyday scenes. Beginning artists are better off choosing simple themes that do not require mixing colors or drawing details.
Such popular directions in choosing the type of painting as:
- applying a pattern;
- image of cartoon faces or characters;
- creating an object (berry, fruit, cactus, ladybug, different flowers, etc.) with complete painting of the stone.
Much in the work depends on the choice of stone. Most often, small or medium-sized pebbles are used for painting. You can choose a smooth oval or round pebble or paint an irregularly shaped stone.
The latter is more often used to create objects of similar shape. For example, oblong and slightly curved stones are suitable for creating stone cacti, teardrop-shaped stones are suitable for creating fish or birds, etc.
However, the small surface area requires drawing fine details. If it is still difficult for a novice artist to work with small drawings, then it is better to start with painting stones for the aquarium. These are large smooth stones, sometimes they have an irregular shape. To get started, it’s useful to watch a master class on creating drawings on pebbles, and then come up with your own stories.
Stage 3. How to draw a stone
Rocks in a sketch can be depicted with softened sharp corners, but this requires a three-dimensional plane that emphasizes the shape. Often the draftsman pauses in his work at this point and does not develop the drawing further. But this option cannot be considered realistic - there are too few details and shades.
An important nuance: if you look at the photo of the stones in black and white, you can find gray tones that will perfectly highlight the details.
Step 1. Draw a large boulder using a 2B pencil for dark areas. The highlights will be drawn in with an F pencil. You can make a few short marks for the sketch, then concentrate on the recesses, recesses and shadows. At this level we draw all the dark places.
Step 2. Having drawn all the preliminary supporting points, take a collet pencil (with a beveled cut) and apply shadow strokes over the entire surface of the boulder. The layer of strokes is smooth and uniform. We change the pencil for different areas: for light areas – 4H, for dark areas – 2H. In the process of shading, do not forget about how planes and angles are illuminated.
Step 3. Let's get down to the most important thing. Use a soft mechanical pencil to create the surface texture. This will require short, seemingly random marks to indicate holes and roughness. Using a soft pencil applied over a hard one will help. It is known that this method displays uneven surfaces well. This is simply a miracle, because the effect of an uneven texture immediately appears, natural and whimsical, which so often happens with mountain ore. The mitered edge plays a big role, it gives flat and wide strokes.
Step 4. We paint layer by layer, periodically take Blu-Tack - it will help to process thin, light areas. An electric grater creates light areas and gaps. Make sure all dark areas are clearly visible and marked.
An important nuance: if the lines were drawn with a hard pencil, then a black tone will be difficult to achieve.
Step 5. Display the specifics of the stone. There are many types of stones, each of which requires a special approach to image technique.
Deep stones. They have a rough shape, are very original, unique, and difficult to depict. Step-by-step tinting will simplify the work. External contours are emphasized by chiaroscuro from behind.
Rocks-protrusions, rocks pointing upward. Typically the top ends appear bleached. To apply chiaroscuro, you can use continuous lines, changing the strength of the impression along the way. Depth and shading will appear in the right places.
Gems. They are quite simple; you can use geometric shapes as a basis.
- Draw triangles with trapezoids inside. Curved lines inside the trapezoid will show the edges of the stone.
- Cut diamonds begin to draw from a right angle with outgoing rays.
- Points are drawn on the rays at equal distances, and they are combined along the rays of obtuse angles. The line must be drawn parallel to the initial triangle from which the figure was created.
- Next, you need to draw a straight line that will unite the vertices of the obtuse angles.
- The perpendicular is divided by rays into equal angles, the connecting points of the rays are connected to the “broken” corners and the middle upper straight line, parallel to the base of the figure.
- “Mirror” similar figures are inscribed into sharp triangles along the edges, dividing the base three times into equal parts.
- From the first point, an angle is constructed from which the rays emanate, falling on the asymmetrical sides of the triangle, the external tone transitions are lower than those inside.
- Connect two points with one straight line to form a median triangle.
- It is necessary to build all the faces on the top surface of the diamond, maintaining symmetry. To do this, a rhombus is inscribed in the lower part of the middle triangle.
- When working with the color palette, pay attention to the shades; they will help the diamond sparkle and sparkle, and give it transparency. While coloring, apply any tones to all edges.
An important nuance: the same principle is used to paint various natural objects with acrylic paints, and to draw geometric mandalas.
Drawing any type of stone is a painstaking process and not very simple. But having mastered key techniques, you can significantly improve your skills in working with graphics and implement different ideas.
https://youtu.be/glX_5bTwcQohttps://youtu.be/e0opxPVfGCM
_
Materials required for painting
This type of creativity, like painting pebbles, is good because nothing is required for the work except paints and stones. The product is completely environmentally friendly, as only natural materials are used. Some craftsmen also use varnish and primer, but their use depends on the choice of paint and the further use of the product.
Paints
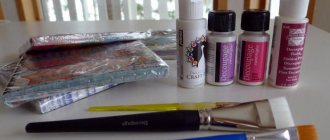
The following types of artistic paints are most often used for painting:
- watercolor;
- gouache;
- oil;
- acrylic.
Acrylic paints are most popular when painting on rocks. Their advantage is that they dry quickly. After just a minute, the next layer can be applied to one layer. While 1 layer of oil paints, for example, will take about a week to dry.
However, this is the disadvantage of acrylic if you want to create a drawing using a large palette of colors by mixing them.
The composition also does not allow you to create relief masterpieces with thick strokes and sharp transitions. More often, difficulties arise for those who do not have a good command of the technique of working with acrylic paints.
Live drawings on pebbles.
Otherwise, acrylic is convenient for painting. The drawing turns out bright, the colors do not fade after drying. The paint applies easily even to an unprepared base and completely covers dark surfaces and previous dried layers.
Acrylic does not wash off with water. It is also resistant to sunlight. However, after completion, the design should be varnished, since acrylic from the surface of the stone is easy to scrape off.
To paint pebbles, it is better to buy acrylic in jars, since the picture is small and the paint consumption will be small. You can dip the brush directly into the jar and take out the paint. Tubes involve squeezing paint onto a palette. And this is necessary when you are supposed to mix paint and paint a picture on a large surface.
Brushes
To work with pebbles, choose the smallest brush size. You can use a soft “squirrel”; under the weight of the paint it takes on a needle-like shape with a thin tip. This brush is convenient for drawing small details. If the stone is large, then larger brushes are used to paint the background and volumetric details. In this case, you can take brushes with stiffer synthetic bristles.
Varnish
To give the pattern a beautiful glossy shine, and to preserve the pattern, the stone can be coated with a clear varnish. It can be either a construction varnish or an artistic one. The second option is preferable, as it does not smell and does not damage the brush. Some craftswomen even use transparent manicure polish. They are also convenient for covering pebbles, and the bottle with varnish already contains a brush.
How to choose the right stones for painting
The embodiment of the painting idea depends on the quality of the selected materials. To get a good result, choose stones that are suitable in size and properties and that are able to preserve the applied pattern.
Checklist for choosing material for painting:
- a suitable size that allows you to completely fit the intended design;
- flat surface;
- regular shape (semicircle, semi-oval, oval);
- absence of cracks, scratches, porous structure;
- light background without dark spots or inclusions.
Excellent material is found on the beaches. Pebbles washed by waves have a smooth and dense surface that can withstand the application of any paint. To decorate the garden, materials of approximately the same size are selected to create a single picture. In gardens and plots it is appropriate to use large painted boulders.
Some painting techniques welcome the presence of a porous structure. Several layers of paint are applied to it to create a denser background for the future drawing. But the most convenient surface for work remains a dense, flat, light-colored surface.
Expert opinion
Zakharova Irina Yurievna
Cleaning professional with 15 years of experience. Our best expert.
Ask a Question
Information! On stones of unusual shapes, it is customary to make drawings of houses, abstract pictures, or place images that are similar in contours.
Features of stone painting
To work, you need to prepare a place, equipping it with all the important tools:
- a work table covered with oilcloth or newspapers;
- old clothes and an apron;
- container with water;
- several types of synthetic brushes;
- suitable stones;
- paint thinner;
- palette for paints;
- cloth or napkins for brushes;
- varnish for processing products;
- paints for painting.
Having selected a suitable stone or brick, it must be washed and dried, after which it is treated with a primer, and then the background is applied. To do this, choose the color of the paint, mix it with water, and apply it evenly onto the base with a wide brush. To make a stone decoration more vibrant, you can first apply a light paint, and after it dries, cover it with the desired color for the background. The product dries for at least 15 minutes.
On a prepared background of a stone surface, a drawing is drawn, which is initially prepared on a sheet and transferred to the base with a pencil. The drawings can be decorated with any additional elements: artificial flowers or leaves, shimmering pebbles or sparkles. After the design has dried, the new decorative element is coated with a colorless protective varnish.
Color of artificial stones
Painting artificial materials is a labor-intensive process. However, coating with paint and varnish helps strengthen the brick. To work with external stone of artificial origin, it is necessary to clean it from damage and corrosion.
Then the brick is subjected to grinding and compressor blowing. The artificial material should be prepared for painting by impregnation three times, this will give the brick a uniform color.
Painting of columns, paths and tiles
Decorating outdoor elements requires a lot of attention, time and effort. However, transforming the columns into unique architectural masterpieces will add more exclusivity to the interior.
Drawing and painting of columns decorating gazebos, entrances, arches requires the use of professional paints, which are applied to a clean surface. For plaster products in the interior of the room, you can use special acrylic or oil paints for painting.
The stone decorative technique can be used for painting on sidewalks. But painting on road bricks is the most difficult. Before applying paint, the tiles or clinker path must be cleaned.
The next option that allows you to add uniqueness to the interior is painting on tiles. To do this, you need to use acrylic paint, applying it to a clean and dry ceramic surface.
Paints for gypsum products
Gypsum is widely used in modern interiors. For coloring plaster, there are various colorful materials that give the effect of gold, silver or shine.
The plaster dye is applied in several layers and secured with a colorless varnish coating. As paint for decorative decorations, you can use compositions that already contain varnish in the composition so that they do not need to be coated.
Working on interior and design is quite an entertaining process that requires compliance with all the rules and technologies. But you can decorate and change your own interior without involving professional workers. Colorful artificial design elements using stone, created at home, are a great way to make your interior unique and exclusive.

