A simple bauble made of satin ribbons
You will need: 2 satin ribbons 75 cm long.
Master Class
- Fold one and the second bauble in half, leaving 10 cm ends for ties.
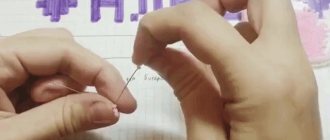
- Weave one ribbon over the other, as shown in the picture.
- Weave a bauble of the required length from 13 to 18 cm.
- Secure the bauble by connecting all 3 pieces into a knot.
A simple bauble made of satin ribbons is ready!
Classic bauble made of two ribbons
You will need: satin ribbons of two colors of the same width, 1 meter long.
Master Class
- Connect 2 ribbons, step back 10 cm from the edge and tie a knot.
- Fold the edge of one ribbon and wrap it with the other ribbon.
- Tighten the knot.
- Fold the loose ribbon into a loop, then thread it through the completed first loop.
- Pull up the first loop (the second loop should become larger).
- Fold the first ribbon and thread it into the second.
- Tighten the loop.
- Repeat the weaving process until the desired length of the bauble.
- Tie a knot.
The classic bauble of two ribbons is ready! I recommend watching the video master class!
#13. Bauble of two ribbons [★☆☆☆☆]
Square bauble made of four ribbons
You will need: 4 tapes 5-7 mm wide, 2 meters long.
Master Class
- Fold 4 ribbons together, space 15 cm and tie a knot.
- Straighten the ribbons on different sides - up, down, right, left. When weaving, you do not need to look for the front side, since in this bauble all sides will be viewed equally.
- Lower the first ribbon from top to bottom to make a loop.
- Move the second ribbon from right to left so that it overlaps the first.
- Bend the third ribbon from bottom to top so that it overlaps the previous one.
- Move the fourth ribbon from left to right, then pass it into the loop of the first ribbon.
- Tighten the weave slightly, then straighten the ribbons - you should get an even square.
- Repeat steps 3-7 until the desired length of the bauble.
- Secure the weave with a knot.
The square bauble of four ribbons is ready! It is worth noting that the bauble can be worn not just straight - square, but also twisted in a spiral. However, you need to handle it carefully, because if it stretches, it will lose its voluminous beauty. This can be avoided if you insert a fishing line or a strong thread at the beginning of weaving.
I recommend watching the video master class!
DIY keychains – Unusual keychains made from satin ribbons
Tips for weaving baubles
- According to the ideas of hippies and some other subcultures, a certain combination of colors of baubles carries a certain meaning. Therefore, the choice of color must be taken responsibly. Otherwise, it may happen that a woven bracelet given by a girl to her beloved guy will “testify” that the young man belongs to representatives of non-traditional sexual orientation.
- When weaving, you do not need to use excessive force when tightening the knots. The knots should be a little loose - this way they will have a neat and uniform appearance, and be positioned strictly symmetrically. Only in this case will the wicker bracelet look beautiful and attractive.
- If the bracelet turns out to be unpresentable and unsuccessful the first time, it’s okay, you just need to unbraid it and braid it again.
- While working, you need to be careful - then the work will go smoothly, and everything will work out the first time.
- If during operation the ribbons slip out and the loops fall apart, they can be secured with a pin. Subsequently, with experience, everything will work out in the air, but at first, in order to save your nerves, you will have to secure the ends of the loop with a pin.
- At the end of making the bracelet, the ends can be tied into a knot, or you can leave them hanging.
You may also be interested in this type of creativity, such as macrame weaving. After reading the step-by-step video tutorials and diagrams with photos, you will quickly master this technique.
This is interesting: Pink highlighting of warm and cold shades - from pearl color to soft ash: photo of what the strands look like after dyeing hair, instructions for implementation
Round bauble made of satin ribbons
You will need: 2 satin ribbons of the same width, 2.5 meters long, a tailor's pin.
Master Class
- Fold the ribbons crosswise and secure with a pin.
- Fold the top (second) tape into an arch over the horizontal (first) tape.
- Unfold the left end of the first strip and lay it parallel to the right (on top of the second strip).
- Lift the right end of the first strip up, then lay it over the ends of the second.
- Take the end of the second ribbon that is on top, bend it to the left, then pass it over and under the first ribbon.
- Pull the knot and straighten the elements of the square.
- Re-tighten the knot.
- Repeat the weaving process (tying knots) until the bauble is the desired length.
The round bauble made of satin ribbons is ready! I recommend watching the video master class!
Round bauble made of 4 satin ribbons
The bauble can be used not only as a stylish accessory for your hand, but also as a pendant on a backpack. If you get creative, you can weave it - a headband, a keychain, handles for a bag... Also, the bauble will be a nice gift for a loved one. Select and combine your favorite colors, creating original masterpieces with your own hands!
We make designer bracelets
It doesn’t take much time to understand how to weave baubles. The axiom of creativity is more practice, less theory! Through experience, we learn to create beautiful things with our own hands, putting a piece of our soul into the product.
Weaving baubles opens up incredible spaces for creativity
Advice:
You need to delve deeply into the process of weaving baubles, then in a minimum of time you will be able to easily create original collections.
Weaving from ribbons is the easiest way to learn the secrets of creating unusual patterns. The material is not only beautiful, but also plastic, pliable, and capable of holding the desired shape. The acquired skills can later be used in creative work with beads, threads or thin leather cords. We offer several simple master classes, after reading which you will understand how to make baubles from ribbons.
The easiest way
Weaving of two ribbons is considered basic in ancient art. Step-by-step master class on creating a simple bracelet:
- We prepare the necessary materials. You will need two pieces of satin ribbon at least 1 meter long. The width of the tape can be any; it is more convenient for beginners to work with tapes 1 centimeter wide.
The choice of ribbon color depends on the wishes of the needlewoman. You can choose consonant shades that complement each other. Contrasting colors look original, bright, and distinctive.
The choice of ribbon color depends on the wishes of the needlewoman
- We tie the ends of the two strips with a knot located close to the edge.
- Let's start weaving. We fold a loop on each of the strips, they are located parallel to each other.
- One loop “dives” into another loop. Then we pull the end of one ribbon and tighten it into a loop. The rule is the following: the end of the ribbon of which color we pull will create a loop of the same color.
- We repeat the maneuver, folding the ribbon into a loop, then pulling one into the other. If the parts are of different colors, alternate threading and tightening so that the weaving is two-color.
This is interesting: Vitamins “Inneov Hair Density”: composition, properties, instructions for use
Bauble weaving pattern for beginners
We continue working until we get the desired length of the accessory. Elegant baubles made of two components are basic; experienced craftswomen can handle similar work in a matter of minutes. For beginners, all the skills acquired will help them move to a more complex level of skill.
Bauble made of two ribbons
Round friendship bracelet
There is an opinion that it is the round shape of the bracelet, or cord, that indicates the most sincere friendship. The symbolism of smoothing corners and the right color scheme will help you express the sincerity of your feelings without words. If we turn to the basics of the hippie movement, then the blue color is a symbol of friendship, harmony in relationships, freedom and goodness. The basis for weaving a round bracelet of ribbons is the ancient Chinese element “lotus”. To work on your masterpiece, we choose two ribbons about 2.5 meters long. We choose two strips of different shades, one darker, the other lighter. Step-by-step algorithm:
- We lay out the ribbons, lay out the dark part in full length, and place the light part perpendicularly in the middle. We fasten them together in the middle with a pin or tailor's needle.
It is more convenient for novice craftswomen to do work on the surface. For convenience, you can take a pillow and attach the ribbons directly to it.
- We fold the dark-colored component into a loop, placing its free edge above the light component. We grab the end of the light part, lay it out parallel to the fixed one, folding the loop on top of the dark strip.
- Similarly, we fold the arch from a dark stripe. You should get two dark arches, and in the middle one long arch made of light ribbon.
- Let's start weaving. Let's pass the edge of the light component over the dark part, then under it, and then pull it from above again. This results in three horizontal light and three vertical dark parts.
- We pull the entire structure together by the ends of the ribbons, carefully and slowly adjusting the position of the weaving components. We tighten the knot and repeat similar steps until we get the desired length of weaving.
- We carefully tuck the ends of the ribbons into the very first knot, connecting them to the beginning of the weaving.
A handmade bracelet will be a pleasant gift to a dear friend or girlfriend.
Friendship bauble made of satin ribbons
It is important to ensure that in the process of laying out the pattern you get an even square of arches. The joints can be pinned together. Then the knot is pulled tightly together, giving the product an even and round shape. Unlike the simplest method, such baubles are more voluminous. The tighter the knot of each element is tied, the thinner and denser the product will be.
Square baubles look more voluminous on the hand
There are many weaving combinations. Having mastered several elements of ribbon baubles, you will learn how to create original and stylish accessories with your own hands without much expense.
Without special expenses, you can learn a new hobby
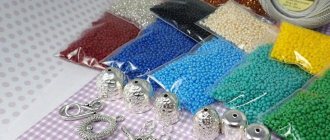
Delicate bracelet made of ribbons and beads