Greeting card for relationship or wedding anniversary
If you are already celebrating holidays with your loved one, such as a wedding anniversary or a relationship, you probably have a lot of photographs that capture the most beautiful moments that evoke a storm of positive emotions. All these photo cards can be used to create an incredibly romantic postcard.
The first thing you need is double-sided cardboard. You must determine its color, but it will be better to choose something bright or light. It should be folded in half to form a booklet shape.
The next step is to decorate with photographs suitable for a relationship anniversary or wedding. In order not to spoil the finished photo cards, it is better to print new ones. An important condition is that your images must be small so that they can be placed on cardboard. It is not necessary to try to cut out your images without a background, because without it they may not look harmonious.
Before pasting a photo over the cover, you need to write in the middle something like the sentence “Happy day, my love!”, and then place the photo around the inscription. Next, we write some congratulatory text on the first page. On the second page we attach a photo with your image cut out in the shape of a heart.
If you feel like there are too many gaps left, you can fill them in with hearts of different colors made from construction paper. And now, the gift for your wedding anniversary or relationship is ready!
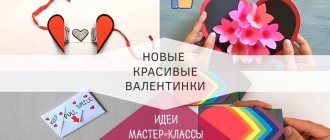
A simple card with flowers in the shape of a heart for a girl on Valentine's Day
The heart has always been a statement about feelings without words. This beauty is 3D, it looks very beautiful, the flowers are hidden inside, and when you open it, you get a gorgeous bouquet!
Or you can do this option.
And also, bending a beautiful sheet of paper in half, paste it with hearts of different sizes. This is a very simple and quick option, and write your wish inside.
We cut out hearts from paper of a different color to create a contrasting pattern. Nowadays we sell very bright and beautiful paper for creativity.
And also, you can make a “stamp from a potato tuber, and dip it in paint and apply it to paper. This can be done with children.
This will be the simplest but most interesting craft. Inside you can arrange everything by writing a wish.
Universal three-dimensional postcard for a guy
Such a voluminous card can be given to a guy for his birthday or any other occasion.
Take A4 size cardboard and fold it in half. It is advisable to choose a color that is not dark or red.
The cover can depict you and your loved one using various details. Clothes are made from colorful pieces of fabric, arms, hair and legs can be created from woolen threads, and other parts of the body are easily made from paper. A suitable background is a huge heart. Don’t forget to write something like the phrase “Happy Birthday, dear!” above.
From red paper you need to cut out a heart that will fit inside the card, draw a face on it and glue handles to it. The palms need to be glued to the inside. The three-dimensional postcard is ready!
Postcard to your loved one with a heart
An unusual, but very easy to make postcard. Cut strips of the same width but different lengths from decorative paper (see template). Glue pieces of decorative paper to the shape of the template and glue it inside the card. Cut out a neat, large heart on the front of the card.
Postcards in the form of a shirt and tie
The huge advantage of these cute men's paper shirts is their versatility. They do not carry intimate, romantic or other specific hints, so they can be used as a birthday present or other celebration for a wide variety of men around you. Such an item will please both your brother, your loved one, and your friend.
The material for the base of the shirt is regular thick paper. Using thin cardboard is also possible. The choice of material color is yours.
If you used an A4 sheet, fold it in half crosswise and place it in front of you in the form of a book. Place a ruler vertically on the top edge and measure approximately five centimeters. Then, place a ruler vertically at this point and draw a straight line with a pencil.
WHAT SOFTWARE
DIY postcard with 3D heart
This version of a romantic postcard for a loved one is for the most patient and careful people in love. Precision and impeccable accuracy are very important in the production of this postcard.
The news portal “Vtemu.by” wishes you to love, be loved and try to make each other’s lives much brighter and warmer.
Crafts for kindergarten
Preschoolers can make simple cards together with the teacher. Children under 4 years old need to work with already cut out elements. It is not safe to work with scissors, needles and sharp objects at this age. This craft can be given to a friend, dad or grandfather.
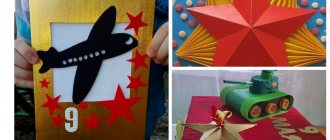
Cardboard rocket
This craft is easy to make and looks quite interesting. For small children, all elements must be prepared in advance. The child’s task is to glue all the parts of the rocket and make a congratulatory inscription.
List of required materials:
- one piece of blue cardboard;
- black rectangle;
- 3 yellow mugs;
- 1 red star;
- 3 red triangles;
- glue stick.
A black rectangle should be glued onto the blue cardboard, which will serve as the base of the rocket. At the top of the base of the rocket you need to stick a red triangle, which will act as its nose. Red triangles should be glued to both sides of the rocket. Yellow circles should be glued onto the rocket to serve as windows. The red star should be glued to the nose of the rocket as a decoration.
Cardboard star
An impressive three-dimensional craft that even kids can master.
To complete the work, you should have the following materials on hand:
- colored cardboard;
- PVA glue;
- colored paper;
- gold foil or decorative tape;
- ruler, pencil, scissors.
A sheet of cardboard must be folded in half, and then a line must be drawn diagonally from the top corner to the bottom. We cut the cardboard along the marked line and mark the place of the cut in the middle. Then you should unfold one part of the cardboard and insert the other half of the craft into the cut places. The finished card can be decorated with inscriptions, decorative tape or pieces of gold foil.
Russian flag
This craft will appeal to a true patriot of his homeland.
Required accessories:
- white cardboard;
- red and blue colored paper;
- glue;
- foil;
- scissors, pencil and ruler.
Step-by-step instructions
- Fold the cardboard in half. One half of the cardboard should be divided into three equal parts.
- The middle part must be cut out, leaving a few centimeters of cardboard at the top. Glue a strip of red paper to the bottom of the cardboard on the outside.
- Blue colored paper should be glued to the second half of the cardboard on the inside. The result should be a Russian flag.
- From thick cardboard you need to cut out a star and the numbers “2” and “3”.
- Red paper should be glued to the star, and the numbers should be decorated with gold foil. The star and numbers should be glued to the outside of the card at the bottom.
Simple paper craft ideas
Heart with eyes
Image source:
A simple but effective craft - a paper heart with eyes. It is absolutely not difficult and even the smallest children can do it. Parents only need to prepare and cut out the necessary materials, and also monitor the process of gluing the parts. Such a craft will be noticeably different from ordinary hearts in kindergarten, and the child will be pleased to know that he made it himself.
Progress:
- Cut out a heart from a sheet of thick colored A4 paper (in order for the heart to come out neat and symmetrical, the sheet must be folded in half). The color can be red or cold blue - the choice of the young artist, the main thing is that it is bright, in which case the postcard will look very attractive.
- Glue plastic eyes to the center of the heart. They can be purchased in advance at any craft supply store or using the services of online trading platforms. If you need to bring the craft to the garden tomorrow morning, but there are no peepholes at home, you can draw them yourself.
- Using a thin black marker or pencil, draw a smiling mouth and eyelashes.
- Carefully apply a thin layer of glue onto colored shaped sparkles (these can be not only hearts, but anything that is at hand: stars, butterflies, leaves, snowflakes, etc.) and carefully lay out the outline of our heart with them.
- The craft is ready. The young author can write his name in the corner or ask an adult to do so.
Postcards
Here we offer you 4 options for Valentine's Day cards that you can make with your children or an adult himself. You will need:
- pastel paper or other thick colored double-sided paper;
- transparent glue “Moment” (or analogues);
- scissors;
- white acrylic outline/white pen/white marker;
- various decor: glitter, satin ribbon, hearts made of polymer clay or salt dough, cut out pictures from children's notebooks, postcards, etc., self-adhesive rhinestones);
- black pen/marker.
Detailed video instructions:
Heart in hands
Image source: https://megagiper.ru/valentinki-svoimi-rukami-dlya-doshkolnikov-iz-bumagi-valentinki-dlya-detei/
For such a touching craft, you won’t need much: double-sided colored paper, a pencil, scissors, a glue stick, thread and a needle. The work process is very simple and fast:
- On a sheet of cardboard or colored paper, you need to circle 2 palms side by side with a pencil and cut out along the contour.
- Fold a rectangular sheet of pink or red paper into quarters and cut out a heart. The result should be many hearts of the same size.
- Fold the resulting hearts into a stack and sew them in the middle with thread to the cut out palms.
- Carefully cut the thread, and on top, so that it is not noticeable, stick another heart a little smaller in size.
Watch a detailed master class on creating a three-dimensional valentine:
Volumetric valentine
This valentine will be a great gift for your mother, teacher or friend.
Progress:
- Cut out half a heart from construction paper.
- Bend the colored paper like an accordion and attach a heart half template to the folded edges and cut out along the contour. You should end up with a full heart.
- Do this with all the colors of the prepared paper.
- Alternating colors, glue the sides of the hearts to each other (more details in the video tutorial below).
- Fold a whole sheet of paper in half, write congratulatory words on the front side, then stick the outer sides of the hearts inside to the fold of the card.
You can find a detailed master class on our YouTube channel “Where are My Children”:
Volumetric heart 3D
A very unusual valentine, which seems too complicated only at first glance. In fact, the idea only requires perseverance and accuracy. This craft will definitely make a splash, no matter who you give it to!
Necessary materials:
- 2 sheets of colored paper;
- glue stick;
- paper knife (note that it must be perfectly sharp).
Follow the instructions and you will succeed:
Garland of hearts
Image source: https://koffkindom.ru/wp-content/uploads/2020/01/soedinenye.jpg.webp
A garland made of multi-colored paper will decorate your home for any holiday, and when you get tired of it, you can always put it away in a box for a while. To create it you will need multi-colored double-sided paper, scissors, a simple pencil, white thread and transparent tape. This garland is suitable for preschoolers.
Progress:
- On sheets of paper (you can use several colors, for example, white and various shades of red), draw and cut out hearts. They can be the same size or different: large and smaller.
- Using tape, glue the hearts to a thread, placing them at the same distance from each other vertically or horizontally.
A more complex version of the garland can be seen in the video instructions:
DIY Valentines: ideas (video)
In any case, the decision to congratulate your ex is a manifestation of emotions that will help you forget the past and the grievances that took place in this situation. Thus, a bright holiday filled with joy and positivity, which the church celebrates in many countries, is an occasion to once again show attention to your loved one. A Valentine card created with your own hands will be unique, individual and unique, just like the feelings that flared up in a couple and grew from simple sympathy into sincere and strong love.