Decorative pillows placed in a chair or on a sofa make the room cozy and homey. Most people purchase these products in stores, but it is not always possible to find the required color or model. After all, you want to choose pillows that match upholstered furniture or curtains. If you want to purchase a truly unique item, for example, in the now fashionable patchwork style, you will have to pay double the price, because handmade items are always more expensive.
In the article we will look at how to make pillows from scraps with your own hands, what fabric is best to choose for sewing, how to draw a sketch of a future craft and how to do the work step by step. The presented photographs will show how varied patchwork patterns on pillows can be. To work, you will need design stencils, lined paper for fitting, an iron, a ruler and chalk, scissors and thread with a needle for basting stitches, as well as a sewing machine for the final connection of small elements into an overall ornament.
Decorative pillows made from patches can be of various shapes - round and square, rectangular and cylinder-shaped. Only the front part of the product is made of multi-colored parts, the back side is sewn from a plain main fabric. The pillow consists of several parts. First of all, sew a bedstead filled with padding polyester and sew it tightly on all sides. Next, work is done on a beautiful cover, which is made removable, most often with a zipper.
Pattern drawing
Patchwork, or patchwork, is always done according to a clear pattern. To compile it, you need to purchase special centimeter paper in a box. The selected drawing is transferred to a sheet in full size. You can draw the diagram yourself, or you can find a drawing on the Internet. Patchwork ideas for pillows depend on their shape. A round product is often divided into sectors. A cylindrical cushion is decorated with stripes, but to make square pillows in this style you will have to work hard, since the pattern can be made up of dozens of small elements.
The sample picture in the article shows that to form the front side of the pillow, you need to sew many squares and triangles together, and so that they are all the same size. In order not to confuse the details, it is advisable to paint the diagram in the colors of the fabric.
Pillow made using the Russian square technique (MK)
To create a pillow in the Russian Square patchwork style, you must complete the following steps, which are presented in the step-by-step instructions:
1. Initially, patterns are prepared. The product consists of a square located in the center of the product. It will be followed by 5 stripes around the perimeter, consisting of four triangles obtained from a square cut diagonally. The central square has dimensions of 6.5x6.5 cm. The squares for the triangles used in each floor have sides of 7 cm, 9 cm, 11 cm respectively.
2. First, sew the central pink square with blue and white triangles. To do this, fold the flaps right sides together, combining the parts in the following way: the side of the square and the base of the triangle. After this the line is laid. All four triangles are sewn in this way.
3. Next, the elements are straightened and steamed using an iron. The result will be a new square, which at this stage needs to be leveled. To give the element the correct shape, trim off all excess and tidy up the edges of the seams.
4. At the next stage, new triangles, larger in size, are sewn to the resulting square. All actions described above are performed. Each time you will get new squares with a larger perimeter. Having completed all the stages, you will get a patchwork pillow element from various patches measuring 32x32 cm.
As a result, you get a pillowcase that needs to be ironed well. To give the patchwork pillow a more stylish look, the front part must be quilted.
On video: how to sew a quilted pillow in patchwork style.
Sewing a pillow
Let's start the master class for a pillow made of scraps by making a square-shaped bedspread. The fabric should be natural, dense and strong, so stock up on satin or calico. Depending on the shape of the product, the fabric is cut. For a square or rectangular pillow, the fabric can be folded in half to create 3 rather than 4 seams. Sintepon must be purchased either by weight or in sheets.
In the first case, the napkin is first sewn, a small hole is left for the filling, the inside is tightly stuffed with synthetic padding, and the remaining piece is sewn up by hand or with a surface seam on a sewing machine. The synthetic padding sheet is first sewn together in several layers, and then carefully inserted into the finished cover; the last side of the cover is sewn up with an outer seam. The same type of filler is used for round and cylindrical pillows.
Fabric selection
For patchwork sewing, it is very important to choose the right fabrics so that they are harmoniously combined with each other and are of the same quality. The most commonly used natural fabric is cotton, calico, linen, muslin or poplin. The fabric should not be stretchy or stretchy, otherwise it will not be possible to fold an even pattern. It looks beautiful alternating several types of fabric with each other, when combining light and dark, bright and dull, with large and small patterns.
Be sure to choose a base fabric with a solid color that will unify the pattern on the front side and take up the entire back of the pillow.
Assembling the Parts Together
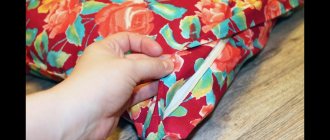
As you already understand, do-it-yourself rag pillows are sewn from individual pieces. In the photo below you can see that fabrics of various colors are cut into squares. However, it must be remembered that on each part on all sides it is necessary to leave 0.5 cm for the hem of the fabric. Some craftsmen use a cardboard template to ensure clarity of form. It is laid out on a cut out square of fabric, folded from all sides into the middle and immediately ironed with a hot iron, making a fold in the right place.
When all the parts are prepared, they are sewn together along smooth, clearly visible lines. Similar patterns are made when cutting out triangles, hexagons or round central parts when sewing patchwork pillows. For beauty, you can add an outer seam using contrasting threads.
How to properly patchwork pillows: master class
Any master class on sewing a patchwork pillow with your own hands is designed to comply with several points:
Before starting work, it is important to carefully prepare your workplace and stock up on all the necessary materials.
Patchwork stages:
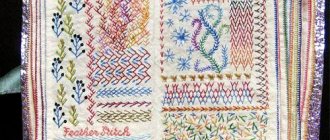
- If it has been decided to use a master class with embroidery for decoration, floss, scissors, a needle, etc. must be present. The embroidery is applied to the fabric, and then used to create a pillowcase or pillow.
- You need to leave 2-2.5 cm on each side of the design. The next step is to cut out the shreds. You will need strips the width of which is equal to the embroidery and the height of 2.7 cm. Be sure to leave 0.6 cm on each side for the seam. After sewing the flap, you need to iron it well with an iron.
- The next strip should be from a different fabric. It is measured by the overall size of the resulting flap and ironed well. The sizes of the remaining strips are measured in the same way and cut from other types of fabric.
- For such a pillow with embroidery, you will need four types of fabric, which must be alternated with each other until the front side is ready. All that remains is to sew the bottom part to it, fill it with filler and make a hidden seam.
Related article: What to do if the gas water heater makes noise, whistles, crackles or clicks?
Before starting work, you need to prepare your workplace well and stock up on all the necessary materials and tools.
This master class is just one of many possible options for creating decorative pillows.
Master class on sewing a pillow using patchwork technique (video)
Making seams
Let's take a closer look at connecting the parts together in a single drawing. For convenience, a composition is assembled from large squares. Depending on the chosen pattern, they can consist of only small squares, or of squares and triangles. Each seam must be ironed with a hot iron on both the front and back sides.
When large elements are prepared, they are sewn together in strips. This only applies to square or rectangular pillows. Next, we’ll take a closer look at how to sew a pillow from round scraps with your own hands.
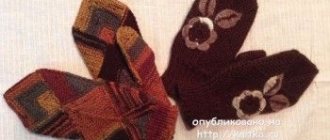
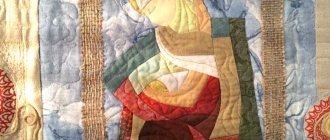
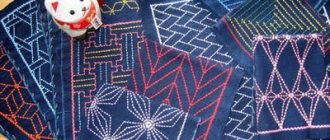
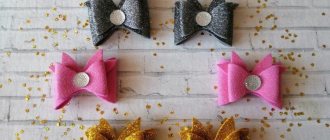
Patchwork pillows (photo)
The best posts
- Tool for caulking a timber house
- Old sofa? We'll tell you how to “hide” it
- Decorative stone in the hallway - installation secrets
- How to make a shower stall in the bathroom with your own hands - expert advice
- Do floral wallpapers look modern in the interior?
- Glass doors for a bath - the secrets of a quality choice
- How to make your stay at the dacha as comfortable as possible?
- Combining wallpaper in the living room photo ideas: combination of two colors for design, combination, how to combine correctly, paste, video
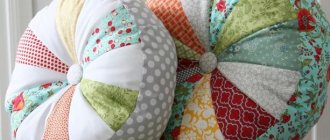
Round pillow
The base for a round pillow is made up of several circles of sheet padding polyester sewn together with threads. The napkin is sewn from thick fabric from two circles and a long thin side strip. Work on the decorative cover is made from individual scraps in sectors. To do this, use a cardboard template and several harmoniously matching colors of cotton fabric. The sectors are cut out in such a way that there is fabric left on each side for hems and seams.
Using a template, iron all the seams to create straight lines for joining the pieces together. To hide the center point of the pillow, prepare two large buttons with a loop at the back, wrap them in any fabric and sew all layers of fabric and padding together, as in the photo in the article.
The side and back sides of the cover are sewn in the same colors as the central part of the craft. They can be colored or plain, at the choice of the master.
Patchwork design solution: pillow ideas
A patchwork pillow is a thought. To create this style, ideas using bright and eye-catching colors are suitable. Thanks to its fashionable sewing technique, this type of patchwork will be an excellent decoration for the room.
Types of pillows:
- Classic pillow. Ideas for lovers of this style can be varied and in demand. Standing out for its traditional style, this type easily fits into any interior. The main condition for such a design solution is a successful combination of the patchwork pillow with the tone of the furniture. Moreover, classic ideas can combine the use of contrasting fabrics or remnants of curtain fabrics. To create such a pillow, preference is given to rectangular stripes and square patches.
- Knitted pillow. Using such ideas for patchwork, you can not only successfully highlight a recreation area, but also improve the interior of the room. For example, comfort and a cozy atmosphere can be achieved with the help of a round tube pillow. Foam rubber, hooks and yarn are prepared in advance. The main thing is to knit the selected openwork pattern, the edges of which should be enclosed in a small square frame at the end. All that remains is to sew the opposite sides of the embroidery and you get a pipe. Using circular knitting, you can make the sides of the pillow. And foam rubber is used to stuff it.
- Denim pillow. Using patchwork sewing for such a patchwork idea, you can create an original design solution. Moreover, there will be no problem with selecting fabric, because thanks to this technique, old jeans will find their new use. There is nothing complicated about the denim patchwork technique. It completely replicates the classic style.
- Crazy patchwork. This is the most striking style of decorative sewing. A master class of this type is presented using many bright patches of different colors and sizes, as well as laces and braid (they will help hide and decorate the seams).
To sew a patchwork pillow, it is better to use fabric of bright colors.
Unlike the classics, there are no alternately connected strips of fabric. The remaining pieces of fabric must be sewn one by one to the central uneven patch, aligning the edges if necessary.
Related article: Interior decoration of the loggia with plastic panels
Option with a heart
For beginners, you can make a pillow from scraps with a heart in the center. You can sew the strips together even without trying them on; just place pieces of fabric in the shape of long trapezoids next to each other and stitch one to the other. Iron the resulting pattern with an iron and set the large square aside. The main work is done on the heart-shaped hole in the main fabric. You will need a template to trace the chalk outline on the back of the pattern.
When you cut a hole with scissors, be sure to leave 1 cm at the hem of the fabric. Since the heart has rounded edges, it is necessary to carefully iron the hem so that no wrinkles remain. You can sew a circular seam using stitches. Then place the patchwork piece so that it covers the hole completely, and sew it with a needle and thread. Use scissors to trim off any excess edges of the strips. All that remains is to stitch the heart along the contours on a sewing machine and the main part of the decorative pillow will be made. This craft can be sewn as a gift for Valentine's Day.
Hexagon pillow
This is one of the difficult options for making a pattern from scraps. Just for the front side of the cover, it is necessary to cut out and sew together several dozen small elements with six seams.
Only experienced craftsmen can perform such painstaking work. To evenly cut and iron all the edges of the hexagons, be sure to use a thick cardboard template. All the parts are first connected to each other, and then at the end the square shape of the front side of the pillow is cut out.
Variety of designs
Pillows from scraps are sewn by hand using a wide variety of patterns. The more complex the drawing and the more small details, the higher the skill level of the seamstress. If you are just learning how to sew from scraps in the patchwork style, start working with large strips or squares. It is easy to make a soft roller from rectangular elements of different colors. The side circles of the cylinder are sewn at the end of the work, and attach a zipper to the central seam.
When you get an even pattern and a clear connection of the elements into a single whole, you can try intricate patterns from small parts. You can fantasize endlessly. So, in addition to the heart, the sewing of which we discussed above in the article, you can make a hole in the shape of an apple, pear or cat figure. It is easy to do the work from the same shaped scraps, but they may differ and be located at different angles. Masters fell in love with patchwork because it opens up the imagination. You can bring any creative ideas and ideas to life in your work. You can vary not only the shapes of the patches, but also the color scheme. Even from several pieces of the same color, you can create many different pillows, combining them differently each time.
In the article, we examined in detail how to independently sew pillows from scraps of fabric in a patchwork style. To work, be sure to prepare a drawing, made by yourself or printed on a printer from the Internet. This will make your work much easier and help you complete the task with ease. To align the edges of each part, you need to make a cardboard template and iron all the folds with a hot iron. Then it’s a matter of technique; all that remains is to sew the parts together with neat seams and the pillow is ready! Try your hand at a new art form! Happy endeavors!
Block Star (master class)
One of the quick and easy ways to sew patchwork is to work in stripes. Strips of fabric are cut, sewn together, cut according to a template and sewn to the main part. Seam allowances are pressed to one side.
Decorative pillowcase in patchwork style