Types of weaving bracelets without a machine on fingers
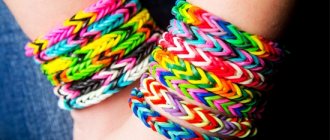
Decorations woven using elastic bands are very popular. This material is affordable and accessible to most people, so the finished product will be inexpensive and will be an excellent alternative to costume jewelry. The design can be chosen by the needlewoman herself, so the decoration will be unique and inimitable. Independent choice of color scheme allows you to create an accessory to suit a specific clothing style.
There are many ways to weave on fingers. Beginning needlewomen first master the easiest patterns, for example, using the chain technique. When you have a little more experience, you can take up more complex weaving methods: “Caterpillar”, “Rain”, “Dragon Scale”, “Double Braid”, wide and voluminous bracelet “Feather”, “Mesh”, “Flower”, “Stripe” , “Hearts”, “Spider”, “Tail of the Dragon”, “Through Line”. This is just a small part of the techniques you can master.
Double "dragon scales" on a slingshot
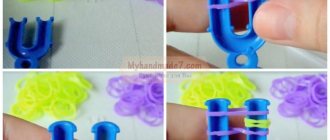
You will need: a slingshot with 4 posts, a hook, a clasp, 86 black and 42 colored elastic bands.
Master Class
- Position the slingshot with the indentation facing you.
- Place a figure eight of red elastic on the 2 middle posts.
- Place a figure eight of black elastic on the right and left posts.
- Throw the red rubber band behind the post.
- Place a pair of pink elastic bands on the middle posts, wrapping them twice.
- Remove the lower middle black elastic bands by the columns.
- Fold the black elastic band in half, then place it in a figure eight on the right posts. Do the same with the left columns.
- Throw the bottom row of rubber bands behind the columns.
- Continue weaving in the same pattern and do not forget to alternate the colors of the rubber bands.
- Finish weaving when there are black elastic bands left on 4 columns, then remove the elastic bands from the outer columns to the middle ones.
- Weave by throwing the bottom elastic bands over the posts.
- Transfer the elastic bands from one column to another, then put on the S-shaped clasp and connect the ends of the bracelets.
The double rainbow “Dragon Scale” on the slingshot is ready! I recommend watching the video master class!
Technique for weaving rubber band bracelets on fingers
Before you start creating a full-fledged accessory, you need to learn the basics of work. Let's look at the algorithm of actions to understand how to weave jewelry on your fingers. Take three different colored rubber bands. You can use one color, but different shades can convey all the beauty of the weaving:
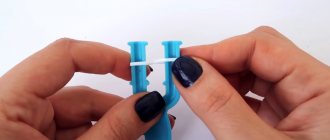
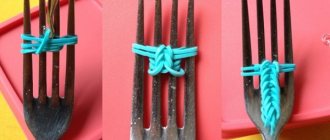
- Place the first rubber band on your index and middle fingers, twisting it in a figure eight.
- We put two more on the same fingers without removing the first one. But don't lose sight of the fact that the second and third are no longer twisted.
- First, grab one end of the lowest twisted one, lift it through one finger, then through the second. It should hang on the second and third.
- We put the bottom one on again, lifting its end up. Remember that the ends of the elastic are raised when there are three more elastic bands on the index and middle fingers.
- We continue to weave in the described way until the desired size is obtained.
Another basic pattern is “Chain”, which can be multi-colored or plain. It's done like this:
- We put an elastic band twisted in a figure eight on the middle and index fingers.
- We pull the next one next to the first one, without twisting it.
- We remove the first one from the fingers, threading it onto the last one.
- Continue until you get the desired length.
The video below describes the process of creating such easy-to-make products as the “Chain”.
Rubber band bracelet Simple basic chain pattern Rainbow loom
Weave a French braid pattern
The French braid pattern is very popular among teenage girls, not only because this pattern turns out luxurious, similar to the hairstyle of the same name, but because it is easy to create. For weaving we need:
- 100-120 irises (choose colors to suit your taste);
- hook (optional);
- S-shaped clip-clip.
Weaving silicone jewelry is carried out according to the following scheme.
- We put an iris twisted in a figure eight on the thumb and second finger.
- The next pair of irises and all subsequent ones do not need to be twisted. Now we hook the bottom loops of the figure eight with our finger or hook and throw them into src=»https://ladyspecial.ru/images/2015/10/25/a08523ecb4d35576b83798d4bd075a20.jpg» class=»aligncenter» width=»550″ height=»389″ [/img]
- We put on another rubber band.
- We remove the lower iris from the index finger and throw it into the middle.
- Remove the middle elastic band from the thumb and drag it to the center.
- Repeating the previous 3 steps, weave the bracelet to the desired length.
- To finish the weaving, you need to put on the clasp. To do this, leave 1 loop on each finger, pulling all the others into the middle.
- We transfer the loop from the thumb to the second one, and put the clip on one end.
- We pull the loop of the first eight and hook it to the second end of the fastener. The bracelet is ready.
How to make bracelets on fingers: step-by-step instructions
If you have a kit for weaving various decorations in your hands, then you should start with the simplest patterns that do not require special slingshots, hooks or machines. This will give you the opportunity to quickly get results and try on original, bright jewelry. After mastering simple patterns, you can move on to more complex ones: using your imagination, it’s easy to create entire sets with pendants, rings, and pendants.
As you improve your skills, you don't have to limit yourself to just using rubber bands. For complex products, try weaving other elements and materials: pebbles, beads, ready-made flowers. By diluting the weaving with such components, you will be able to create unique designer accessories. Knowing these secrets, you will be able to weave a piece of jewelry that suits you personally, and make accessories for any clothing. So, how to weave on your fingers?
- Inhalations for dry cough
- How to prepare lean and choux pastry for dumplings with potatoes
- How to freeze zucchini in the freezer
A simple rubber band bracelet for beginners
This type of finger braiding is considered fundamental, easy, and helps you learn basic techniques for working with elastic bands. If you master the simple steps, you can move on to other types of weaving without experiencing any difficulties. To create a bracelet you will need elastic bands and a clasp. Step-by-step instruction:
- We put the first elastic band on the fingers in a figure eight pattern.
- Then we put on the second one, without twisting it.
- We pull the lower one off one finger, drag it over it, and release it. We do the same with the other bottom elastic band.
- As a result, you will end up with one elastic band on your finger, tied in the middle of the second.
- We put on another elastic band.
- Repeat the same steps until the desired length is achieved.
- Finally, we transfer one end of the elastic band to the other.
- We put on the clasp and fasten the ends of the product.
Weaving a fishtail bracelet
When you have practiced weaving a simple pattern, you can move on to complex techniques that reveal all the creative potential hidden in this type of needlework. When you become a master of this hobby, you will master a lot of techniques and weaving methods that allow you to make original, varied jewelry. Fishtail technique:
- We wrap the first elastic band around the index and middle fingers in the shape of a figure eight. He puts two more untwisted ones on top.
- Remove the bottom one from the left side so that it is on top between your fingers.
- We repeat the same action on the other side.
- Add the next elastic band. We lift the bottom right and left up, lower it between the fingers.
- We continue to add elastic bands to achieve the desired length of the bracelet.
- When the bracelet is ready, we do not add the third elastic band; instead, we remove the other two from the fingers. Next you need to secure the clasp.
Decoration with beads
You can weave a wonderful bracelet using rubber bands and beads using only your hands. This master class will help you with this.
To create a bracelet you need to take:
- Elastic bands in two contrasting colors;
- Beads with a wide hole.
Take three rubber bands and insert them into each other as follows.
Insert the bead into one of the central elastic bands, as shown in the photo.
Fold the ends of the two center elastic bands together and reinforce the iris in a contrasting color by pushing it through the tails of the elastic bands.
Again, take two elastic bands and pull them through the contrasting iris loop, tightening a little.
Repeat the above steps until you get the bracelet length you need. Thread the clasp through the first and last loops and enjoy wearing it!
Read this: How to make a panda out of rubber bands: a friendly animal keychain
Video tutorials on weaving bracelets on fingers
The basic techniques for weaving various models of jewelry are demonstrated in an accessible and clear manner in the video tutorials below. There are many techniques for creating beautiful, interesting bracelets on your fingers:
- “French braid” - the method got its name due to its resemblance to the famous women's hairstyle. Weaving is easy to do, but the end result is a soft, voluminous, chic decoration.
- “Sidewalk” is an easy technique that allows you to create a wide, dense accessory.
- “Rain” is one of the simple weaving patterns that will result in a beautiful, neat bracelet.
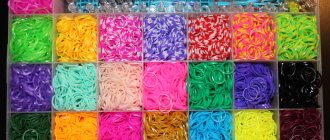
Before starting work, you should stock up on the necessary materials. Choose different colors, because the range presented is huge: from black to neon, acidic, striped shades. In stores you can find entire sets that include a hook and a machine. There are also models of jewelry that are woven without special equipment: on fingers and forks.
