Pincushion – cactus
To knit a cactus pincushion with your own hands, you will need a hook of a suitable size, some threads in green, brown, black and beige colors. You will also need a small pot or jar, about 6 cm high. First tie the bottom of the jar with brown yarn. Cast on 6 stitches in the ring, close them in a circle and knit, making uniform increases in each row.
Next, tie the height of the pot on the sides, without any increases. The jar should be tied alternating rows. First, knit the first row with a brown thread in single crochets, and knit the next row with a beige thread in single crochets.
Having tied the entire pot, start knitting the cactus itself. Take green yarn and knit a cactus crosswise. Crochet 20 chain stitches. Next, on this chain, do this: in each loop in order - 1 chain lifting loop, sc, half-column, 2 tbsp. s/n, 10 columns, 1 tbsp s/2n, 2 tbsp. s/n, semi-st., st. b/n.
The next row, as well as all subsequent ones, should be knitted according to the pattern of the first row, only insert the hook behind the legs of the columns of the previous row. The result is embossed columns.
Do rows in forward and reverse directions. By knitting the relief columns, characteristic folds appear on the surface of the part, and the cactus turns out to be round in shape.
In total you need to knit 28 rows, then sew the first and last rows. Tighten the upper loops of the part with green thread, and fill the cactus with filler (sintepon, holofiber) through the lower hole.
Attach a black thread to the lower part of the cactus and use it to knit a circle with single crochets, crocheting evenly in each row. The black base circle should be made the same diameter as the pot. Then fill the pot with any filling, and sew the edges of the pot with the edges of the base circle. A beautiful unusual cactus is ready!
On a forest motif
The mushroom pincushion, which we will now work on, is knitted from not very thick threads.
To create it we will need:
- hook one and a half millimeters;
- scissors;
- soft filler;
- needle and thread.
The first thing we will work on is the leg of the mushroom: we knit a ring of six loops, then we knit a pair of NBR posts into each loop. Now we knit an additional couple of lines with additives. In the first row, additions should occur on every second stitch, and in the second row, every two stitches. In total, we will get twenty-four buttonholes.
The new series has no additives yet. We knit the BNK column through the back walls of the buttonholes. Next we knit seven rows of twenty-four columns of BNK.
When the part is made, we put stuffing into it.
Next we have to work on the top of the mushroom. The first thing we will do is knit a circle of forty-eight stitches. We produce additives in each row. In total, we will have eight rows. First, we make a ring of six loops and knit additives throughout the loops. Out of six loops we got twelve. Now we put additives in every second buttonhole. From the next row every couple of buttonholes. Then we add after three buttonholes and after five buttonholes. Thus, we knit a circle of forty-two stitches, making six additions for each row.
New three rows of forty-two BNK columns.
We work in the same way on a circle of forty-two loops, but after the additional rows we do not knit anything else.
We sew the upper and lower parts of the hat with regular threads, leaving a small hole. We insert the stuffing into this hole and sew it up.
We also sew the upper and lower parts of the mushroom.
Related article: Do-it-yourself keychain made from a cartridge case
From threads of a different color we knit several circles of six and twelve buttonholes and sew them to the hat with the same threads.
Our pincushion is ready. You can also tie a stand leg to it or leave it in the form in which it is now. A composition of several of these mushrooms sewn together will look great.
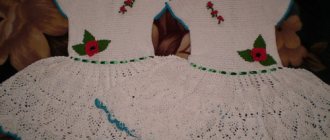
Pincushion - hat
This very simple hat to make with your own hands is a pincushion. To make it you will need a hook and some bright yarn, as well as filler.
The hat is knitted in the round. Start knitting with six chain loops connected in a circle. Next, make increments. First in each loop, then through one and through two. Make the required diameter, then knit without increases, knitting loops evenly in each line. Knit until the hat reaches the desired depth. Then you will need to knit a flat circle, the same in diameter as the cap, and connect it to the main part of the needle bed, filling it with filler. The hat must have a brim. Make them based on the diagrams:
Edge binding scheme
You can take a satin ribbon and sew it to the needle bed around the perimeter. This will make the knitted hat look more interesting. Decorate the ribbon with a small bow or small flower.
Video tutorials on crocheting pincushions
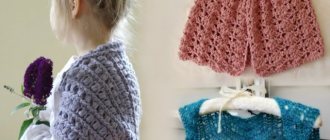
A pincushion is a necessary thing for every craftswoman. Every needlewoman always needs a needle bed at hand. And it’s very nice when your table is decorated with a cute hand-knitted item. This can be a flower pincushion, which is made from the remnants of any yarn.
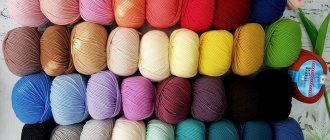
To knit this pincushion, I used two colors of Lira yarn from Vita Cotton (composition: 60% cotton, 40% acrylic, 50 g/150 m). I crocheted with size 2.5. Video master class (contains a knitting pattern).
Enjoy watching and easy loops!
Cup - an original gift for a seamstress
In this master class, the author will tell you how to knit a flagellum for the handle of a cup, and a description of the cup itself. Yarn 50g/135m and hook number 3.
Bear - cupcake, the most charming crochet pincushion
We will need Annabelle yarn and a hook number 3.5 cm. In the video tutorial, Emily Freeman will tell you how to crochet a basket. You can put the head of any soft toy or knitted cream in the basket.
Continued in this video:
Pincushion – frog
Such a funny and amusing hand-knitted frog will become a very unusual thing. To make it you will need a hook, filler, and green and red yarn. The frog consists of three identical circles. Knit them in the same pattern. Cast on 6 air loops, connect in a circle. Next, make two double crochets in each loop. In the next row, also make 2 treble stitches in each stitch. Starting from the next line, knit in double crochets, alternating increases with regular stitches. There should be a total of 6 rows. Knit two circles with a green thread, and start knitting the third with a red thread, only knit the last row in green.
You can crochet the eyes yourself, or you can simply glue two ready-made pupils.
The frog has legs
Knit them with green thread. Cast on 12 stitches in a circle. Then in the next row in each column make two pieces of st s/n. Total 24 pets. Fold the piece in half and join the edges of the foot using the back walls of the loops as follows - 1 sc, 2 sc in one loop. On the next round make 3 ch, 2 single dc, picot, 2 dc. with nak, 3 air pet connecting post attached to the subsequent loop of the base. Repeat the pattern 3 times.
The frog is almost ready. All that remains is to sew all the knitted parts together, focusing on the drawing and diagrams. Fill the product with filler. Your handmade frog is ready!
Knitted pincushion of classic round shape
If you are a lover of the classics, a pincushion of this shape will certainly evoke a lot of positive emotions inside. A circle is always associated with something complete, correct, perfect - and therefore such a pincushion will find its place in any home, on any shelf, near any other things, and will be not only a functional item that brings benefits, but also a decorative thing that decorates space.
How to crochet a round needle bed - job description from Craftingfingers
Pincushion-sun
Well, and the sun - what would it be like without it? Summer demands, obliges, and generally says quite unequivocally that everything around should be permeated and saturated with the sun and its rays. That is why the choice of such a pincushion seems completely logical. With this thing you will feel warm, beautiful and bright, with it you will want to smile and enjoy every new day - no matter what the weather is like outside the window.
How to knit a pincushion in the shape of a sun - master class from doradoes
Pineapple pincushion
Summer is just around the corner! It's summer! Time for fruits, colors, aromas! Give yourself a gift, give a gift to your friend - knit a pincushion in the shape of a pineapple, and both of you will feel sweet, joyful and beautiful. Sudden surprises for no reason, by the way, significantly improve any mood - do you know about this? So what’s stopping you from getting down to work right now and doing something nice for a good person?
How to knit a pineapple pincushion - description from Thecraftycats