Tools
To create a bookcase with your own hands you will need the following tools:
- Hammer
- Combined square
- Roulette
- Pencil
- Hacksaw or circular saw
- Anti-dust mask
- Protective glasses
- Work gloves
- Miter saw or backed hacksaw and miter box
- Tsulaga
- Grinder
- Universal plane
- Electric drill
- Drill 6.5 mm
- Wire Disc Brush for Electric Drill
- Four C-clamps
- Socket wrench with 11 mm head
Necessary materials
| Detail | Material | Length | Quantity |
| Side/back bar | old picket fence* | 1500 mm | 16 |
| Shelf plank | old picket fence* | 768 mm | 16 |
| Frame crossbar | hardwood 50x25 mm | 767 mm | 8 |
| Frame jumper | hardwood 50x25 mm | 320 mm | 12 |
| Base jumper | hardwood 50x25 mm | 298 mm | 4 |
| Bumper board | old picket fence* | 768 mm | 1 |
Additionally:
- Sandpaper: ten sheets of each grit 25 and 12 according to GOST (60 and 120 according to ISO);
- PVA glue;
- finishing nails 60 mm;
- nails 30 mm with a flat head;
- four synthetic polishing sponges;
- clean rags;
- teak oil with wax or finishing material of your choice;
- eighty-four bolts 3x50 mm with a mushroom head and washers.
* The old picket fence is well dried and should not deform. However, you will have to adjust the width and depth of your shelving to match your picket fence. If desired, you can use 95 mm wide hardwood boards.
The final height of the structure is 1500 mm; width 795 mm; shelf depth 378 mm. Lumber is indicated with nominal dimensions.
PVC pipe product
Prepare:
- PVC polymer water pipes;
- sandpaper 220 RUR;
- measuring tape or tape measure;
- plastic or special primer for PVC;
- glue;
- PVC tees and caps;
- for shelves, boards, chipboard or plywood, depending on what you have at your disposal;
- jigsaw;
- drill and bit;
- screwdriver;
- screws;
- spray paint (choose color as desired).
You need to select the parts for the size of the shelf that you are planning. We have this:
- legs 15 cm long - 4 pieces;
- horizontal supports 52 cm each - 9 pieces;
- side supports 15.5 cm each - 14 pieces;
- vertical supports 26 cm each - 20 pieces;
- tops 10 cm - 4 pieces.
Related article: DIY Christmas garlands - 39 ideas
We glue the parts together, using tees if necessary.
We put caps on the legs.
Now, in the corners of the wooden shelves, we drill holes for the diameter of the pipes.
We will treat the cut areas with sandpaper.
In addition to glue, we duplicate the fastening of the angles with screws for reliability.
Until the shelves are installed, we paint the frame of the shelf with paint. Be sure to lay a backing so as not to stain everything around. And of course, we don’t forget about safety precautions: we work with gloves, in the fresh air, preferably even with a respirator (if you have a sensitive sense of smell or a tendency to allergic reactions).
We assemble the entire structure.
We install it in the desired location and place things.
Preparation of material
1. Remove nails from the picket fences, if any. Carefully select the best planks, that is, the smoothest, with the same thickness. In total you will need approximately thirty-five pickets.
2. Take the material for the frames, mark it and cut the parts. Make markings using a square across the face and on the edges to ensure the squareness of the ends when sawing. Saw close to the pencil line on the waste side. Place a combination square on the material to act as a guide for the circular saw. If you are not very handy with a circular saw, use a miter saw or a back saw and a cutlass.
3.
The pickets usually rot from below, but from above they are in fairly good condition. Stack two or three planks and saw off the perpendicular ends evenly. When you have sawed off the ends of all the pickets at one end, mark them and cut them to a length of 1500 mm. Trim the corners of the top ends as shown in the picture on the side. Do not try to make the cuts absolutely identical - small irregularities will emphasize the rustic style of the product.
4. Cut the shelf strips as described in step 2.
5. Using sandpaper with a grain size of 25 according to GOST (60 according to ISO), sand all parts. Sew the top edges only of the frame material to make them even. Make a small 2 mm chamfer on the frame parts.
Flower shelves
Long gone are the days when the whatnot was the “highlight” of the living room and the hostesses of secular salons vying with each other to see whose was cooler. Nowadays, most of the shelves in everyday life are used to place indoor plants. Here the openwork of the whatnot works for functionality: using the whatnot, plants can be placed on a minimal floor area so that they do not shade each other and it is convenient for the owner to care for them. For the same purpose, special shelves for flowers are built, but they are, as a rule, stationary, attached to some kind of base, and the shelf is adjustable. However, the difference is very relative.
What kind of shelf for flowers should be depends on the role and significance of the latter in the interior. Most often, a few indoor plants are kept in the house, small and not very picky - to liven up the interior. But many amateur plant growers also collect large collections of sometimes rare exotic plants at home.
Shelves for indoor flowers
Shelves for purely decorative flowers are usually made cantilever, i.e. with a large offset of shelves rotated relative to each other around a vertical axis. The design is either onlay (pos. 1 in the figure), or rack-mounted, pos. 2. The first ones are simpler and cheaper; the latter are more openwork and less distracting from the plants.
Shelves for collections of indoor plants are already made as ladders, pos. 3-5. The shelf is especially multifunctional - an extension ladder, pos. 3:
- In winter, it is stored without taking up much space in a pantry or closet, where you can put all sorts of little things in boxes.
- In spring – used as a rack or shelves for seedlings.
- In summer - installed in a suitable place for summer maintenance of indoor flowers in the open air.
- In autumn - suitable for drying crops from the garden before sorting and preparing for winter storage.
Note: a shelf made from a construction pallet is also good for keeping indoor flowers in the summer. If such an unsightly internal corner of the building is blocked, pos. 6, then in the nook behind it a microclimate will be created that is favorable for the health and development of plants.
A drawing of an extension shelf-ladder for flowers is given on the left side of the next page. Fig., and on the right there are drawings of a greenhouse bookcase for the most whimsical people from the depths of tropical rainforests: orchids, gesneriaceae, etc. The substrate on which these plants grow is always slightly warmer than the surrounding air due to the abundance of rotting organic residues in it. It is impossible to lay a layer of red soil of more than 1 m at home for such sissies and populate it with tropical soil microflora/microfauna, but in the “basement” of this shelf an infrared heater of 20-50 W can be easily placed, heating the soil in the trays to the required degree. A pair of 15-25 W incandescent lamps are perfect for this purpose.
Drawings of shelves for flowers
There is also an interesting version of a flower shelf - a vertical bed of flower pots, see the inset at the top left on the next page. rice. Usually a shelf of pots is assembled by simply stringing them onto a pin with drainage holes: the bottom one is filled with soil, the top one is placed, filled, etc. However, firstly, the shelf for flowers from pots turns out to be suitable only for outdoor use. Secondly, physiologically optimal watering of the upper plants inevitably entails overwatering of the lower ones, and adding hydrogel to the soil does not always prevent it. Thirdly, only plants that grow together in nature can be grown in a simple flower bed, while dissimilar ones will suppress each other by secreting their roots into the soil.
Scheme of arranging a shelf for flowers from flower pots
Meanwhile, indoor gardeners have long known a version of a shelf for flowers from pots, which is devoid of these disadvantages; a diagram of its device is shown in Fig. The guide pin insulation is a heat-shrinkable tube (HERE); It is used for its intended purpose to insulate wire connections and is sold in electrical stores. Shrinks by heating with a construction hairdryer at low power or with a household hairdryer at full power. Spacer bushings are made from scraps of propylene water pipe. Fine screenings are added under the bottom pot to ensure general drainage.
Frame assembly
6. Clamp the frame jumper in a vice with one of the ends facing up. Apply some PVA glue to the end and rub it into the wood with your finger. Then apply glue to the end of the piece. This will strengthen the connection. Take the crossbar and drive a 60mm nail into the face of the material near the end of the piece. Place the crossbar on the header so that the ends are flush and the planed edges are neatly aligned. Hammer the nail and adjust the fit. Hammer a second nail into the joint and repeat the process at the other end. Check the squareness of the frame by measuring the diagonals. If they are equal, then the corners of the frame are right.
7. Add middle crosspieces to the frame. They should be evenly spaced, but the accuracy of the position is not very important, as long as the surfaces are flush with the top of the frame.
8. Make two more shelf frames and a plinth frame with shorter lintels.
Assembling shelves
9. While the frame glue is drying, clean and sand the picket strips. Wear safety glasses and gloves and, if possible, use a wire wheel brush in a power drill to scrub all surfaces of each picket, paying special attention to areas where there is rot. You can use a regular wire brush, but the process will be more labor-intensive and time-consuming. When all the planks have been wire brushed, sand them with 25-grit sandpaper according to GOST (60 according to ISO). Be sure to sand the edges thoroughly to remove flakes and nicks; work along the grain, not across it. To obtain a smooth surface, also treat the parts with sandpaper with a grain size of 12 according to GOST (120 according to ISO). Use a soft cloth to remove wood dust.
10. Check if the glue is dry. Glue the plinth frame (it is narrower) with PVA glue and nail the bumper board with flat-headed nails, aligning its upper edge with the top of the frame.
11. Apply a liberal amount of glue to the area on the plinth frame where the front picket strip will be located, and place the picket strip on the frame so that it protrudes no more than 10 mm beyond the face of the plinth. Make sure it is flush with or slightly over the side of the frame and nail in place with flat head nails. Apply a little more glue to the frame, place the next plank and nail it, lining up the ends. Repeat the process for the third plank. Leave the fourth strip for now: it will be too wide and will require trimming
12. Attach three strips to each shelf frame in the same manner, positioning them flush with the front of the frames.
13. Place the four planks in place and mark the required width along the frames. Secure them onto a suitable work surface and cut them to width. Nail the final planks into place.
Finding Studs in Frame Houses To attach a shelf to a wood frame wall, you will need to find the studs of the frame. This can be done in several ways.
- Use the structural member finder (post and beam indicator). This battery-operated device is available from retailers.
- Lightly tap the wall and identify places with dull sounds.
- At shelf level, try to find the studs using a nail.
- Look for nail marks on the drywall as they may indicate studs.
- In the under-roof space, find the ends of the racks. Measure the intervals between them and the distances to the corner.
Shelves for order
Modular shelves, consisting not of shelves, but of cells, are also quite widely used, see next. rice. They are usually made from scrap materials: boxes (items 1-3), boards from disassembled construction pallets - pallets, waste lumber, but the point in this case is not only the availability of raw materials. For example, a shelf-rack for toys (item 4) teaches the child good order. Little ones have not yet matured into the subtleties of aesthetics and design, but they understand functionality from birth.
Modular shelves
Modular openwork lattice shelves, or partitions, pos. 5 is one of the best means of zoning a room: they clearly divide the space without visually reducing the volume of the room, and are sufficiently light-transparent. How to make a partition bookcase from ordinary pine boards, see next. video.
Video: do-it-yourself bookcase with cells
For books
Bookcase
Books, especially valuable publications, should be stored for a long time in a special bookcase or on a rack in a room with suitable conditions. A small number of books and magazines for current reading are placed on the shelf of a regular bookcase or in a nightstand. If, due to your occupation or hobby, you have to have a lot of books, folders with papers, plus, possibly, a file cabinet at hand, then you need to take into account their considerable weight. In this case, it is better to assemble the bookcase with an overlay, and to make its shelves, so as not to sag over time, make them box-shaped (see the figure on the right) from a fairly rigid material: laminated chipboard, moisture-resistant plywood.
Perfectly exclusive
Even today, a shelf can become a key element of interior design. It is possible to do this without expensive rich decor, valuable wood, complex and delicate work, by making a bookcase, for example, in a rustic style. Well-made rustic furniture looks amazing and fits into almost any interior, up to a loft, see next. rice. Those who want to learn how to make rustic things are faced, first of all, with two tasks: aging the wood while simultaneously increasing its decorative qualities and surface strength, and also, as regards rack-mounted shelves, adjusting the junction of branch cuts for the racks.
Rustic style furniture
Artificial aging and visible refining of wood is achieved by firing followed by brushing - processing with a steel brush along the grain and, possibly, impregnation with tinting oils. On aging wood for rustic, see the master class:
You can add to this that there is no need to purchase or rent an expensive brushing (brush-grinding) machine for small piece work: a much more effective result is obtained by manual brushing with a metalwork brush (new!), the wire bristles of which are cut to 1 -2 cm with an angle grinder. As for adjusting the junction of branch cuts, see the video tutorial:
Preparing the side and back slats
14. On one of the side strips, measure 60 mm from the bottom. Set aside another 400 mm from this mark to determine the position of other shelves. Draw a center line along the strip to provide drilling points. Using an electric drill with a 6.5 mm drill, make holes in them.
15. Use the first picket as a template for drilling the remaining pickets. Stack two or three planks with the template on top. Secure with a clamp and drill everything together in the appropriate places.
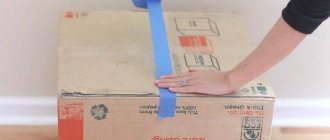
16. Apply finishing material to all planks and frames (these areas will be difficult to access later). We used teak oil and wax to give it a rustic, simple look as it brings out the texture. Rub the wax in thoroughly using a rotating motion of the polishing sponge. This will also remove any small splinters left behind after sanding, so wear protective gloves. Use a dry, clean cloth to remove excess wax. The bolt heads were painted matte black. The bolts were stuck into corrugated cardboard so that only the heads were visible, which were painted with an aerosol can.
Alternative finishing materials for bookcases
- Natural wax. Very popular, but requires increased rubbing and high consumption.
- Teak oil. For good results, apply multiple layers.
- Matt lacquer. Make a couple of layers of aerosol.