Seal
Unusual master classes often began to appear in the DIY crafts sections. Decoupage Easter eggs with napkins. Simple crafts made by the hands of a child. These are souvenirs for relatives for Easter, for competitions in kindergarten. And just a spiritual time for parents with their child. Decoupage of boiled chicken eggs is the simplest master class. More complex techniques for decorating wooden, ceramic, and foam blanks. From the article you will learn about decoupage of various options for Easter crafts.
What is decoupage – description of technique and scope of application?
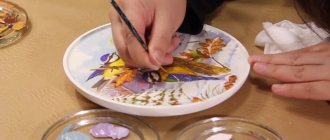
Description of technology. Decoupage is the design of objects with colored fragments of paper. It's not always napkins. Beautiful appliqués or photographs printed on thin paper are often used. The choice of design leaves room for imagination.
The larger the area for decoration, the larger the paper for decoupage. Larger surfaces are more difficult to work with. Today's topic is Easter egg decoration. A small surface for pasting small pieces of napkins. Such a master class will not take much time.
Decorators use decoupage techniques to decorate everything. These are fabric, wood, glass. After covering the surface with paper, special glue and varnish are applied. The glue secures the paper layer. Varnish makes it stronger. Because of the varnish layer, surfaces decorated with paper are easy to wash and wipe off dust.
Decoupage decor looks like a real painting by the artist. The more carefully the work is done, the more difficult it is to distinguish the glued paper from the paintings.
Application area:
- cabinet shelves;
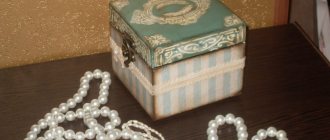
- caskets;
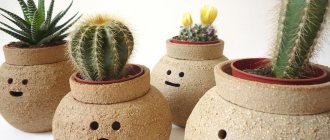
- flower pots;
- decorative kitchen utensils;
- figurines;
- decorative bottles, vases, bowls, perfume bottles;
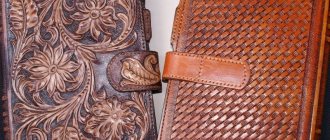
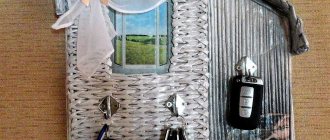
- key holders;
- organizers for stationery;
- New Year's toys;
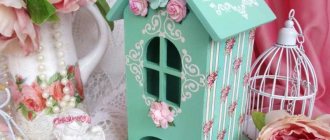
- houses and bird feeders.
What materials are suitable for decorating in decoupage style:
- foam blanks;
- wooden models;
- ceramic plates, blanks for decoration;
- chicken eggs for Easter.
- wax candles;
- plaster parts;
- thick cardboard;
- glass;
- plastic;
- textile.
Materials for decoupage of Easter eggs
The simplest decoupage is similar to appliqué. This is exactly what technology looks like to a child. Decorating Easter eggs is used for children's activities in clubs and at home. Accordingly, elementary materials for the master class will be useful:
- boiled chicken, duck or goose eggs;
- raw chicken egg white (as an adhesive);
- single-layer colored napkins (small or large pattern for eggs of different sizes);
- scissors;
- brush;
- cotton pads;
- vegetable oil (or without it).
Depending on the decorative idea, various details are added:
- flowers and small figures for scrapbooking;
- cuttings from figured hole punches;
- beads;
- half beads;
- braid;
- decorative laces.
Working with egg whites
To decorate Easter eggs you will need:
- ready-made white chicken egg;
- one raw protein;
- napkins (single-layer or multi-layer, colored);
- scissors (manicure scissors are ideal for this task, they are convenient for cutting small elements);
- flat brush.
Before you start decoupaging the egg, you should know a few little secrets - with them the whole process will go right and everything will be very beautiful. It is not recommended to beat the protein that will be used instead of chemical glue. If you do beat the whites, then bubbles may remain on the shell, due to which the entire application will not have a very neat appearance. Stir the protein with a fork - this will prevent it from foaming, but will only disrupt its structure.
Now you can move on to the napkin: the bottom layer is separated if all the work is done with the top one. This is true for multi-layer napkins. It is better to work out the image in advance - apply the cuttings to the shell and see if there is enough surface area and whether the image fits completely.
It is worth considering that the larger the selected pattern or individual element, the more difficult it is to work with it. Larger pieces are more difficult to glue smoothly due to the round shape of the chicken product. Use a brush to smear the Easter egg; decoupage in this case requires extreme care.
The added layer of white can make the shell very slippery, increasing the risk of the egg breaking.
An element from a napkin is applied to the area lubricated with protein and glued on either with your hands or with a brush. The element is also coated with protein on top - apply a layer carefully from the middle of the napkin to the edges. While working, you should try not to touch the already glued parts of the drawing.
When the image is completely ready, coat the Easter eggs with white again. The decoupage on the surface must be dry, and after that it should be treated again with protein until completely dry. At this stage, our master class is completed, the whole process can be done on the remaining eggs.
Related article: New Year's templates: decorating windows and creating cards
Features of working with different eggs
Depending on the material from which the egg is made, the steps of the master classes vary slightly. Just like the materials. The easiest option is real bird eggs. Chicken, duck or goose eggs. The option is more complicated - plastic, wooden, ceramic blanks.
Chicken
First boil the bird eggs in salted water. Here you are doing 2 things at once. Boil the eggs and degrease the surface of the shell. Decorators often degrease egg shells with additional soda, vinegar or soap. But, believe me, after boiling in salted water, the egg is ready for decoration.
The smaller the egg, the smaller the pattern should be. Large flowers look great on goose eggs. Raw egg white is suitable as glue.
To make the finished egg shiny, grease it with vegetable oil using a cotton pad. This will add chic to the craft. And it’s better not to use harmful varnish on an edible egg.
Plastic
Plastic blanks for chocolate eggs are the next option for crafts. But there are some nuances. An egg like this is too smooth to stick napkins on it. Therefore, the workpieces are first sanded with fine-grained sandpaper.
There are 2 design options for plastic blanks:
- The 2 halves are glued together with colored napkins. The result is a solid piece.
- The halves are decorated separately from each other. After drying, the parts are connected. You can put sweets inside.
Glue for plastic blanks – PVA. After gluing the napkins, the blanks are coated with acrylic varnish.
From foam plastic
Polystyrene foam is a soft, porous material. It's difficult to stick anything to it. Yes, the skin will be of no use. What to do? Prime! Place the foam piece on a wooden skewer. Cover with a layer of PVA or water-based primer. Let dry.
After decoration, such blanks are also varnished. You can stick a special hook with a decorative cord on top.
Wooden
Wooden blanks are first polished with sandpaper. First large, then small. The result is a slightly rough egg. Next comes a primer with PVA or a mixture of PVA, water and acrylic paint (ratio 1:1:1).
After drying, the wood is covered with a layer of acrylic paint. Colored drawings are glued to the wood with glue. The top of the craft is coated with clear acrylic varnish.
Paper
Another option is paper eggs. What it is? Another craft. Making a paper egg couldn't be easier:
- inflate a small balloon about the size of a pear;
- cover the ball with pieces of thin paper or newspaper (PVA glue);
- hang to dry;
- pierce the ball and remove it from the workpiece;
- seal the hole from under the ball;
- cover the workpiece with gouache;
- Glue the paper drawings with glue.
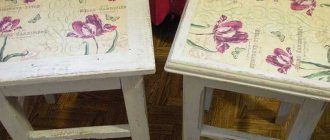
Decoupage Easter egg in shabby chic style
Shabby chic style, also known as shabby chic , is an imitation of antiquity using a white or light pastel base and pastoral motifs. It is characterized by an abundance of cute small details, lightness and romance.
A decoupaged egg made in the shabby chic style will be a great Easter gift. You just need a little patience and work to create an original Easter souvenir.
For this DIY Easter egg decoupage you will need:
- wooden egg blank on a stand
- one three-layer paper napkin with a small pattern on a white background
- acrylic paint white and gold
- PVA glue
- synthetic flat brush
- very fine to medium grit sandpaper
- white paraffin candle
- colorless acrylic water-based varnish for woodworking
Master class on decorating an Easter egg in shabby chic style:
- Prepare the blank for decoration. Remove any rough edges using medium-grit sandpaper.
- Cover the workpiece with gold acrylic paint and leave for 30 minutes until completely dry. Then add another layer of gold paint and let it dry.
- Rub the painted piece with a candle in those places where there will be abrasions (be sure to go along the top and bottom edges of the stand).
- Carefully tear out the motifs with which you will decorate the egg and stand from the napkin. Separate the two bottom layers of the napkin. Attach the motifs to the workpiece, determine their location and composition.
- Apply white acrylic paint to the egg and let sit for 30 minutes. The paint must dry.
- Using fine-grit sandpaper, rub the workpiece in the places where the paraffin was applied. Scuffs and scratches form on white paint because paraffin prevents it from adhering to the previous layer of paint.
- Dilute PVA glue with water in a 1:1 ratio. Using a brush, begin gluing the motifs to the blank one at a time, moving from the middle to the edges, since the egg blank has a convex shape.
- Coat the workpiece with varnish. Let it dry completely. Repeat the procedure 2-3 times.
- Use fine-grit sandpaper to smooth out any wrinkles and irregularities formed when gluing the motifs.
- Re-coat the workpiece with varnish and let it dry. Repeat sanding if necessary. The number of varnish layers depends on the smoothness of the workpiece surface. The more wrinkles and roughness there are, the more layers of varnish you will need. Alternate varnishing and sanding until the desired result is achieved.
It is better to tear out motifs for decoration from a napkin rather than cut them out. The cut edge gives a rare noticeable border between the background and the napkin.
Insert a sharp awl into the bottom of the workpiece. This will make the work much easier. You will be able to hold the workpiece without touching the surface to be decorated with your hands.
Be careful, smooth the motif with careful movements, as the damp cloth easily spreads and tears. Allow the motif to dry thoroughly before gluing on the next one. Avoid the formation of large and wide wrinkles, they will be difficult to remove in the future.
Look what this decoupaged Easter egg looks like in these photos:
Glue for decoupage
The following substances are used as an adhesive for decoupage:
- Raw egg white. Carefully separate the white from the yolk. Even a small amount of yolk will show through the napkin. The craft will look unpresentable. The white should not be beaten, just shake with a fork or whisk. Apply the white to cold eggs. When hot, the whites will immediately curl up.
- PVA is a glue of chemical origin. Used to decorate souvenirs.
- Potato starch paste. A small amount of starch is mixed with cold water. Cook until boiling while stirring. After cooling, the composition is used for gluing.
- Sugar syrup. Sugar or powdered sugar is mixed with hot water in a 1:1 ratio. As soon as the sweet particles dissolve, the syrup can be used in decoration.
- Swollen gelatin. The powder is mixed with water in a ratio (1:4). After swelling, the mixture is not heated to a boil. As soon as the gelatin particles dissolve, the mixture should be removed from the heat. The liquid is filtered through cheesecloth. At home, gelatin is used to decorate bird eggs.
Types of egg decoration using decoupage technique
Using various materials you can make a wide variety of crafts. Let's look at how to decorate Easter eggs with cereal, candy, fabric or even shells. Read with pleasure:
- Semolina adds texture and volume to the craft. The blanks are coated with an adhesive composition. Sprinkle with dry coarse semolina or roll in semolina. After drying, the craft is coated with paint. Is the paint dry? Glue on beautiful pieces of paper napkins. Finally, coat with varnish. As you already understand, decorating with semolina is not for real eggs.
- Small beads. A line or ornament is drawn on the workpiece using PVA glue. Small beads or glass beads are carefully sprinkled on top. The decor dries while hanging. It turns out original.
- Paper butterflies. This is a design option for paper elements. Butterfly drawings are printed on thick paper and cut out. The butterfly is glued to the egg only in the middle. Try to make it feel like soaring wings.
- With eggshell. Dyed eggs become covered in broken eggshells. The result is a craft that looks like a dinosaur egg. Miniature, of course.
- Candies and cutouts of their figured hole punchers. Such small clippings are perfectly glued with both protein and PVA.
- Patchwork technique. For gluing, scraps of thin fabric and tulle are used. For children's crafts, scraps of corrugated or crepe paper are suitable. Each flap is applied to the glue separately.
- Antique decor. A souvenir with antique decor can be made at home. You will need craquelure varnish. It is applied to a previously painted workpiece. This technique is not for edible eggs.
Another option is decoupage with newspapers. It looks attractive and original. The drawing turns out to look antique if you hand draw something on top of a black gel newspaper. For example, a cage with a bird. How do you like it? Look at the photo to see what decoupaging eggs with newspapers looks like.
Decoration-stand for eggs “Birds of Paradise”
These birds look simply magical! Even the simplest table will look elegant with them. The main material for these original stands is cardboard boxes, which you can probably find at home or in your nearest store.
You will need:
- egg carton;
- acrylic paints or gouache;
- brush;
- colorful feathers;
- glue glitter;
- plastic doll eyes;
- universal rubber glue;
- scissors;
- felt-tip pen.
You can also make birds from colored cardboard boxes, then you don't have to paint them.
- Using a felt-tip pen, draw the outlines of the birds in the two outer corner cells, as shown in the photo.
- Cut out the birds along the outline. From one box of ten eggs you will get two stands.
- Paint the stands with acrylic paints or gouache. Let them dry completely.
- Select beautiful feathers that match the color of the bird and glue them to the inside of the stand with universal glue.
- Glue a crest - a piece of feather - onto the bird's head.
- Cover the place where the tuft is glued with a drop of glue glitter.
Popular articles What can be made from under a carton of eggs. original crafts that can be made from ordinary egg cartons
- Glue on the eyes. The stand is ready!
Decoupage of boiled chicken eggs with napkins - step-by-step instructions with the hands of a child
Decoupage made by a child looks cute. Both the youngest artist and his mother will love this craft. Step-by-step instructions for beginners - an excellent choice for activities with kids.
Tools and materials:
- colored paper napkins;
- raw egg whites;
- boiled chicken eggs;
- colored paper;
- egg tray;
- PVA;
- scissors;
- cotton pads;
- brush.
Master class on how to do the job - step-by-step instructions for beginners:
Boil chicken eggs in salted water. Cool. Wipe dry.
Divide multi-layer napkins into parts. Leave only the top part with the pattern.
Tear out individual fragments from a colored napkin with your fingers or with scissors. Select the fragments that you plan to glue onto the craft.
Brush the egg shell with raw white.
Attach a fragment of the design to the lubricant. Immediately smooth with a brush dipped in protein. Cover the entire surface of the egg. Leave to dry.
Make coasters from an egg tray. Cut out several individual recesses. Insert 3 napkins into them, overlapping each other. Like flower petals.
Glue long strips of green colored paper to the bottom of the trays. First, twist the strips into curls. This is easy to do with scissors. Run the blade of the scissors along the strip. Glue 3 strips on three sides of each tray. The stands are ready.
Place dried eggs in stands. The children's craft for Easter is ready. Along the way, we suggest telling your child about the history of the Easter holiday.
Decoupage with napkins with a different pattern.
In addition to a colorful souvenir, make an original card with candy. It's easy to repeat master classes at home using simple materials.
How to make decoupage eggs from foam plastic with your own hands
Decouping a foam egg takes longer than decorating a regular chicken egg. It's all about multi-layer painting. It’s not difficult to make such a souvenir with your own hands. But it will take time and special supplies.
Materials and tools:
- foam blank;
- a small piece of sandpaper;
- white acrylic paint;
- sponge;
- toothpick;
- colored paper napkins;
- PVA glue (1:1 mixture with water) or special acrylic glue;
- acrylic paints;
- acrylic lacquer;
- brushes
How to make decoupage eggs from foam plastic with your own hands:
- Lightly sand the foam piece with sandpaper.
- Place the workpiece on a wooden skewer or toothpick. Using a sponge, coat the workpiece with white acrylic paint. Make smearing movements not with strokes, but with pressure. Press down, release. Press down, then release again. Cover the entire surface with paint.
- Let the paint dry.
- In the meantime, cut out attractive pieces from colored paper napkins. Drawings, ornaments, flowers.
- Hold the workpiece by the toothpick. Apply glue to the painted surface. Attach napkin elements. Smooth over with a brush dipped in glue.
- Leave the crafts to dry.
- Using a semi-dry brush, slowly paint over the egg fragments where there is no pattern with acrylic paint. Select those areas that were not covered with napkins. Choose a paint color that matches the decoupage pattern.
- When the paint has dried, cover the workpieces with a layer of acrylic varnish. Let it dry thoroughly.
How to make decoupage with napkins for Easter eggs
Decoupage an egg in a napkin for Easter is not difficult at all. To do this, you need to look through several master classes and choose the most suitable one, prepare everything you need for work.
It is worth noting that an egg without contents is quite fragile and therefore requires very careful handling.
For beginners, you can draw up and write down a step-by-step plan for completing the work.
What you might need (materials and tools)
To work you should prepare:
- Base: it can be natural or wooden, plastic, ceramic or foam.
- PVA glue or egg white, starch paste.
- Acrylic varnish, paints, brushes, scissors, sandpaper, sponge.
- Napkins, decoupage cards, magazine clippings.
Now new and modern decoration techniques have begun to appear.
Step-by-step instructions
The process of performing work using the decoupage technique consists of several stages.
Preparing the surface for work:
- sanding;
- applying primer to the base;
- gluing the decoupage element;
- varnishing;
- additional drawing of some elements, as well as: gilding, aging, glazing, craquelure, etc.;
- final varnishing.
Options for coloring eggs.
If you use a raw egg, you should blow the contents out of it into a glass. To do this, in an egg well washed with soap, 2 holes are made in the shell on opposite sides with a thick needle. A tube is inserted into one of the holes and the contents are slowly blown into the glass. A clean and dry egg is ready for use.
Prepare everything you need for work.
Wooden blanks are convenient and durable, they are simply ideal for creativity, but foam eggs are also very durable and lightweight, which is very good when working with children. Decoupage on such blanks is the simplest way to create creativity with your child.
This technique is available to anyone who wants to make their holiday table brighter and more joyful.
Progress:
- The foam is treated with wet sandpaper.
- Cover with acrylic paint - you can only use water-based varnishes and paints, otherwise the workpiece will melt. You can cover the workpiece with just a white napkin using acrylic varnish.
- Then classic decoupage is performed with drawing. Here special glue or acrylic varnish is used.
- The work ends with varnishing.
- You can stick a skewer into the soft base and attach a bow to it. You can prepare a small wreath of willow twigs and attach decorated eggs to it - a wonderful decoration for the Easter table.
Napkins are sold in stores - this is the best material for decoupage.
How to make decoupage from napkins on a wooden egg:
- The workpiece is processed with sandpaper.
- Prime with wood mortar or PVA glue.
- Cut out the design and apply it to the base using a brush and glue.
- After drying, sand the uneven surfaces.
- Decorated with beads.
- A thin layer of gold plating is applied with a sponge.
- Varnished.
The master class will help you learn how to work in this technique.
The durable wooden base allows the use of many other techniques: aging, abrasion, craquelure and others.
Decorating wooden Easter eggs using decoupage technique
Craftswomen purchase wooden eggs on the Internet. In shape they do not differ from real birds. But the design technique is a little different. Now you will learn more about it.
Materials for work:
- wooden blanks;
- half beads or rhinestones;
- white acrylic paint;
- a piece of sponge;
- paper napkins with flower patterns;
- PVA;
- colored acrylic paint (to match the color of the napkin ornament);
- acrylic clear varnish.
How to make decoupage with your own hands:
- Take the workpiece in your hand. Draw ovals on both sides of the future souvenir. It is in the ovals that the picture will then be placed.
- Take a sponge and white acrylic paint. Paint the inside of the ovals with a thin layer of paint. Let it dry.
- Cut out small flower fragments from napkins.
- Using PVA glue, glue flowers into the oval parts of the eggs. First coat the painted surface with glue. Attach a napkin. Smooth on with a glue brush.
- Paint the surface without napkins with a brush with colored acrylic paint.
- After drying, cover the entire surface of the souvenir with acrylic varnish. Glue small rhinestones along the edge of the picture. It would be good if the rhinestones were on a self-adhesive basis.
Other binders
Easter eggs using the decoupage technique are also decorated using pictures and glue on starch or gelatin using sugar syrup. Gelatin glue is made simply: the powder is poured with water in the proportions specified by the manufacturer and soaked, then the composition is filtered and heated until the granules are completely dissolved. As for the application technique, it is no different from the technology with protein. This egg decoupage pattern can be confidently used with other adhesives.
Wooden eggs are also often decoupaged; this technique is somewhat different from decorating ordinary eggs with napkins. First of all, the wooden surface is sanded and primed in several layers. Well, then an image is applied to the base with a napkin, which is fixed with PVA glue and acrylic paint. Decoupage Easter egg is beautiful, simple and exciting. Children will also really like this activity, because they love to show their creativity.
Ideas for decoupage of chicken and wooden Easter eggs (2 videos)
Ideas for decoupage eggs for Easter (36 photos)
The best posts
- Weaving paper tubes for beginners: master class with video
- Toilet in Khrushchev: design and renovation, photo of arrangement ideas
- How to zone the hallway and living room: working methods
- Provence style in interior design: design ideas (+50 photos)
- Do-it-yourself floating cup: master class with photos and videos
- Is it possible to paint vinyl wallpaper: 3 types of canvas
- Swing knitting technique: master class with patterns
- Ceiling wallpaper: for design, interior photos, which ones to choose, non-woven backing, transition to the kitchen, how to glue, what to do first, video
How to make volumetric antique decoupage on a ceramic blank
The new master class is dedicated to volumetric decoupage. What is its “zest”? Using a simple technique, a textured part is created on a ceramic blank. The craft is painted in several layers. If desired, you can apply patination.
Materials for work:
- ceramic blanks in the shape of an egg;
- decorative napkins;
- black 3D acrylic outline;
- PVA (if the glue is too thick, dilute with water in a 1:1 ratio);
- white acrylic paint;
- clear acrylic varnish;
- fine grit sandpaper.
Step-by-step antique decoupage:
- Pick up a ceramic egg. There should be a small hole at the bottom of the workpiece. It was necessary for firing the workpiece. After all, ceramics are made from clay. The raw clay is shaped into a figurine. It dries and then bakes in a special oven. So, to prevent the craft from bursting, the craftsmen leave a small hole in it. What should you do with it? If desired, cover the hole with a piece of paper using PVA. This way the craft will turn out to be solid, beautiful from all sides.
- In the area of the workpiece you have chosen, draw a pattern with a pencil. Curls, flowers, leaves. Who likes what.
- Take an acrylic 3D outline. Draw a contour along the drawn ornament. Place to dry.
- After the outline has dried, cover the crafts with white acrylic paint. Place to dry again.
- Cut out fragments from decorative colorful napkins. Elements that you will glue onto the craft a little later.
- Cover the completely dried egg with a layer of PVA. Immediately glue the drawings onto the egg. Choose places for napkins where there is no volumetric outline. Smooth the top of the design with a brush dipped in glue. Try to smooth out the drawings so that there are as few wrinkles as possible.
- Once again, place the craft to dry. It may take about a day, but it's worth it. All layers of paint will dry well, and you can begin the final part of the decoupage.
- Take fine grit sandpaper. Rub lightly in those places where there is a volumetric contour. The point of this step is to allow the color of the outline to show through the paint here and there. The result will be an antique effect.
- Cover the blanks with clear acrylic varnish. Leave to dry.
Classic decoupage of boiled eggs
You will need: boiled, cooled dry eggs, a napkin for decoupage, scissors, a brush, raw egg white as glue.
Master Class
- Separate the top layer from the napkin
- Cut out the required pieces from the napkin.
- Brush the shells using a brush and raw egg white.
- Carefully stick the fragment of the design onto the shell in such a way that there are no lumps.
- Leave the egg for 30 minutes to dry completely.
Easter eggs in decoupage style are ready! I recommend watching this video!
Decoupage eggs
decorative egg
You will need: a wooden egg, acrylic primer, white and pink acrylic paints, brushes, thin relief paste, decoupage card, decoupage glue, acrylic glossy varnish, sandpaper, awl, scissors, a simple pencil, a medical syringe without a needle or a pastry syringe or a bag with a hole in the corner (for a pattern).
Master Class
- Rub the egg with sandpaper, slightly smoothing the surface.
- Place the egg on the awl.
- Apply a thin layer of acrylic primer, then place in an empty jar to dry.
- Cut out the design from the decoupage card and draw an oval on the egg with a pencil to match the size of the design.
- Paint the egg with white and pink paint in 2 layers, as shown in the picture, then wait until dry.
- Wet the decoupage card design with water and blot with a napkin.
- Lubricate the figurine with glue, place it on the egg and grease it with glue again, press the brush well to expel the air.
- Fill the syringe with relief paste, draw a pre-designed pattern. If you are a beginner, draw a pattern with a simple pencil, and only then cover it with paste.
- Cover the egg with 3 layers of varnish, drying in between.
A chic wooden egg using the decoupage technique is ready!
Video of decoupage eggs for Easter
We present a video with a master class on an original craft. Easter composition with a tree and eggs made from foam and plastic blanks. You can decorate such a tree with ribbons, decorative branches, and artificial flowers. A great idea for a gift or large craft for kindergarten. How to make an ever-blooming Easter tree, watch the video.
Take note of decoupage of Easter eggs with napkins. As a result of the article, let’s be honest, only the lazy cannot make such beauty with their own hands. Before Easter, websites on the Internet are full of advertisements for paid courses on decorating Easter eggs. Don't buy it! Make your own souvenirs with simple tutorials. Even semi-antique volumetric equipment is not a secret. Good luck to you!
Decoupage Easter eggs with polka dots: master class with video
The first master class on decorating Easter eggs using the decoupage technique is dedicated to decorating in the “chintz” style.
Yellow peas and small summer bouquets with which these eggs are decorated give a sunny mood. They will look best in a small basket.
To decoupage polka dot Easter eggs with your own hands you will need:
- three artificial eggs
- napkin with small floral patterns
- acrylic primer
- white and yellow acrylic paints
- decoupage glue
- decorative varnish
- small basket
- white spray paint
- yellow ribbon
- glue gun
- scissors
- Paint the basket with white spray paint. Tie a bow from a ribbon and attach it to the basket.
- Prime the eggs and then paint them with white paint and dry well.
- Color two eggs with small yellow polka dots and leave the third egg white.
- Cut out several flower bouquets from a napkin and layer the pictures.
- Stick pictures: on a polka dot egg - small bouquets, on a white egg - a large bouquet.
- Cover the eggs with decorative varnish, dry them, and then put them in a basket.
Tip: You can decoupage yellow Easter eggs with white polka dots. For this you will additionally need light yellow acrylic paint.
A master class on decorating Easter eggs is presented in this video: