The first stage - we decide on the choice
Don't rush to grab scissors and thread. The first step is to decide exactly what we are going to make.
Look on the Internet for more photos of burlap crafts and get inspired. You will probably want to repeat something, or maybe you will have your own idea!
Choose the technique that suits you. If you hate sewing or don’t know how to handle paints, don’t.
We will offer you the simplest and most original DIY burlap crafts that you can create, and it will bring you a lot of fun!
Rugs, panels and other household items made from ropes.
This article contains interesting ideas for creating with your own hands various household items for your home from ropes, ropes or nylon threads. Here, for example, are rugs twisted from jute rope (jute thread from bags) or sisel into circles, then fastened together or with stitches of dense thread or hot glue. By the way, in the same way you can make an original wall panel, decorating it with fabric flowers, which were discussed in the previous article. Look how beautiful it is:
If you would like to receive new articles from the site directly by email, then
<<<SUBSCRIBE TO SITE UPDATES>>>
To make such rugs we need rope, thick threads, and a hot glue gun:
You can fasten the rope with stitches, as shown in the diagram, or you can use glue, so it’s faster0, choose for yourself:
But these rugs are woven from nylon thread:
Such rugs are woven according to the following pattern:
Before you start weaving, mark the middle so that your product is symmetrical.
Using this pattern, you can weave not oblong, but round rugs:
And then you can fasten them together, getting a larger product:
Here is an original idea for making a rope wreath:
It can also be used to decorate an oval or round mirror.
You can use a template cut out of cardboard for the base. And the decoration can be not only shells, but also all sorts of shiny beautiful beads, buttons or the same flowers made of fabric.
If you braid the wire base of the old abahur with the same rope, you will get a good chandelier for the kitchen:
If this lampshade decorates your kitchen, then in addition to it there will be old pots braided with ropes that are not needed for their intended purpose, which can be used for storing fruits and vegetables:
You can braid the pan as follows:
You just need to lubricate the pan itself with glue so that the curls of the rope do not slip off.
And here are some wonderful vases made from empty bottles and rope:
For bread or small kitchen utensils, you can build these cute containers:
And here is the method for making them. You just need to take any shape, braid it, then carefully remove it:
You can experiment. These things will look very stylish and will delight you with their exclusivity.
Rug made from strips of fabric, video master class:
Watch Larisa Ryadnova's master class on making dolls from ropes. It's very simple to do, but it turns out very beautiful! Can be used as home amulets:
Well, that's all for today. Sculpt, create!
Beautiful vases for the interior
First of all, we offer you a great idea for crafts made from burlap and twine. These are stylish interior vases in eco-style. They will decorate any room! The blank is any bottle, preferably a beautiful and unusual shape.
Take a piece of burlap, soak it generously in PVA glue, and casually wrap your bottle, making sure to form beautiful folds. Then wrap the twine on top, decorating the vase and at the same time securing the burlap. Leave it to dry in this form for several hours.
We recommend reading:
- Crafts from isolon - a manufacturing master class, nuances of working with the material and step-by-step instructions on how to make a craft (85 photos)
- Crafts from saw cuts: stylish and beautiful options for decorating the garden and interior with your own hands (130 photos)
- Crafts from toothpicks - interesting ideas, manufacturing examples and the best crafts for children (120 photos)
When everything is dry, coat the vase with clear varnish and then start decorating. Glue beads, ribbons to it, sprinkle it with sparkles or highlight it with gold paint. In a word, get creative and decorate the vase to your taste!
Gift bag
If you are looking for what kind of crafts you can make from burlap as a gift or as a souvenir, then such a stylish craft bag is what you need! You can put a main gift or some small surprise in it.
Take a long rectangle of burlap and fold it in half crosswise. Sew the sides, turn right side out. Then take a large needle and thread the jute thread through it.
Measure a short distance from the top edge of the bag and sew stitches around it to create a drawstring. Cut the thread, tie the ends with knots or hang a bead from each end.
Decorate the bag with ribbon or beautiful lace, you can also sew on massive wooden beads or buttons. Very easy and beautiful!
Composition with fabric flowers
Before you start making a more complex picture on a panel, you need to be thoroughly familiar with the technology of its creation. First you need to prepare all the necessary materials and select or draw the appropriate diagram. This will take you no more than an hour, but then it will significantly help in your work.
Let's present step-by-step instructions on how to make a floral panel from fabric with your own hands:
1. First, select pieces of fabric with which you can create flowers. Circles of different diameters are cut out of them.
2. If you want to give the flower petals a beautiful wavy shape, then you must first burn the edges of the circles over a candle.
3. Collect each flower in this way: fold the circles in descending order of diameter.
4. To prevent future flowers from falling apart, sew them with thread in the center.
5. As a finishing touch, sew a bead in the middle.
6. After all the elements are ready, all that remains is to attach them correctly to the base. Silicone glue is used to attach very small objects. Larger parts should be sewn on.
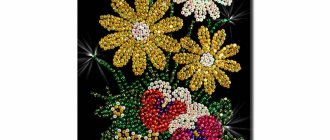
Flowers do not have to be round. Turn on your imagination, creativity and experiment. Panels made of different fabrics, photos of which are presented below, can help with this.
On the video: a panel with roses made from ribbons with your own hands.
Soft Valentine
This original craft idea made from jute and burlap is suitable for Valentine's Day or just as an original romantic surprise.
You will need burlap, some padding polyester, jute thread, a piece of milky lace, a beautiful wooden button, thread with a needle and scissors.
We recommend reading:
Crafts from natural materials - a step-by-step master class on creating original crafts for children and adults (100 photos)Wood crafts - the best craft options, instructions for beginners and ideas for making wooden crafts (85 photos)
- Fabric crafts - the best ideas and the most practical crafts and toys made from various types of fabrics
First, fold the burlap in half and cut out a heart. Then put padding polyester between the halves and sew the pad. Sew the edge of the heart with a jute loop stitch along the outer edge to create a beautiful border.
Then sew a strip of lace diagonally to the heart and sew a button on top. You can attach a string on top, then the Valentine can be hung.
Soft toy Bunny
This is a great souvenir and a pleasant memorable surprise for any occasion! If you like to sew, then be sure to make a bunny from burlap and felt. Select a small piece of felt in the color that best matches the burlap.
Prepare beads for the eyes and nose, jute threads. It would be great if you could find a small piece of white faux fur.
Cut out the shape of an egg from two halves of burlap. Place padding polyester inside and sew. Next, cut out the ears from felt and sew the hare on top.
Make a nose and eyes from beads, and a tail from fur. You can make a beautiful apron for the bunny from lace, or decorate it in some other way.
Panel for the New Year
Another variation on the theme of the panel - this time New Year's. Prepare thick cardboard, jute, burlap, PVA glue and hot melt glue.
You will also need winter decor - cinnamon sticks, star anise, dried lemons, beads, miniature Christmas balls and Christmas tree branches.
To begin, cut out a circle from a piece of cardboard, and separately, a slightly larger ring (the ring will be the frame for the round panel). Spread the ring with PVA and wrap it tightly with jute, and cover the circle with burlap.
Then use hot glue to glue the ring frame to the round base. Now place Christmas tree branches, balls, and other decor on the picture. You can sprinkle the composition with artificial snow. Very beautiful and festive!
Video: Master class: marine-style panels
Adviсe:
If you don't have a wooden board, you can replace it with a plastic one. Twigs and pieces of wood can be replaced with artificial sticks. You can also replace moss. However, natural materials will look better and more natural on the panel. Do not cut the required size piece of paper exactly with scissors, but deliberately roughly tear off the edges to give brutality and a marine spirit to the product. If the twine or jute is too thick, then do not rush to divide it into parts. Perhaps in this form it will look good, reminiscent of the ropes and yards on ancient ships. Take some glue. Otherwise, your panel will look sloppy.
If glue remains on your fingers while working, it is better to get rid of it immediately, because dirty marks will ruin the impression of your work, no matter how hard you try to hide them later. It is also important to take care of the “correct” proximity: place a product of a similar style next to it. This could be another panel made in a coffee theme. To make a “coffee” panel, you can use natural coffee beans, delicate lace napkins, beaded or pearl jewelry, and dried flowers. Made according to the same principle, such paintings will set off and complement each other.
Make masterpieces with your own hands!
Creating is so nice! The creative process will captivate you and allow you to relax, improve your mood and inspire you. And the finished beautiful craft will remain as a keepsake or become an original and warm gift for a loved one!
Use our original ideas in your creativity, don’t forget to fantasize and add something of your own. And create a miracle with your own hands - easily and with pleasure!
DIY burlap panel “Inspiration”
DIY panel with flowers
Burlap panel. Master class with step-by-step photos
Master class Panel made of burlap “Inspiration”
Author of the work: Tatyana Egorovna Dudina, labor instructor at the Shushensky Orphanage No. 1 for orphans and children without parental care.
Krasnoyarsk Territory Shushenskoye district Shushenskoye settlement. Burlap is an amazing material: on the one hand it is simple and inconspicuous, but on the other hand, once you put your imagination into it, and with skillful hands it becomes unique. You can make beautiful things from burlap that will decorate the interior of your apartment. A wonderful activity like making flowers distracts, calms and ennobles the soul. It’s good to do it with children, because any manual work develops fine motor skills and develops such necessary qualities as patience, attentiveness, and perseverance. Creating flower arrangements not only awakens imagination, but also helps the child comprehend this beautiful world. This master class is designed for children 12-13 years old who have mastered the basic techniques of working with textile materials. The produced panel can be used for interior decoration or as a gift.
Purpose: to introduce the technology of making flowers from burlap. Objectives: - educational: teach how to design compositions from artificial flowers. — developing: develop coordination of hand movements, eye. — practice the ability to work according to an instruction map. - educational: teach accuracy and perseverance. Materials and tools: burlap, box cardboard, ruler, wire for weaving with beads, scissors, a simple pencil, large beads (yellow and orange), stationery knife, Strongman glue, beige thread No. 10.
Progress:
1. Cut the wire: Oblong leaves - 30 cm; Leaves are round (5-6 pieces per flower) – 25 cm; Stamens (3 pcs per flower) – 15 cm.
2. Roll up the oblong and round leaves. 3. Apply glue to the oblong and round wire outline, glue all the leaves to the burlap, and let it dry thoroughly. Cut out the leaves with sharp scissors.
4. On a wire 15 cm long, we collect large beads (5 yellow, 1 orange, 5 yellow). Fold the ends of the wire in half and twist. We twist the resulting loop again.
5. Assembling the flower: a) Bend round leaves.
b) We put three stamens together, wrap the wire with thread - 1.5 cm from the beads. c) We put three round leaves and stamens together and wrap them with thread.
d) We apply three more petals to the resulting part, wrap it with thread, and tie the thread.
e) We straighten the flower petals.
Relaxation pause Gymnastics for the eyes: We look to the right - no one, (sharply move our gaze to the right, left) We look to the left - no one. One - two, one - two (circular movements with the eyes) My head began to spin. We close our eyes, (close our eyes) Our eyes rest. As soon as we open our eyes, (sharply look up and down) Let's look up, once and twice. Lower your eyes, lift them up again. Stroke your eyes with your fingers (we stroke the eyelids with your index fingers) It’s time to rest. 6. Using a stationery knife, cut out a circle with a diameter of 216; 37 cm, in the center cut another circle with a diameter of 216; 24 cm.
7. Cut out a circle with a diameter of 216 from whatman paper; 36 cm.
8. Cut out strips 5 cm wide from burlap, pull out threads from one edge to make a 1 cm fringe. Cut the resulting ribbons into 10 cm pieces and glue them onto a cardboard circle with PVA glue.
9. Cut the edge of the burlap to the cardboard.
10. Glue the cut edge to the cardboard circle.
11. Cut out a 37*37 square from burlap, pull out the threads to form a mesh.
12. Glue the resulting mesh to the circle from the wrong side, cut off the corners.
13. On the wrong side we glue a loop of brown paper and cut off the corners.
14. Use an awl to pierce a cardboard circle to install flowers and leaves, and widen the holes with scissors.
15. Insert flowers and leaves into the holes, twist the wires together on the wrong side. We glue the wrong side with a circle of wa class=»aligncenter» width=»627″ height=»600″[/img] 16. Tint the flowers and leaves with the following solution: four teaspoons of instant coffee and 50 g. hotter than water. Congratulations, the job is finished! Well done! Resource used: “DIY mirror decor, burlap flowers” June 30, 2013, Author: Maria Ilyina.
We recommend watching:
Crafts from shells. Photo DIY flowers from waste material DIY spring panel DIY roses from plastic spoons. Master class with step-by-step photos
Similar articles:
DIY summer flowers from waste material
How to make an original panel with your own hands
DIY money tree made from coins. Master Class
DIY roses from shells
Citrus roses. Master Class
Photos of burlap crafts
0