What it is?
Decoupage is a kind of hobby. Thanks to it, you can create magnificent works of art from various materials. Starting from wood and ending with stone. By the way, in this situation, you may not even have artistic skills or sculpting. For this art you only need imagination and the ability to see beautiful things in places where no one sees.
At the beginning of the 15th century, using this method in the Middle Ages, nobles decorated their expensive and antique furniture. Later, when trade from the East began to flourish, decoupage began to be created with the aim of counterfeiting the painting of furniture from China and Japan. And this technique turned out to be the most popular in France. From the very name “decoupage” it is already clear that this word took root there. French rich people loved to decorate their decorative items with various pictures in the style of Boucher or Watteau. Currently, designs such as flowers in a romantic style have become popular.
What is decoupage today? In the concept of handmade, decoupage is a simple and cheap technique for creating decorative items. Starting from tiny accessories to expensive furniture. In order to transform the most ordinary and simple surface. First, a finished drawing is selected, which is made on very thin paper. Then the part is cut out and glued to the surface of the selected object. This is called decoupage.
Decoupage
It sounds somehow rude and ugly, doesn’t it? It seemed like where could there be art in this? How can an object on which paper is glued be beautiful? But not everything is so simple and gray - decoupage is an unusual thing, you cannot approach this matter without imagination. A correctly found drawing with a beautiful design can recreate a completely new thing from an old thing. Everything can be done by hand if you have the desire and opportunity.
We recommend reading:
Powdery mildew
Materials and tools
For decoupage you will need the following materials:
- The surface to be decorated is the object on which a new masterpiece will be created. It is better to start the procedure with a smooth and even surface. But before that, degrease the item with a cloth to remove dust and dirt.
- Ground covering. If the surface is glass or ceramic, then acrylic paint will do. For wooden products it is better to use a primer. Paint is applied only when the primer surface is completely dry.
- Drawings. We are looking for pictures only those that are suitable for this surface. For this task, various napkins, newspapers or clippings will be suitable. Print them out first.
- Scissors. In such work it is better to use small and thin scissors, as the work is painstaking. It is easier to cut out pictures with a stationery knife.
- PVA glue.
- Set of brushes and sponges. If you don't have a sponge at home, use a regular sponge.
- Sandpaper or polishing paper.
- Acrylic lacquer.
You also need a set of paints, a palette, tape and a glass of water. This is all enough to create decoupage. But there are also additional materials: glitter, gilding, varnish, etc.
How to make decoupage flower pots - master class
When you first decide to do decoupage, start with objects with a flat and smooth surface. Use glue and pictures that are made on napkins. In this case, if the first attempt at creation fails, do not worry. Just wash everything off the surface with water, carefully, and try again. The technique of creating decoupage for beginners and already experienced people differs only in sleight of hand, skill and experience, because the materials for art are the same. The main task of applying a pattern is to carefully glue it, so that folds do not form and air does not collect. In this case, the drawing is moistened with water and smoothed, using a brush. This is quite a difficult process. It may even take several attempts.
One little trick is to apply the design using a paper file. The picture must be placed face down in the file and smoothed out. The drawing is completely covered with water. Using this procedure, any pattern will quickly stick to the surface. The main thing is to remove the water during application after application. Thanks to this interesting method, it has become convenient to work on a flat surface.
We recommend reading:
Fitosporin M - use of the drug
Features of working with different types of pots
Let's look at examples of decoupage of some of the most popular types of flower pots. Having mastered these techniques, you can easily come up with your own decoration options: delicate flowers, abstract patterns, floral patterns, cute animals or modern inscriptions.
Clay pots
Products made from this material may deteriorate over time and take on a dull, unsightly appearance.
You can transfer pictures onto them and give them an updated design using decoupage.
When working with this material, it is important to first clean and level the surface. After washing, the clay pot needs a lot of time for all layers to dry thoroughly. The glue will not stick to a damp surface, and the picture will come off after some time, becoming covered with wrinkles and folds.
The drawing is transferred to the surface of the pot according to the following scheme:
- A thin layer of paper with a picture is peeled off.
- The surface is cleaned and covered with a layer of glue.
- A sheet of paper with a pattern is glued, and all irregularities and wrinkles are smoothed out.
- Additional details are drawn using acrylic paint.
- The coating is secured with a layer of varnish to achieve smoothness and maximum fusion with the coating.
Decoupage of plastic pots
Features of working with this material include preliminary degreasing of the surface. To prevent the picture from slipping during gluing, the surface of the pot should first be wiped with a cotton swab dipped in an alcohol solution. This will make the decoupage process much easier and better quality.
Plastic pots can also be painted with acrylic paints, for example, decorate them with floral designs or animal designs.
The work sequence includes the following steps:
- The surface of the plastic pot is cleaned and degreased.
- Using glue, the picture is glued, and you must immediately smooth out all the edges.
- The contours of the image and additional elements are drawn with a brush.
- The finished drawing is secured with a layer of transparent varnish.
Pots decorated using the decoupage technique can not only become an element of interior decoration, but also an excellent handmade gift for loved ones.
Decoupage flower pots using a napkin
For work you need: a flower pot, a three-layer napkin with a pattern, PVA glue, acrylic varnish, brushes.
- We take our pot and wash it thoroughly. Wipe dry and set aside for now.
- We remove the top layer of the napkin, the rest will not be useful to us. We will glue it to the pot using PVA glue diluted with water.
- We put our napkin on the pot. We take a brush and dip it in glue, then carefully glue our napkin onto the product. It's better to start smearing from the middle.
- Then you have to wait for everything to dry, and if you don’t want to wait, then just dry it with a hairdryer. Dry with warm air only.
- Then it remains to apply acrylic varnish to secure it. It comes in matte and glossy. Apply 3-4 layers over time.
- Then, when the work has dried well, you can sand over the places where the folds have formed.
- Then we apply two more layers of varnish and your decoupage is completely ready.
Trying to work with decorating a regular plastic pot
Plastic pots can be decorated using the same technology as clay pots. But there is an even simpler option - even without using glue. To do this, apply a motif cut from a napkin to the surface of the pot and glue it with light movements of a brush dipped directly in acrylic varnish.
Exactly the same as in the first method, smooth out folds and irregularities. After drying, apply another layer of varnish.
For detailed MK, watch the video tutorial.
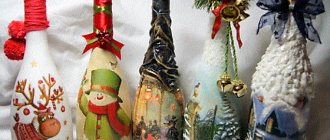
A flowerpot decorated using decoupage technique will never go unnoticed. We also recommend decorating the bottle and jar in decoupage style. They will take their rightful place in your home and will attract the attention of guests no worse than famous works of art, and will also decorate and refresh the overall interior of your home.
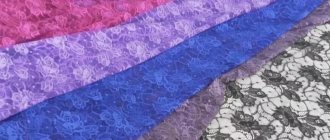
Decoupage flower pots with fabric
For work you will need: a flower pot, PVA glue, lace or any fabric, paint and varnish.
- Sand the surface of the pot and cover with glue.
- As soon as the surface is dry, coat it with glue and lay out the lace. Then smear it again.
- Let it dry and repeat again.
- Next we paint the surface with oil paints, and after a week simply varnish it. The product is ready.
Author of the publication
offline 3 years
How to decorate a flower pot: 12 decor ideas with instructions
How to decorate a flower pot with fabric
You can completely change the appearance of a pot by covering it with fabric. Thickly coat the pot with glue (take one that will be waterproof when hardened) and wrap it in a cloth. Press down on the fabric, smoothing it out. Trim off any excess edges.
Photo: diy-enthusiasts.com
Unusual design of house plants: 12 ideas with instructions
How to decorate a flower pot with lace
In the same way, you can glue lace fabric or strips of lace onto the pots - if you like that style.
Photo: abeautifulmess.com
Decoupage for decorating a flower pot
Decoupage is one of the simplest, most effective and versatile ways to decorate a flower pot. The method is suitable for uncoated ceramic pots or pots already coated with paint. Clean and dry the pot. Before decoupage, you can cover it with paint (wait until it dries). Cut out designs from napkins and use decoupage glue and a paintbrush to adhere them to the pot.
Photo: placeofmytaste.com
Japanese technique is wrong: paintings from plants and flowers
How to Decorate Ceramic or Plastic Flower Pots with Strips of Fabric
An option that is best suited for decorating large pots with large plants. Cut fabric of different colors into strips and squares using zigzag scissors. Cover the top edge of the pot with squares, and then glue the strips one at a time. Also decorate the bottom edge of the pot with squares. You can decorate both ceramic and plastic pots with fabric, and you can also decorate an old flower pot.
Photo: hgtv.com
Paint + lettering for decorating pots
To change the appearance of a flower pot, you can paint it. And in addition - add an inscription or drawing. For an effect like in this photo, use thick exterior paint, so the coating will be more durable. Wash the pot, dry it and cover it with two layers of paint, allowing each to dry. The inscription can be applied using a stencil or a thin brush.
Photo: littleredwindow.com
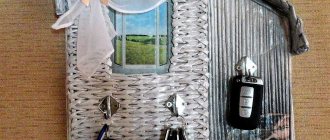
Do-it-yourself... wicker planter
Uneven coloring + stamped inscription
This kind of coloring, when the paint covers the pot unevenly, gives the effect of aging and emphasizes handicraft. For this effect, take a matte, dense paint and apply it with a wide, flat brush with stiff bristles. Inscriptions in contrasting paint are applied using stamps.
Photo: rusticandwoven.com
Painting upside down to decorate a pot
To achieve a drip effect, first paint the pot one color and let the paint dry. Then turn the pot over and pour another paint on top (if the paint is not liquid enough, you can dilute it, preferably with a special liquid).
Photo: wonderfuldiy.com
How to create comfort at home: 10 simple ways
Stenciled pots
For such decor you need stencils, which can be bought in craft or art stores, matte waterproof paint and a sponge or a fairly stiff brush. Glue the stencil to the crust, apply paint, let it dry and remove the stencil. Ready!
Photo: diycandy.com
Decorating flower pots with gold leaf
This is one of the most sophisticated and unusual decorative options, made using gold leaf, the thinnest sheets of metal imitating gold leaf. You will also need special glue and a brush (it’s best to look for all this in art stores). First, glue is applied to the surface, then a sheet of gold leaf is applied, which is carefully smoothed out. Potalia can be used to decorate both a painted pot and a simple ceramic one.
Photo: huntedinterior.com, homedit.com
Spicy garden
Decorating flower pots using newspapers
Here is another unusual, but simple option for decorating flower pots, which you can easily repeat with your own hands. The technology here is the same as in papier-mâché; glue can be used for decoupage. Tear the newspapers into pieces, apply glue to the pot and glue the pieces, also coated with glue, one at a time.
Photo: averageinspired.com
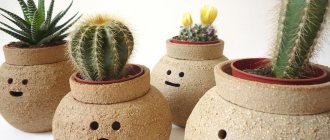
Shell pot decoration
Decorating pots with shells is a good option to complement your succulents. Sort the shells according to size and glue the larger ones with a glue gun first, starting from the top edge. With each new row, take smaller shells and decorate the entire pot in this way.
Photo: billabong.com
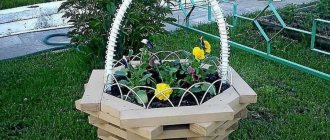
How to make a flowerpot from rubber boots
Decorating flower pots with paint and decorative stones
These 4 succulent pots are designed and constructed as an ensemble, each painted a lighter shade of the same color. First, paint all the pots with two coats. Once the paint is dry, protect the tops of the pots with foil and masking tape and paint the bottoms with gold spray paint. Cover the trays with it. Finally, add colored decorative stones on top of the soil.
Photo: blog.potterybarn.com