Choosing decorative material
The pattern of malachite is familiar to everyone - arcs, loops and streaks of green in all shades from the palest, almost white, to dark emerald. In general, we can say that malachite is green, but this “green” can actually be composed of many other colors and shades. You can repeat such a pattern using very different means - paint, using a brush or fabric roller, sculpt it from tinted salt dough, make it from polymer clay or plasticine.
You should choose the material according to your purposes, which can be not only decorative, but also utilitarian, as well as your own capabilities.
The most accessible and easy-to-work material is plasticine. Despite the fact that it is quite soft and pliable, when subsequently treated with hardening varnish it can become a wonderful decoration. You can use it to make a malachite box with your child, and the result will definitely pleasantly surprise everyone.
Stone pattern
Even without real malachite and tools for processing it, it is possible to create a similar pattern with the simplest tools at hand.
To create a fabulous box you will need plasticine, a stationery knife, a rolling pin for polymer clay, which can be replaced with any even, smooth cylindrical object, varnish for the final coating of the product and a varnish brush.
This master class is dedicated to making a malachite box from plasticine.
In addition to tools and materials, you need the base of the box - if you wish, you can purchase a blank in the store, use an old unnecessary box or cardboard box. You can also make the base yourself from cardboard and velvet paper.
To reproduce malachite stone, you will need plasticine in several shades: black, dark green, emerald, light green and white. You can get new colors by mixing existing greens with white or yellow; in any case, the selection of shades is always up to the master’s choice.
For final processing of the product you will need varnish - you can choose a varnish for creativity or a glassy varnish for decoupage.
To repeat the pattern of the stone, you need to roll out pieces of plasticine into “sausages”, and then into strips of varying thickness:
The resulting strips are cut into approximately equal squares, and there is no need to follow the order of the set of colors - the pattern of natural malachite is always random, and it is precisely this randomness that needs to be reproduced.
Multi-colored pieces of plasticine are collected into piles of approximately the same height, which then need to be flattened a little so that the layers of plasticine are held together more tightly.
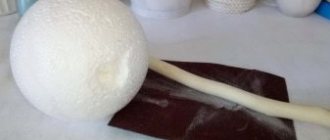
In order to continue working, you need to take a rod for the base - a pencil or a sushi stick will do - and bend the stack around the end of the rod:
In the same way, the remaining assembled layers of plasticine are stuck onto the rod. The rod is only needed to start work; if the resulting column holds tightly, the rod can be removed and continued without it. When all the layers are assembled, the plasticine column needs to be rolled out so that you get an even “sausage”. Already at this stage, the cut will slightly resemble a malachite pattern:
You can study this stage of work step by step from the photo:
Further work will consist of cutting the plasticine sausage and laying out a large plate from the resulting sections. After laying out, to fasten the sections, this plate should also be rolled out. After rolling, the plate should be as thin as possible, but this also depends on the level of skill:
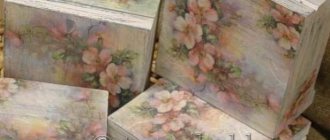
The main work has been completed, the resulting “malachite” plates can be fixed to the base. For a wooden piece, this stage is not difficult. If you want to make the base yourself, you can use the following box-chest diagram:
After covering the base with a layer of plasticine malachite, if there is a solid base of the box, it can be varnished.
Often there is not enough space in the house to store buttons, sequins, beads and small items for creativity. A malachite box, made in the best traditions with your own hands, is a real work of art. It is handmade that always remains the most valuable. Plus, it's a good gift idea.
Even a child can make a box.
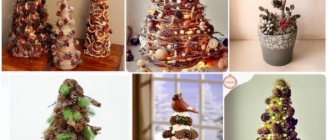
Useful tips and interesting design ideas
So, we got a lot of beautiful sections with colored stains. Will they really turn out to be a real malachite box made of plasticine? How to make the lining of a chest as similar as possible to real stone? Everything is quite simple: start filling the existing surface with pieces of plasticine. If you wish, you can lay out the pictures or arrange them in random order. There should be no gaps between individual elements.
A malachite box made of plasticine will look more natural if all external surfaces are covered. The finished craft must be coated with transparent varnish so that the decor is not damaged during use. A plasticine box deserves decoration inside. Cover the inside of your chest with velvet paper, fabric or foil. Don't forget to make a lock and a device to make opening easier.
Making a malachite box with your own hands in a step-by-step master class
Materials for crafts from plasticine:
- ball fine-grained plasticine that will harden;
- a small box with a plastic lid;
- beads and beads for decoration;
- a piece of felt;
- scissors;
- pencil with ruler;
- modeling board;
- rolling pin for rolling out plasticine, glue.
To make such a box, you can use coarse-grained and fine-grained ball plasticine. He is easy to work with. It does not remain on hands or clothes. With its help you can make a wooden, cardboard, plastic figurine or craft. Therefore, even a child can work with such plasticine.
Making a box with your own hands:
- The first thing to do is prepare the interior of the box. Using felt, they decorate the inside of the box. You need to cut out circles in advance, which will then be used for the bottom and lid. You need to make a wide strip that will be the same as the height of the box. Felt parts are glued or simply inserted. You can fix them using plasticine.
- Then the box is covered with plasticine and distributed over the surface. While the plasticine is soft, it is applied and applied with rubbing movements to the entire surface of the box.
- For the walls and lid, it is better to apply a thicker layer, then it will be easy to press the beads. But you can apply a light thin layer to the bottom so that the bottom is not visible. Use a rolling pin to level the walls. To make the bottom even, you need to place the craft on the board and press on it.
- Beads and beads are pressed into the still soft plasticine. To decorate the box, different colors of plasticine are used. You can make ornaments with cereals, sequins, buttons, shells, pebbles and kanzashi.
- The lid can be decorated with a three-dimensional felt flower, which is subsequently glued.
- This completes the manufacturing process. It is better to leave it for a day. At this time, the plasticine will dry and the beads will be securely attached.
The box is used to store jewelry. Your mother, sister or grandmother will love this gift.
Detailed lesson on creating a malachite box step by step
Required material:
- red or brown velvet cardboard;
- scotch;
- squared paper;
- stationery knife.
Malachite can be imitated using plasticine. To do this, mix black, dark emerald, green and light green colors. And yellow will perfectly complement this range as a decoration for a box.
To make the base of the craft, you will need thick paper.
You can also use colored cardboard. The pattern is made on checkered paper. Connect the parts using tape. How to make a base for a box:
- After the pattern drawn in the cells is ready, it is transferred to the back side of the velvet paper. Cut it out with a stationery knife. You can also use scissors if you are working with children. All folds are carefully pressed from the inside out, then the box will bend better.
- Now the parts are bent and connected at the joints on the outside with tape.
How to imitate malachite from plasticine:
- To do this, take several colors of plasticine, which can be found in natural malachite. Roll each shade into a sausage and make long strips. They should be layered and rolled out together. Then strips of plasticine are cut, the thickness of which is no more than 2 mm.
- They need to be connected to each other, first making rings from the strips. This is how the most valuable malachite “peacock eye” is imitated. Then they take part of the strips and make a sausage again. To make the pattern striped, you need to roll in one direction. You should get a plate about 1mm thick.
How to assemble the box:
- The lid and sides are separated from the finished pattern. They are placed on plasticine to be cut out with a stationery knife, and then the box blank is covered with the resulting elements. You can see how to do this correctly in these photos.
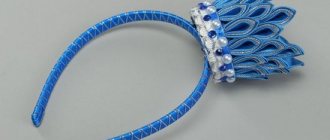
- You will need yellow or gold plasticine. A 2mm thick plate is made from it and then cut into strips. This will make a square. The strips are twisted into helical spirals, which will later be on the folds of the box.
- A yellow plate is used to cut out a lock, which then needs to be stuck to the front of the box.
Literature lesson “Secrets of the malachite box”
presentation for the lesson PPTX / 2.03 Mb Final literature lesson based on the tales of P. P. Bazhov (grade 5)
The topic of the lesson is “Secrets of the malachite box.”
Lesson objectives:
1. Educational:
summarize students' knowledge about P.P.
Bazhov and his tales; show the differences between the fairy tale and tale genres; introduce the features of Palekh painting technique. 2. Developmental
: develop skills in text analysis, oral storytelling;
descriptions of the illustration; develop imaginative perception and creative thinking. 3. Educational:
to instill in students an interest in native literature and fine arts; to cultivate hard work and respect for the nature of the native land; the ability to see and appreciate beauty.
DURING THE CLASSES
I. Org. moment.
Introduction to the topic.
U: “Working hands can do anything! Some will be crushed into powder, some will be collected grain by grain and smoothed softly - and what will come out is a stone of unprecedented joy. It’s a wonder and a lesson for the whole world.” This is what Pavel Petrovich Bazhov said about the skillful hands of the Ural craftsmen. (slide 1)
But he, too, piece by piece, collected Ural beliefs, legends, not fairy tales, but tales, smoothing them out with his thought, but without destroying the folk language, but making it understandable to the reader. And he produced works of unprecedented joy. “It’s a wonder for the whole world and a lesson too!” And today we will collect bit by bit our knowledge about the fairy tales we read, and if all our answers are bright and interesting, our lesson will sparkle like a malachite box full of semi-precious stones and give us its secrets.
— “Secrets of the malachite box” is the topic of our lesson. (slide 2)
-So, today is our final lesson on the topic dedicated to the amazing original works of the Ural master P. Bazhov. What goals do you think we can set for ourselves when starting work?
(summarize knowledge on the topic)
-True, but that’s not all we’ll be talking about today. Let's watch a short video clip
.
(slide 3)
What is it about? Finding the answer to the question of what PALEKH is and how it is connected with the tales of Pavel Bazhov is another goal of our lesson.
II. Updating basic knowledge. "Warm-up."
U: Let's start with a warm-up.
– What do you know about Pavel Petrovich Bazhov? – How does a tale differ from a fairy tale?
T: You have task cards on your desks. Complete them by working in groups.
Write down your answers.
| fairy tale | tale |
| 1. Narrator- 2. Events - (magical, have no basis in reality.) 3. Heroes - (magical) | 1. Narrator - (there is a narrator - a person from the people. 2. Events - (magical, but have a real basis) 3. Heroes - (ordinary people, there are magical ones) |
U: Conclusion from the table:( (slide 4)
Fairy tale
- an entertaining story about unusual, fictional events and adventures.
Tale
- this is a true story with elements of a fairy tale. P. Bazhov.
III. New topic:
U: In 1936, when Bazhov himself was already fifty-seven years old, Bazhov’s first tales were published in the magazine “Krasnaya Nov”. The success of these tales prompted Bazhov to continue his work. From that moment until the end of his life, Bazhov devoted himself to working on the book “Malachite Box”. (slide 5)
This book is really like a box: one after another the writer put into it more and more new tales about the difficult life and amazing work of miners and stone cutters, stone workers - and opens it with the tale “Mistress of the Copper Mountain”, then “Stone Flower” , “Silver Hoof”, “Sinyushkin Well”, “Two Lizards” and other tales.
U: So, the malachite box is open, and the first story in it is “The Mistress of the Copper Mountain.”
Questions:
1.What is the theme of this work?
2. What heroes do you remember?
4. Why does this work belong to the tale genre? Did you like him? How do you think Stepan's story would have ended if he had been the hero of a fairy tale?
U: Guys, look at the screen. There is a painting by P. Bureev on it. Do you think it has anything to do with our conversation? (This is an illustration for the tale “The Mistress of the Copper Mountain”)
-What is an illustration?
Illustration is a drawing that illustrates or explains something.
U: Let’s take a closer look at the illustrations that are placed in our textbook on pp. 69-71. Looking at these illustrations, I noticed next to the names of the artists the unusual word “Palekh”. this word was already heard in the video clip at the beginning of the lesson. Have you already guessed what PALEKH is? (students' answers).
I hope that Tatyana Evgenievna, an art teacher, will help us find the answer to this question.
Word from the art teacher:
Palekh is a village in the Ivanovo region. Until 1917, it was a major center of icon painting in the traditions of Russian painting of the 15th-17th centuries. After the revolution of 1917, religion was banned and the work of the Palekh masters remained unclaimed.
In 1923, in Palekh they decided to revive ancient traditions, but in a new way. Instead of icon-painting workshops, an artel for painting papier-mâché products was created. The artel began producing various small items: boxes, caskets, powder compacts. They were covered with black varnish and painted with bright colors: red, green, gold, blue. Drawings made using the palekh technique have bright distinctive features:
1. Floral ornament in the upper part of the picture, which is formed by branches and leaves of trees.
2. In the lower part, the ornament is created by graceful figures of swans, blue waves, and an intricate carpet pattern.
3.Often the drawing contains architectural details: side pillars, carved arches, decorated roof bulbs.
4. Thin lines of the drawing, clear silhouettes.
Uch. IZO: Let’s take a closer look at G. K. Bureev’s drawing for the tale “The Mistress of the Copper Mountain” (slide 6)
1. What episodes of the tale did the artist depict?
2.What is the composition of the drawing?
3. What place is given to the image of nature?
4. How are the heroes of the tale depicted?
5. Find in the drawing signs characteristic of Palekh painting.
Description of the drawing.
At the bottom of the picture are human figures. The main character of the tale, Stepan, is depicted in the central part of the picture. He's wearing a white shirt. Above him is the figure of the hostess, directed into the sky, surrounded by light translucent clouds. The main space of the drawing is occupied by the image of nature. The mountains and coniferous trees indicate that this is the Urals. The artist maintains the thin graceful lines, smooth drawing, clear silhouettes characteristic of Palekh painting, and uses bright colors on a black background.
Uch. lit.:
Before continuing with our work, I suggest giving our eyes a chance to rest a little.
So, exercise for the eyes. (slide 7)
Academic lit
.: The textbook contains other drawings by Palekh masters. What tales of P. Bazhov do they illustrate?
You have read these stories at home, let's imagine them.
The class is divided into groups. The group representative must give a brief review of one of the three above-mentioned tales according to the plan:
1. The title of the tale. 2. The main characters of the tale. 3. Briefly say what this story is about. 4. Tell which episode of the tale is depicted in the illustration.
5.Features of Palekh painting used in the picture?
Lesson summary:
-So, guys, our lesson is coming to an end, it’s time to sum it up. At the beginning of the lesson we set important goals for ourselves, what are they?
Do you think we can now say that our goals have been achieved? Why?
-If so, then our malachite box will sparkle with precious stones of new knowledge. (slide
Reflection:
We will determine how interesting and useful the lesson was for you using a quick survey.
1. Suitcase, meat grinder, basket
(slide 9)
The suitcase is everything that will be useful in the future. Meat grinder - I’ll process the information. Basket - I'll throw everything away. Students are asked to choose what they will do with the information received in the lesson.
Annex 1.
| Fairy tale | Tale |
| 1. Narrator— 2. Events— 3. Heroes - | 1. Narrator— 2. Events— 3. Heroes - |
Appendix 2.
Plan for a brief review of the tale:
1. The title of the tale. 2. The main characters of the tale. 3. Briefly say what this story is about. 4. Tell which episode of the tale is depicted in the illustration.
5.Features of Palekh painting used in the picture?
—————————————————————————————————————-
Annex 1.
| Fairy tale | Tale |
| 1. Narrator- 2. Events- 3. Heroes - | 1. Narrator- 2. Events 3. Heroes - |
Appendix 2.
Plan for a brief review of the tale:
1. The title of the tale. 2. The main characters of the tale. 3. Briefly say what this story is about. 4. Tell which episode of the tale is depicted in the illustration.
5.Features of Palekh painting used in the picture?