A magical winter is coming, and it seems that real miracles are happening around. Snowflakes glitter in the sun, shimmer, sparkle - you look, and you want to take them home, but this is impossible.
Each craftswoman is a sorceress and makes her dream come true. The quilling technique will help you make any item by hand, from jewelry to room decoration.
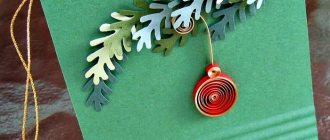
Snowflakes using the quilling technique turn the house into a New Year's winter fairy tale, and you will provide it yourself.
Types and patterns of snowflakes
Decide what the snowflakes are for and where you will hang them. Consider different ideas, choose an interesting one, and get to work. Any snowflakes using the quilling technique will fit into the New Year's interior. You can hang them on the Christmas tree, or combine them into a garland to decorate your room.
Take double-sided tape and attach snowflakes to window glass, mirrors and curtains.
If you take colored paper rather than white for snowflakes, then after the end of the New Year holidays it is not necessary to remove them. Let them hang all year round, delight you with rich colors, and bring original style to your home.
Products made using the quilling technique can be used as jewelry; they are worn as earrings, rings, bracelets, or pendants. In this case, the craft is varnished for strength and durability.
If you cover it with glitter and stick it to wrapping paper, you will get gift wrapping, a box or other useful thing.
. Volumetric snowflakes decorate New Year's costumes for children, headbands or handbags.
Master class for beginners
The easiest way for beginners to understand this craft is with the help of step-by-step pictures. Description is attached below. From it you will learn how to make a quilling snowflake yourself.
Step by step instructions
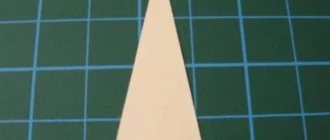
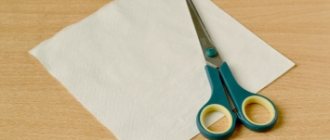
- Using a ruler, draw identical lines on a piece of paper and then cut.
- A homemade twisting device is a needle stuck with the eye into a bottle cap, an awl, or a common toothpick. Wrap the strips around this tool one at a time, then let them separate and glue the tip.
- Squeeze each finished part with your fingers so that you get the shape you need. This can be seen in the photo.
- Draw a template for laying out the part. These can simply be drawn lines. Two of them are perpendicular to each other, and the rest are located diagonally.
- Coat the middle with glue and apply other elements to it.
- Once the snowflake is assembled, leave it to dry. If necessary, make a loop for a pendant or earrings.
Assembling a snowflake
Assembly schemes vary. Try making different snowflakes in master classes, and then come up with new patterns yourself. Classic versions are made from tight rolls.
It will be great to assemble one figurine from several identical parts. Rhinestones, beads or sequins will create an additional effect.
Combine loose and elastic rolls.
How to make a snowflake using a video tutorial
Openwork snowflake
Look at the detailed photos.
- Paper strips are shaped into drops of different sizes and then connected to each other. These will be the extreme rays.
- For other elements, bend short strips in half, and wrap their ends ¼ with an awl. Squeeze the drops until they become narrow. The force of pressure determines the appearance of the snowflake and how you arrange the V-shaped parts.
- Assemble the pieces using glue.
- Sprinkle with glitter if desired.
Learn to make snowflakes using video lessons
Schemes and ideas for creating snowflakes
Source: https://vnitkah.ru/quilling/snezhinki-kvilling.php
Snowflakes using quilling technique - New Year's paper rolling!
On the eve of the New Year, snowflakes not only cover the ground, but also decorate the windows and walls of apartments. The easiest option is to cut them out of paper, but if you have an extra hour of free time, try making snowflakes using the quilling technique. Such a beautiful decoration will help create a festive atmosphere, and help you and your children plunge into the pre-New Year's troubles. This product can be used to decorate a postcard, a gift box, or give as a New Year's souvenir.
Required materials for quilling
The technique is very simple and you don’t have to spend fabulous money on materials. To work you will need:
- strips of paper;
- scissors;
- tool for twisting ribbons;
- glue;
- tweezers.
You can buy a ready-made quilling kit, which will already contain colored strips of paper and tools. But for snowflakes, even plain white paper will be enough. If you want to make beautiful colored snowflakes, then take paper of the appropriate colors.
The strips are easy to cut yourself. Take a sheet and a ruler, mark points at equal distances from each other (optimally 0.5-1 cm), line the sheet and cut along the lines. You will get identical strips from which you can make a snowflake. To replicate most of the crafts presented in the photo, diagrams are not needed; all individual details are visible quite clearly.
The principle of forming all the parts is based on twisting strips of paper. They can be screwed onto an ordinary wooden skewer. It is much more convenient to do this if you make a 0.5 cm cut in it with a knife. Then the end of the paper can be inserted into this hole, it will be well fixed, and you can easily form the necessary element.
Making snowflakes
To create a magical New Year's interior you will need a lot of snowflakes, so you can safely involve the whole family in the process of making them. It is important to understand exactly how parts are formed, of one form or another.
Take a few tips: to make elements of identical size, prepare strips of the same length in advance. To make a circle, simply twist and remove a strip of paper. If you need something like a diamond, remove it and pinch it with your fingers on both sides. If you want to get an oblong petal, squeeze it a little with your fingers.
Start with simple snowflakes, gradually making the patterns more complex. Decorate the finished crafts with rhinestones and sparkles.
Source: https://new-year-party.ru/kvilling-snezhinki-foto/
Quilling snowflakes for beginners
Dear needlewomen!
Let's talk on this day about snowflakes - light, airy, lace New Year's decorations. We will show you how to create quilling snowflakes for beginning needlewomen and craftswomen.
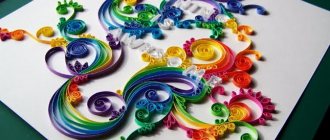
These snowflakes are especially fascinating. Every curl seems to be flirting with us. A snowflake resembles a kaleidoscope; you can admire it endlessly.
This kind of crafts can be glued to postcards or hung on a New Year tree.
Snowflakes quilling
To create quilling snowflakes we will need:
- white office paper, cut into 5mm strips
- wooden skewer for rolling
- PVA glue
So let's get started. Before you create snowflakes, you need to prepare various figures from twisted strips.
For the base of snowflakes, only closed forms, that is, glued ones, are suitable.
DIY snowflakes
1. Take a strip. Pull it slightly with your fingernail and round the end. Place a skewer on it. Then wind the strip, trying to make the first turns tighter.
2. When the paper strip “grabs” the stick, only the stick can be rotated until the end of the strip.
3. Twist a flat washer. To remove it, slightly rotate the stick.
4. Now unravel the workpiece so that you get a ring with a twisted spiral with a diameter of 12-14 mm. Most often, it is enough to simply release the workpiece. Glue the tip with PVA glue.
5. To get the “Drop” shape, pull the middle of the spiral to one side, and on the other side, squeeze several layers so that you get a sharp end.
Master class snowflake
Other closed forms of quilling:
- Triangle shape. Make a teardrop shape, then grab a corner and flatten the base of the triangle.
- "Eye" shape. Simultaneously squeeze the round workpiece from both sides.
- Shape "Square". Make an “Eye” shape, then turn vertically and squeeze the sides again.
- "Rhombus" shape. Make this shape from a "Square".
- Arrow shape. Make a triangle shape and use the end of your index finger to press the middle of the short side inward.
- Crescent shape. This shape is done in much the same way as the "Eye" but in a curved shape. And the corners are pinched with a shift, and not opposite each other.
Master class snowflake quilling
Open quilling forms:
- "Horns". Fold the strip in the middle. Twist both halves outward.
- "Heart." Fold the strip in the middle. Then screw both halves inward.
- "Twig". Bend the paper strip in a ratio of 1:2. Twist the ends of the strip in one direction.
- "Curl". Lightly mark the middle of the strip, but do not create a fold. Then twist the ends towards the middle, but only in different directions.
paper snowflake
Now that we know how to make individual shapes, let's collect snowflakes! We glue the necessary parts together.
Snowflake in quilling style
Snowflake quilling technique
Snowflake original
Crafts quilling
Quilling snowflakes are a great addition to the New Year's decorations of your Christmas tree. Upcoming holidays!
Source: https://masterpodelok.ru/kvilling-snezhinki-dlya-nachinayushhix/
How to make snowflakes using quilling technique
Have you decided to take up the quilling technique? Then know that this skill is very easy to learn. As the New Year approaches, it is worth making snowflakes using this technique. In this article we will tell you how to make quilling snowflakes for the New Year for beginners. Here you will find interesting master classes and a lot of useful information.
What is the quilling technique?
Quilling appeared approximately 500 years ago in European countries. This technique involves twisting strips of paper. These strips are used to make combinations into a variety of crafts and patterns.
To create a craft using the quilling technique, you will need a small number of tools. You should prepare:
- toothpick,
- tweezers,
- scissors,
- glue.
In addition, you will need paper. For crafts using this technique, paper strips that are 3 mm wide are used.
How to make a simple snowflake using the quilling technique
We talked about the quilling technique. Now it’s worth talking about how to make a snowflake from quilling.
- So, you should take a landscape sheet on which you draw stripes using a pencil and ruler. The lines should be straight.
- Now the sheet should be cut into even strips.
- Next, take a toothpick or an awl and apply its end to the edge of the paper strip.
- Screw the strip onto the tool.
- The end of the strip should be glued to the resulting coil. After that, carefully remove the resulting roll from a toothpick or awl.
- You need to make another coil. However, the next coil should be slightly squeezed with your fingers on one side. As a result, you will get a coil that will look like a teardrop. It’s worth making 5 such coils.
- After that, you take the first coil and glue 6 teardrop-shaped coils to it.
- Then you should roll 6 coils and squeeze them with your fingers on two opposite sides. As a result, you should get a figurine that reminds you of an eye.
- New parts are glued between the petals of the snowflake.
- Next, take 3 strips, bend them in half and cut them. You should end up with 6 short strips.
- 6 coils are twisted from new strips.
- A new eye-shaped coil is glued to each tip of the part.
- We make 6 coils from long strips. However, they should be slightly larger in size than the first coils. In this case, you should not tighten the paper too much.
- Glue the new coils onto the parts “droplets” between small rolls.
- Now it’s worth making 6 more large-sized coils. They need to be bent with your fingers in order to give them a square shape.
- Square blanks are glued at the top to large coils.
- Now wrap a strip of paper around the pencil.
- Glue the end of the strip and remove the spool.
- A new coil is glued to one of the tops of the snowflake. You should thread a thread or ribbon into the ring.
If you manage to make such a snowflake, the finished product will look attractive on the Christmas tree. It can also be attached to a window or door.
Snowflakes using quilling technique
If you make all the parts using the quilling technique, then these parts can make completely different snowflakes. For work, it is worth using many strips of paper that are of equal length and width.
These strips are screwed onto a toothpick. There are a lot of similar preparations that need to be made. They are glued together using glue. Absolutely any schemes can be used. You can see examples of the diagram in the picture.
The process of creating snowflakes using the quilling technique should start from the middle. In other words, you should glue the parts to each other so that they form a circle.
After which you should continue gluing other coils to the circle. It is worth saying that the patterns of snowflakes can be different. For example, in some types of snowflakes fit tightly to each other.
In others, on the contrary, the center should be hollow.
Adsense
Quilling and what forms exist today
The quilling technique today has 12 forms of coils that are used in the work. Snowflakes for the New Year can be made either using one technique or using all at once.
- This blank is called an open coil. In this case, the end of the strip is not glued.
- The next coil is a closed coil. The end is glued here.
- This reel is tight. The strip is tensioned throughout the entire work. The end is glued tightly.
- Big reel. To create it, you should use a regular pencil.
- A drop. One end should be pressed with your fingers.
- Eye. The 2 ends of the workpiece are pressed with your fingers.
- Petal. The coil is compressed with your fingers, and on one side it bends.
- Sheet. The coil is compressed on both sides and waves are created.
- Curls. The strip is folded in half, after which the ends are twisted in the desired direction.
Snowflakes: DIY quilling
What is hidden behind the word “quilling”? Quilling, or paper rolling, is a technique for making compositions from twisted strips of paper.
The name of this type of needlework comes from the English word “quill”, which means “bird feather”.
To understand what the pen has to do with it, you need to plunge into history. Quilling originated in Europe around the 14th and 15th centuries, and was first practiced by monks, who, according to some sources, trimmed the gilded edges of books, wound strips on bird feathers and used them to decorate utensils, imitating gilding. This was especially true for churches with small parishes that had little financial resources. Then this art was forgotten for a long time.
The revival of quilling began at the end of the last century, in Western Europe, in particular in Great Britain and Germany. It also migrated to the East, where local craftsmen changed some of the paper rolling methods and added their own elements, giving it a special flavor. Korean craftsmen were especially successful in this and created their own quilling school.
Among the fundamental differences between the European and Korean schools, the following points can be mentioned:
- Europeans use quilling in the design of photo frames, make postcards and panels, with characteristic minimalism and simple elements.
- The Korean school approaches this art completely differently, following the principle “The East is a delicate matter”: using the quilling technique, three-dimensional paintings are created, each element made from many small parts.
In Europe, craftsmen wind paper strips onto a rod, while Koreans prefer to roll the blanks by hand.
Quilling technique: snowflakes of extraordinary beauty
Snowflakes made using the quilling technique may differ in shape and color. Beautiful snowflakes are an integral attribute of the winter season. Like pictures, they attract the eye, striking with the beauty and unusualness of the patterns: large and small, they are so unique that it is simply impossible to find two identical ones. Needlewomen have come up with many ways to convey the delicacy, lightness and originality of snowflakes. One of these techniques was quilling.
Snowflakes: DIY quilling
What is hidden behind the word “quilling”? Quilling, or paper rolling, is a technique for making compositions from twisted strips of paper.
The name of this type of needlework comes from the English word “quill”, which means “bird feather”.
Beginners are recommended to make snowflakes using the quilling technique, which do not contain complex elements.
To understand what the pen has to do with it, you need to plunge into history.
Quilling originated in Europe around the 14th and 15th centuries, and was first practiced by monks, who, according to some sources, trimmed the gilded edges of books, wound strips on bird feathers and used them to decorate utensils, imitating gilding. This was especially true for churches with small parishes that had little financial resources. Then this art was forgotten for a long time.
The revival of quilling began at the end of the last century, in Western Europe, in particular in Great Britain and Germany. It also migrated to the East, where local craftsmen changed some of the paper rolling methods and added their own elements, giving it a special flavor. Korean craftsmen were especially successful in this and created their own quilling school.
Among the fundamental differences between the European and Korean schools, the following points can be mentioned:
- Europeans use quilling in the design of photo frames, make postcards and panels, with characteristic minimalism and simple elements.
- The Korean school approaches this art completely differently, following the principle “The East is a delicate matter”: using the quilling technique, three-dimensional paintings are created, each element made from many small parts.
In Europe, craftsmen wind paper strips onto a rod, while Koreans prefer to roll the blanks by hand.
Materials and tools for snowflakes using quilling technique
All technologies involve the right choice of materials and tools. Quilling is no exception.
If you have an idea to make unusual decorations in the form of snowflakes, you need to stock up on the following devices:
- Paper (density from 116 to 160 g per m2);
- Scissors;
- PVA glue or other thick glue;
- Rod for twisting paper strips;
- Tweezers with sharp tips;
- Ruler with round holes of different diameters.
All quilling materials are sold in craft stores and online.
Since the key to quilling is curling strips of paper, special attention should be paid to a tool that will simplify this process, making it more efficient.
Typically it is used:
- A plastic or metal rod sold in specialized stores, at the end of which there is a small slot;
- Ballpoint pen refill;
- Thin awl;
- Toothpick;
- Bamboo stick;
- A needle with a large eye, the tip of which is bitten off.
Craft stores sell a ready-made quilling kit with cut strips of paper of various widths and lengths.
What you need to make a snowflake: quilling patterns
When the tools have been selected, it’s time to start making snowflakes. Quilling is based on combining several basic elements or modules into a single pattern, which ultimately forms a design.
Before you start making the modules themselves, you need to prepare blanks - paper strips.
If you don’t have a ready-made quilling kit, don’t worry: you can make the material for twisting yourself, following the description.
Anyone can find quilling patterns on the Internet and print them out.
The instructions are:
- Draw a sheet of paper so that you get stripes with a width of 5 to 15 mm;
- Cut the paper into strips using scissors or a cutter;
- Attach the edge of the strip to the winding device and wind it evenly;
- Remove the wound strip and release the edge so that the resulting roll “opens” to the desired diameter;
- Secure the tip of the strip with glue.
The width of the stripes depends on the type of craft and the experience of the craftsman. The optimal size is 5-7 mm. When using a cutter, you need to place a board under the sheet, be careful and, if possible, do not give children a sharp object in their hands. If you need to make spirals of the same size, you can put the resulting roll in the hole of the ruler and wait.
Original quilling snowflakes: patterns for beginners and master class
When simple parts are mastered, you can begin to create more complex modules.
Before you start making snowflakes using the quilling technique, you should watch the instructional video
The following complex elements are mainly found in various master classes:
- Open coil. More often this is a large part, the free edge of which is not glued.
- Curl with a wide hole inside.
- Tight roll. Once twisted, the spiral does not unravel.
- A drop. Pinch one edge of the spiral to form a corner.
- Petal. It is obtained by transforming the “Drop” shape by compressing one of its sides so that a slight bulge is obtained.
- Eye or leaf. It is obtained by compressing the spiral from both sides.
- Square. The “Eye” template is compressed on both sides.
- Rhombus. It is obtained by stretching the sides of the workpiece in the form of a square.
- Triangle. It turns out if you make the base of the “drop” flat.
- Arrow. The base of the “triangle” in the middle bends inward.
- Crescent. It is performed similarly to the “eye” with a slight displacement of the corners and pressing one of the sides inward.
- Heart. You will need a strip longer than this, which you need to first fold in half and make rolls on each end in turn.
- Horns. It is performed similarly to the “Heart” module, with the curls going in a direction away from each other.
- S-shaped curl. The strip is divided into three parts, the edges are twisted so that the middle part is between them.
- A beam with curls at both ends. The strip is divided into three parts, the edges are curled inward.
These schemes are basic, so this list can be continued endlessly. The variety of forms depends on the imagination of the master.
Quilling snowflake, master class, step-by-step instructions with photos
Graceful openwork snowflakes are a wonderful decoration for the New Year's interior. One of the best techniques that can convey the tenderness of snowflakes is quilling, a paper torsion technique. This method is very simple to implement and does not require expensive materials.
All you need are toothpicks, glue, scissors and, most importantly, paper. Quilling paper is usually sold in specialty stores. It consists of thin strips of paper, 5 millimeters wide.
You can make quilling paper yourself. To do this, you need to take landscape sheets and use a ruler to measure a five-millimeter strip along the narrow side of the sheet.
Cut the strips with scissors or a utility knife. Snowflake will require some time, and she also recommends the presence of an adult.
The finished snowflake can be presented as a gift, hung on a Christmas tree or on curtains, or decorated with a greeting card.
How to make a quilling snowflake, master class
- To make snowflakes you will need:
- PVA glue
- White acrylic paint
- Toothpicks
- White quilling paper 34 pieces of 10 centimeters long
- fishing line
- Step-by-step instruction:
- To form a snowflake you will need blanks: hearts, droplets, circles and S-shapes.
Paint the toothpicks white. Let dry. Cut 6 toothpicks to a length of 4 centimeters. Cut off 20 centimeters of fishing line. Wrap the quilling strip around the toothpick in a tight spiral. Unravel the spiral to a diameter of 0.6 centimeters. Secure the tip of the strip with glue. Attach the cut toothpicks to the round piece with glue.
You need to glue the toothpicks on a horizontal surface so that you get neat symmetrical rays of a snowflake. Glue a piece of fishing line like a loop to one of the toothpicks at the top. Make blank hearts – 6 pieces. To do this, bend the quilling strip in half and use a toothpick to bend the ends inward towards each other.
Make droplet blanks – 6 pieces. To do this, wrap a tight spiral onto a toothpick or other tool. Bloom to a diameter of just over 0.8 centimeters. Bend one side with your fingers to create an acute angle. Glue the droplet blanks inside the heart blanks.
At the junction of each two toothpick rays, glue a heart blank with a droplet glued to the center.
The amount of glue should be small; all elements should be glued to each other on a flat horizontal surface. Make 24 blanks in the shape of the letter S.
To do this, use a toothpick or other tool to bend the ends of the quilling strip in opposite directions symmetrically.
Glue two S-blanks onto the toothpicks-rays on each side of the toothpicks. Toothpicks-rays should be completely filled with quilling figures, only the very tip can remain uncovered. Leave the snowflake to dry on a flat horizontal surface.
Katerina Sergeenko
Source: https://strana-sovetov.com/hobbies/rukodelie/7405-kvilling-sneginka-master-klass-poshagovaia-instrukcia-s-foto.html
Christmas tree decoration made of paper
For this master class you will need:
- strips of paper;
- glue;
- scissors;
- quilling tool;
- geometric ruler.
You can either buy paper strips at a craft store or make them yourself. You will have to make a large number of strips (the strips should be 0.5 cm wide). Fold six strips in half (they should be approximately 14 cm long).
Take six more strips (but 27 cm long) and roll them into a spiral.
Remove the spiral from the quilling tool and set it aside so that it unravels a little, then glue the tip. It is advisable to make all six spirals the same size; you can check this using a geometric ruler.
Compress one end of the spiral into a corner (as in the photo).
The result is a “drop” element.
Take the first six strips, folded in half and glue drops inside each fold. Glue the bent strips together with glue. The result is a figure similar to a snowflake.
Prepare and fold six strips in half (14 cm each) again.
Glue the top parts of the strips together and bend the remaining ends to the sides.
Curl the ends that stick out using a quilling tool. The result is “hearts”.
Make 12 "S" curls using the same tool.
Glue the “hearts” with the snowflake obtained earlier.
Next, glue the “S” curls as shown in the photo.
Twist six spirals in the same way (the length of the strip is 54 cm), glue the free edges, and then pinch the corners, but on both sides. The result is “leaves”.
After this, prepare six more elements (length of strips 27 cm). Fold in half and twist the spirals from opposite ends in different directions.
These elements resemble birds or horns.
Glue the “leaves” and “horns” together.
Related article: Accessories for a brown dress
Attach the resulting figures to the “S” curls.
Prepare six more drops as before.
Trim the protruding straight strips a little with scissors.
Glue the droplets to the place where you cut them off. Wait until the craft dries.
The big snowflake is ready!