Lost your lipstick and can't find your eyeliner? You urgently need a cosmetics organizer. There is no need to spend money and buy an expensive acrylic organizer for cosmetics; in this article we will look at many options on how to make an organizer for cosmetics with your own hands.
Use available products, a little imagination and order in your cosmetics is guaranteed. Let's get started.
Brief overview of types of organizers
An organizer, whatever it may be, solves the problem of organizing your cosmetics and your good mood: everything is in place and at hand. Let's look at what materials organizers can be made of and where they can be used.
Organizer materials
Organizers for storing your decorative and natural cosmetics can be made from:
- boxes;
- cardboard;
- tubes from newspaper;
- plastic trays;
- tin and glass jars;
- plywood and wood;
- fabrics and felt;
- oilcloths;
- bamboo mats.
Types of organizers by functional use
The organizer can be:
- stationary at home - stand on the bedside table or dressing table, or can save space and hang on the wall;
- travel case - the product is rolled up and tied with a ribbon, which is very convenient when traveling.
Now we will take a closer look at and make our own cosmetics organizers.
A simple organizer made from cosmetics boxes
Algorithm for creating a storage box:
- So that all cosmetic little things have their place and are conveniently located, they think over the appearance of the organizer and schematically apply it to paper indicating the exact values of each detail.
The drawing outlines the exact dimensions of the parts and the purpose of the compartment - The base of the box for storing cosmetics is cut out of cardboard using the markings.
The dimensions of the box are transferred to the cardboard and the part is cut out - Select napkins for decorating parts.
Napkins are used to cover the elements of the boxAttention! The napkins are glued using PVA. The glue is diluted with water in a ratio of 1:1. The mixture is applied with a flat artificial bristle or fan brush.
- The elements are glued together and carefully coated with PVA glue to impart strength to the structure and securely connect all parts.
PVA glue, when dried, creates a transparent protective film - The compartments are attached to the base.
The ends and seams are decorated with lace. Decorating seams and corners with lace will give the structure additional strength. - Separators are glued in.
Decorated with beads. The organizer is ready for use. 2 horizontal dividers are placed inside the compartment for convenience
How to make a cosmetics organizer from boxes with your own hands?
A storage system made of boxes of various shapes and sizes, standing on a bedside table or dressing table or hidden in a dresser drawer, will help put your cosmetics and other small items in order.
For the box organizer we will need:
- a thick shoebox (surely every home has one);
- smaller cardboard boxes, and if they are not available, then cardboard to make with your own hands;
- wrapping paper or wallpaper scraps;
- scissors;
- glue gun or just glue;
- Ruler and pencil;
- various decorations: ribbons, buttons, pebbles, lace, dry plants (anything you would like to decorate your boxes with).
Let's get started:
- Take a shoebox (we will only use the bottom, without the lid) and measure the size of the paper to wrap it.
- Cut the paper and wrap the box beautifully.
- We take smaller boxes (these can be boxes of cosmetics, products, etc.), if there are none, you can make them yourself from cardboard. We also wrap these boxes in beautiful paper.
- We place small boxes in a large box. It will be more convenient if they are arranged in ascending order (large and tall ones are further from you, and smaller and low ones are in the foreground). If you want, the boxes can be glued to the main box, but you don’t have to do this.
- Our organizer is ready. Organize your cosmetics and nothing else will get lost.
There is another way to make an organizer from a cardboard box, only the filling will be from cardboard tubes that are left over after using foil, cling film or a baking sleeve. Let's do:
- We wrap the box and decorate it beautifully.
- We cut the cardboard tubes into pieces of equal height.
- We coat them with glue and glue them to the bottom of the box.
- The organizer is ready.
DIY cosmetics organizer
But it won’t be difficult for needlewomen to make it themselves, with their magic hands. Before you start, you need to determine the desired size of the organizer so that all your cosmetics fit in and have their place. We come up with what our organizer will look like and begin to outline it schematically, signing the dimensions.
Cut out all the parts from scrub cardboard.
We prepare napkins for gluing parts.
We coat all the parts with PVA glue and stick on napkins, covering the corners well.
Let's start assembling the organizer.
We glue the two sides and the back wall to the base.
We decorate all seams and joints with tape and braid.
Glue two horizontal dividers inside.
The organizer is ready to use.
DIY cardboard cosmetics organizer
The organizer made of corrugated cardboard with two drawers is very spacious. To make it you will need:
- corrugated cardboard (you can disassemble packaging from any equipment or other);
- paper for pasting (it can be white or colored, at your discretion);
- stationery knife;
- glue with a brush.
You should get the following details.
Here is a drawing of a cosmetics organizer:
- Having drawn the details on corrugated cardboard, we carefully cut them out with a utility knife and assemble the rough version, adjusting minor inaccuracies.
- We disassemble and cover all the parts with paper: colored or white (as in the photo).
- We wait for everything to dry and assemble the organizer. We cover all the cuts with white strips of paper, gluing it.
- We glue the drawers and insert them into the organizer.
- The corrugated cardboard organizer is ready. It can accommodate not only professional facial cosmetics, but also many different small items.
How to make a DIY organizer for cosmetics from cardboard?
Anyone can make an organizer out of cardboard. To do this you will need the following materials:
- Thick cardboard
- Craft paper or decorative paper for creativity (this is necessary in order to decorate your product).
- Scissors
- Ruler, simple pencil
- Glue
- Decorative decorations
can serve as the basis for the organizer . It will accommodate a large number of cups of different sizes to accommodate all cosmetics. Use only the bottom of the shoebox. It should be wrapped in beautiful paper. This can be done using glue or a stapler.
Paper organizer base
Now you should measure the area of the box in centimeters to understand what size cups you will need to fill the space inside it. You can also make these cups from shoe cardboard, or you can take thinner material, for example, stationery cardboard .
Each container should also be decorated with beautiful paper . After this, let the products dry and insert small cups into a large box. It’s best to make each container a different height and width, so you can place a variety of cosmetics: long brushes and small boxes, for example.
The containers should be arranged in ascending order from you, that is: the tallest cups should be further away from you, and the lowest ones should be closer to you.
If you don't have craft paper for decoration, you can decorate cardboard with regular wallpaper. Any housewife always has this material in abundance, it is not expensive, it is beautiful and can fit cardboard quite tightly.
Decorating a cardboard organizer with wallpaper
Another good idea for creating an organizer is to use cardboard base tubes (tubes) from kitchen cling film or foil. A roll of soft toilet paper will also work The bottom of any box is used as the basis for the organizer.
It should be decorated in any way : pasted over with paper, wallpaper, rhinestones, ribbons, painted with paints, and so on. In the decorated box you should insert cups made of cardboard tubes, the size of which you adjust yourself, and glue them to the bottom with glue.
This product can perfectly accommodate a large number of cosmetic brushes, pencils, tubes, brushes, but it will not fit boxes and bottles.
Do-it-yourself organizer for cosmetics made of paper and cardboard tubes
Ideas for creating organizers from paper:
Stylish organizer made of cardboard in the form of a box Compact desktop organizer made of cardboard for cosmetics and small items Organizer made of cardboard with compartments and cups Organizer made of cardboard in the form of drawers Multi-level organizer for cosmetics made of thick cardboard
Making a wooden organizer for cosmetics
Of course, without certain skills, working with wood and plywood is difficult. But you can connect the male half and work together. Wooden organizers are mini chests of drawers for cosmetics.
Most often they consist of:
- housings;
- internal dividers;
- drawers.
- For a chest of drawers measuring 300x400x300 mm, you will need a sheet of 10 mm plywood measuring 1525x725 mm. The body blank will look like this:
- We choose the shape of the case according to our preferences: radius or curly. We also design the internal insert-divider accordingly.
- Drawings and details are presented:
You can decorate such an organizer with paint, varnish or self-adhesive. It can accommodate children's cosmetics for girls and cosmetics for adult fashionistas.
Master class on making
The organizer can have different shapes. Among the most popular options:
- multi-level open design for storing brushes, combs and cosmetics;
- mini chest of drawers;
- container for storing brushes, pencils, inks and other vertical objects;
- box for palettes, lipsticks, eye shadows and powders.
The best option for self-production is an open one with compartments. The partitions are made of cardboard, having previously taken measurements. Strips of cardboard are cut along a ruler, the height corresponds to the height of the box. Before attaching the partitions with glue, you need to try them on by placing them in the box.
Sections should be small, the exact size depends on the packaging of cosmetics
Cup compartments are suitable for storing brushes, combs, and tubes of mascara. They can be made from cardboard rolls from toilet paper rolls. They are glued to the bottom of the box using a gun; they can first be covered with decorative paper or painted with a spray bottle. The bushings are installed closely, placing them at the far edge of the organizer.
Instead of partitions cut out of cardboard, you can use boxes of the desired size. Suitable containers for jewelry, small accessories, and cosmetics. They are glued to the bottom and tightly fastened to each other. If the boxes turn out to be too high, the edges are carefully trimmed with scissors.
Decorative paper will help give the organizer an attractive look. It is glued onto the finished product, the joints are masked with braid, lace, and finishing cord. The outer part can be additionally decorated with patterns, appliqués, beads or rhinestones.
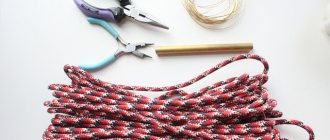
Cosmetics organizer made from newspaper tubes
An organizer made from newspaper tubes, which are prepared in advance, looks very beautiful and original. It can accommodate professional hair cosmetics, nail polishes, and various makeup tools. Let's try to make an organizer of the simplest form. For this you will need:
- any cardboard box that suits your size;
- prepared tubes from newspaper;
- scissors;
- PVA glue;
- pencil;
- awl;
- paper or fabric to decorate the inside of the box (optional).
Let's get started:
- We cut off the top of the box so that it does not close, or take a ready-made one from under the shoes.
- Apply markings for the racks with a pencil along the entire perimeter of the bottom.
- Use an awl to make holes.
- Take long tubes and bring them out from the inside.
- Start weaving from the corner with a tube folded in half. Attach others to it as needed.
- The inside of the box can be completely decorated with paper or fabric, or you can cover only the bottom.
- It’s convenient to store your cosmetics in such an elegant box.
Organizer for cosmetics
Don't rush to throw away an unnecessary cardboard box. With a little effort, we will transform it with our own hands into a very beautiful and functional organizer for cosmetics or any other small items.
Women know that you can find a convenient organizer with compartments and several levels in almost any cosmetic department. The only problem is that they cannot be called budget, and the quality of the plastic sometimes leaves much to be desired. Organizers quickly get scratched and become, to put it mildly, unsightly.
A homemade organizer for small items is a completely different matter. If you cover the product with durable fabric, it will last a very long time. In addition, you can decorate it in decoupage style (this looks especially cool) and varnish it - then no amount of moisture or time will ruin your creation.
By the way, such a cardboard organizer can also be adapted for school supplies: just play with the size and shape of the product and install partitions in the right places. We will show you an example, and you can customize the craft to suit yourself.
What do we need?
- cardboard box
- glue
- material for finishing (we will look at the example of finishing with fabric sealed with padding polyester)
How to make a cosmetics organizer with your own hands?
From a cardboard box we cut out two rectangular parts measuring 30*18 cm. The first is the future bottom of the organizer, the second is the back wall.
Now we cut out the future side walls of the organizer - two square parts measuring 18*18 - and make recesses on each of them as shown in the photo below.
The front part of the product measures 30*6 cm (we make two rounded corners on top).
Now we get down to making the internal crossbars. To do this, we cut out two rectangular parts: the first – 30*8 cm, the second – 30*10 cm.
Then we get to work on the decor of the future organizer. To do this, each part needs to be carefully covered with fabric with padding polyester (or decoupage).
First we make a pattern, then we sew everything from the wrong side, leaving room for turning, and then we insert cardboard and carefully hem the open parts (or glue them). However, you can first assemble the organizer, and then simply cover it with fabric or special adhesive paper.
We fasten the parts to each other using tape or glue (while the hidden seams have not yet been made).
We install partitions and decide on the number of small dividers. We process them separately to suit your taste.
The cosmetics organizer from a cardboard box is ready!
18+
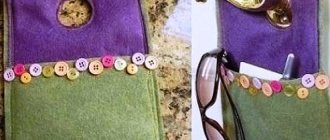
Travel organizer for cosmetics
The travel organizer is a fabric case with many pockets and compartments sewn onto it. It easily rolls up and unfolds if necessary. This organizer takes up little space and is very convenient for traveling. We will sew an organizer from felt. It is easier for beginners to work with, since felt does not require additional edge processing. We will need:
- 2 pieces of felt. First piece: length – 30-50 cm, width – 20 cm. Second piece: 2 cm longer than the first piece, width – approximately 10 cm.
- Velcro or tape;
- scissors;
- needle and thread.
Sew a travel organizer:
- Connect two pieces of felt so that one edge matches in length and width.
- Sew the smaller piece to the main one along the width edge.
- Sew the pockets without stretching the fabric (so that you can put mascara, lipstick or a brush there).
- Sew the remaining sides of the pocket along the length and width.
- Sew on some tape or Velcro to keep the organizer closed, and you're good to go.
Tools and materials
The simplest and most convenient option is a cosmetic organizer made from a cardboard shoe box, as it is quite durable.
Its size is chosen at will: if there is a lot of cosmetics, a box from under boots will do; for more compact storage, you should take a container from sandals or shoes.
The box should not have damage or dents, and its color is unimportant
To create an organizer you will need:
- scissors;
- Ruler and pencil;
- toilet paper rolls;
- thick cardboard;
- decorative paper (craft, corrugated, glossy, velvet);
- glue (preferably use a glue gun);
- details for decoration.
Master class on creating a do-it-yourself cosmetics organizer
We make an organizer from a cardboard box. We decorate it beautifully and get the desired item and interior decoration.
Original organizer for cosmetics on the wall. An excellent decoration and a comfortable item.
Making a chest of drawers for cosmetics. Original ideas for pens.
In this article, we described in detail and showed what types of organizers there are and how you can make your own organizers for storing cosmetics. I think that you definitely wanted to put your cosmetics in order and make an organizer with your own hands. Well, how did it work out? Write and share your ideas, tell us what you did.
Materials taken from the source: www.joxin.club
Organizer out of the box
Decide what you will store, whether you need space for lipstick, the amount of creams. And after that, start drawing.
Usually the back wall is made higher than the front.
Measure out all the partitions; you can use round holders for pencils; for this, take a paper towel tube. You can glue it using PVA glue or hot glue (heat gun).
Glue all the parts to the base.
You can make a small supply of lipsticks.
It is better to putty all the cracks and front sides of the partitions.
We cover the entire product with white acrylic paint to protect the organizer from moisture.
Then we paint the organizer in the desired color.
You can use a stencil to decorate the organizer.
Print the pattern you like and cut along the outline. For durability and ease of use, it can be laminated or covered with tape on both sides.
Let's draw a picture. To do this, press the stencil and apply paint with a sponge. Make sure that the stencil does not move.
After all the paint has dried, turn the box over and decorate the bottom. Apply glue and seal with cardboard, paper, fabric.
The result is a very compact organizer.
Juice bag organizer
A very simple way to make an organizer with your own hands using juice cans.
You will need 6 juice boxes of different sizes, self-adhesive paper and plain paper or napkins.
Bag organizer
Cut the longest bag in half lengthwise. For small bags, cut off the bottom at the same height.
We mark the height of the second level and cut off the top of the smallest boxes; in the example there are three of them.
We do the third level like the second.
We assemble the organizer without gluing.
We cover the insides of the organizer with paper or napkins.
We connect all the parts, you can use a heat gun or double-sided tape.
To avoid noticeable irregularities and transitions, we cover the boxes with masking tape.
We decorate the front part with self-adhesive paper. Glue all levels together.
Organizer made of cardboard and box
We measure the box and cut out an even number of partitions equal to the length and height of the box.
For partitions, you can use a joining system by inserting partitions into grooves.
To do this, we make markings according to your drawing and cut them out. And we insert the partitions into the grooves of each other.
We assembled the partitions and inserted them into the box. If everything is smooth and everything fits in, then we disassemble the structure and begin decorating.
We glue all the parts, including the sides.
You can use wrapping paper, self-adhesive film, napkins, or print the desired design on a printer.
Stylish DIY cosmetics organizer made of cardboard and fabric
Every self-respecting woman has in her handbag a purse, a cosmetic bag and, of course, an organizer for cosmetics and manicure tools. But where and how you buy it, whether you make it yourself or just buy it at a handicraft store, depends on your preferences. But it’s no secret that recently handmade products, that is, made by hand, are highly valued and are considered a sign of good taste.
So, today we would like to invite you to sew an unusual organizer for cosmetics and manicure tools with your own hands. It will not be difficult at all, and even beginners will be able to repeat this task and, as a result, get an interesting organizer, which in the future can be presented as a gift or surprise to your loved one.
Are you ready to take on this work? If your answer is yes, let's get to work. So, in order to sew a travel bag we need the following:
- Cardboard for binding,
- Linen fabric with polka dots,
- Plain cotton fabric, light green color,
- The elastic band is beautiful with a white frill,
- Glue Moment Crystal or Dragon,
- Sintepon,
- Scissors,
- Eyelets – 2 pcs.
- rubber stamp,
- Stamp pad with acrylic paint.
Let's start making the organizer from the base. We will make it using cardboard for binding. To do this, let's draw it out into the necessary details. Namely: one rectangle - 17x10 cm, and 4 rectangles measuring 4x17 cm.
We cut all the marked parts using a stationery knife and a ruler.
Next, we will draw four more strips, but from less dense paper.
We begin to glue and assemble the base. So, how it should look: glue the parts together using adhesive tape or masking tape, as shown in the figure.
At this stage we will prepare the fabric for the front side of the toiletry case. To do this, cut out a rectangle of suitable size with allowances of 5 cm on each side.
After which we will prepare a soft layer for the product. We will also cut a rectangle with small allowances of 1.5-2 cm along the edges of the solid padding polyester.
Now let's move on to the inside of the travel bag. For the overlays of the inner wrapped fabrics we will also need rectangles of hard paper. Here you can use cardboard that is not very thick. Let's draw rectangles of the same size as last time, but 2-3 mm smaller.
Then, for each inner tab, prepare a piece of fabric, previously ironed with a hot iron.
So, we will distribute the top part over a piece of padding polyester. Next, we apply machine stitching on the inside.
We trim off the excess edges strictly along the binding cardboard using sharp scissors.
Apply glue along the top and bottom of the base. We lay ironed fabric under the base, stitched with synthetic padding. Then we wrap the fabric on the inside of the base, where we applied the glue. These steps are visible in the figure. We will do the same with the left and right sides of the base, laying the fabric on the glued base. Secure along the edges with paper clips until completely dry.
Let's prepare pieces of fabric for the internal parts that will not be covered with covered panels.
Let's glue them to the folds.
Then we will begin to wrap the inner tabs with fabric, gluing the cardboard and folding the fabric, like the base.
Now let’s prepare a piece of elastic – 2 units. We need them strictly according to the size of the folded organizer. These elastic bands will help us close the travel bag. To do this, fold the elastic in half and make a small hole on the edge (cut with the tips of scissors). Insert a grommet into this hole.
Then we will install it by making a hole in the base. We install it with a special device, crushing the grommet from the back side.
Now on a large rectangle (tab) glue the elastic in the center.
This is what it will look like from the front.
Using Moment or Crystal glue, glue the tab in the center, bypassing the folds - do not go over them.
In this way, we make all the tabs, gluing the elastic bands either on the side or in the center, this is all visible in the figure.
Let's prepare a rubber stamp and an acrylic stamp pad. Let's put a few prints on the inside of the tabs.
Let's put everything under "oppression." Let the glue dry thoroughly. After which the organizer - toiletry case is ready! Let's organize cosmetics and manicure accessories! Job done - congratulations!
Author: arivederchy