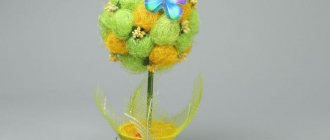
What is topiary: highlights
Topiary is the tree of happiness. Money topiary is quite common in European floristry. The wide popularity of the product is explained by the fact that it is an alternative to indoor plants. But compared to fresh flowers, you don’t need to care for the money tree or worry about the composition dying from lack of watering or sunlight.
It is generally accepted that topiary is an alternative to living plants
The money tree is a very original composition that always attracts the eyes of guests and it is not at all difficult to make it with your own hands after watching the master class once.
Topiary “Money Tree” from banknotes: do it step by step
The money tree, which is made by hand from sisal and banknotes, looks original.
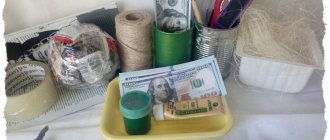
To create a masterpiece you will need:
- Decorative vase;
- Copies of banknotes;
- Sisal fiber of bright colors in a skein;
- A piece of satin ribbon;
- Glue gun;
- 300 g alabaster;
- Scissors;
- Strong wire;
- A piece of cable (to create a money tree trunk);
- A foam ball with a diameter of 70 mm (can be replaced with a newspaper ball wrapped in thread);
- Decorative elements - birds, berries that decorate the money topiary.
Flowers for the tree are made from banknotes. First, you need to fold them diagonally so that you get a square. The excess is cut off. Subsequently, each square is also bent diagonally. The result is small triangles. Each corner of the base of the resulting triangles rises to the top and bends. Then the corners of the triangles are folded.
Topiary made from banknotes will add zest to the interior of any home
After the blanks are ready, they need to be glued together using a glue gun. It is preferable to use this particular adhesive because PVA takes much longer to dry, which means it will take much more time to create a money tree. Flowers are formed from ready-made 5 models.
For a ball with a diameter of 70 mm, 24 flowers are enough. Before making topiary, it is better to watch the master class.
The vase must be decorated with sisal fiber. The shade depends only on the imagination of the author of the exhibition. But, it is better to choose fiber and satin ribbon of the same color. The fiber is laid out in a vase, on which a regular T-shirt bag is placed.
The plaster will hold the “trunk” of the money tree. First, gypsum or alabaster is diluted with water in a 1:1 ratio to the consistency of thick sour cream. The composition is poured into a plastic bag, a cable and 4 pieces of thin wire are inserted into the center of the thick mass. They will become branches of the money tree. The plaster hardens very quickly, so after 10-15 minutes, the master class on creating topiary from banknotes can be continued.
Flowers for the money tree are made from souvenir bills that look very similar to real money
After hardening, the plastic bag is removed, the plaster is placed in a decorative vase on the fiber and the top is also decorated with sisal. Satin ribbon is needed to wrap it around the trunk and branches of a tree. Not straight stems, but twisted ones will look very beautiful.
The ball serves as the crown of the money tree. You don't have to take a foam ball. If you don’t have such a handy tool, then a regular newspaper will do.
A ball is formed from it, on top of which threads and sisal are applied to strengthen the structure. The ball is attached with glue to a cable - a tree trunk. Ready-made flowers made from banknotes are glued onto the ball. To make money topiary look more magnificent, individual “tendrils” of fiber are passed between the flowers.
How to make topiary from banknotes (video)
Lush crown
Before you start working on a money tree, you should stock up on:
- a pack of counterfeit bills of the desired denomination;
- scissors;
- hot glue;
- wooden stick;
- decorative braid, flower net;
- a foam ball with a diameter of 2.5-3 cm (can be bought at a pet store);
- a small glass of yogurt;
- brown acrylic paint;
- a small amount of cement with sand.
The presented master class involves the use not of whole bills, but of their halves. Therefore, you need to cut each “money” piece of paper into two equal parts.
The first workpiece is taken and one of the corners is cut off.
The resulting pentagon is rolled up like a miniature bag, the open edge of which is fixed with hot glue.
The narrow tip of the bag bends.
The rest of the “money” parts are also made in this way. The work will require an average of about 70 blanks.
The prepared wooden stick is tightly wrapped with decorative braid. With transparent tape, it is advisable to carry out a double winding.
The free ends of the braid are attached to the stick with a glue gun.
An incision is made in the foam ball into which a decorated stick is inserted.
To ensure that the craft lasts a long time and does not lose its shape, it is recommended to fix the stick in the ball with hot glue.
Thus, the base of the topiary was created, where the stick plays the role of a tree trunk, and the ball serves as the basic element for attaching the “money” crown.
Related article: Velvet fabric: types, composition, properties
From the side of the connection between the barrel and the ball, the design of the craft begins with paper blanks. To do this, take the first little bag, which is glued with the narrow end to the ball and fixed along the trunk.
The next workpiece is attached in a similar way, while fitting tightly to the previous one. This is how the entire bottom row of the “crown” is designed.
In further work, the bags are attached both to the ball and to each other.
As a result, a neat “money” ball should form on the trunk of the tree.
All that remains is to make the base for the tree. To do this, an empty yogurt jar is painted brown.
It is advisable to use acrylic paint in this work. After the workpiece has dried, it needs to be decorated with decorative mesh and braid.
A small amount of cement is mixed with sand and diluted with water to the consistency of sour cream. The mixture is placed in a makeshift pot. A tree is inserted into the center of the pot.
The composition should be left until the cement mixture has completely dried.
Before the liquid base “sets,” the trunk may tilt. To prevent this from happening, it is recommended to support it.
After drying, the cement mixture must be treated with glue and sprinkled with decorative sand.
Decorating with sisal also looks interesting: it creates a semblance of grass.
To create a complete composition, you can add artificial foliage to the work, and randomly wrap the trunk with braid.
If you plan to use the topiary as a gift, then it would be appropriate to invest in it several real banknotes.
Topiary made from banknotes with green leaves: doing it right
To create such a product with your own hands, you will need all the same materials that were described above. Only this master class involves decorating a topiary with five decorative leaves and ladybugs.
First of all, you should make “pounds” for the crown. To do this, each bill is cut in half and “balls” are formed from them and secured with glue. 50 bags are enough. Then all the pounds are glued together with their sides. The result is a single flower made from banknotes. This is the base of the crown of the money tree. But it will consist not of one, but of several layers, and the number of “balls” decreases with each layer. To make it clearer, let me watch the master class.
Decorative branches are attached to the cable, which is pre-wrapped with a satin ribbon, using thin wire. The cable does not have to be straight; it can be twisted in a spiral.
The decorative vase in which the money tree will be located is filled with foam cubes, which are filled with plaster. Then the cable and branches are installed. Drying time – 20 minutes.
Foam cubes are stuffed into a topiary vase to prevent the stick on which the base is attached from falling
A circle with a diameter of 110-140 mm is cut out of cardboard. A hole is cut in the center of the circle. Through it it will be easy to decorate the base for the crown with a satin ribbon. Decorative leaves are glued to the base. After this, a multi-layer crown of banknotes is attached using a glue gun.
The plaster is covered with sisal on top, the branches are straightened or curled. The crown and cable are attached to each other with a glue gun. Finally, ladybugs are placed on the money tree. After watching the master class, you can clearly see all the methods described.
Topiary made from coins: decorate the pot with your own hands
The next thing this tutorial says to do is a pot. It is difficult to find a flowerpot that is ideal for a souvenir tree. It is clear that it should be the same in decor, that is, golden.
How to make a beautiful pot with your own hands:
- This mini master class consists of simple steps . Take a regular plastic cup, preferably a wide one. Degrease it and paint it with beautiful golden acrylic paint.
- Just painting won't be enough . You can use sparkles, colored salt, small rhinestones and painted buttons. The old-fashioned method, when you make glitter with your own hands by beating Christmas tree decorations, will also work. In general, scroll through the photo gallery, you might want to repeat something, do it your own way.
- Next, you need to fill the pot with plaster , and while the plaster is still wet, stick a table into it, making sure that it is firmly attached. The top layer of plaster must be decorated, otherwise the coin topiary will have a gap in this place. The easiest option is to throw in the same coins or just sprinkle glitter.
You can decorate the pot with gold-painted burlap, decorative lace, artificial pearls or the same coins
Don’t forget to take a photo - if the tree turns out beautiful and graceful, it wouldn’t hurt to show it off. Or you can take a photo master class.
DIY coin topiary (video master class)
DIY money topiary from banknotes: master class
For the New Year, all living spaces are decorated with appropriate items. And not just a tree, but a Christmas tree made from banknotes will look original and unique.
To make a tree with your own hands you will need:
- Decorative flower pot;
- Foam cone;
- Wooden sticks (for sushi or fireplace matches);
- Copies of banknotes;
- Toothpicks;
- Paper;
- Scissors;
- Adhesive composition.
A Christmas tree made from banknotes will be an excellent decoration for your home during the New Year holidays.
Part of the cone is cut off and placed in a vase. The cone itself is placed on wooden sticks and placed in a vase. There is no need to cut the banknotes; they are folded in such a way as to form a fold. The money is attached to the foam cone with small pins. You should start forming rows from the bottom. After this, you need to examine the tree from all sides and make sure that there are no gaps left. The final stage is a star, which is cut out of paper and attached to the top of the money tree using a toothpick. This Christmas tree decoration looks good in combination with multi-colored ribbons or tags.
To create a money topiary from dollars you need:
- Cardboard;
- Gypsum;
- Banknotes;
- Shish kebab skewer:
- New Year's beautiful napkin.
Combine the cardboard into a tube, dilute the plaster with water and fill the mold with it, after installing a skewer in the center of the plaster base - the table of the future money tree.
Make 40-50 “bags” from banknotes, from which 3 layers of the Christmas tree are then formed. For example, the bottom one will consist of 13 bags, the middle one of 10, the top one of 7. The paper cones are attached to each other with glue. The tiers should be attached to the skewer in the same way. The plaster base is wrapped in a napkin. Perhaps just draw a picture with watercolors.
Master class using an example
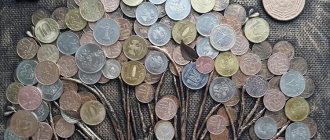
Coin topiary begins with the selection of material. To create such a tree we will need new shiny coins.
And if there are none, you can use the old ones, but then cover them with gold paint.
The ball in our case is a soft foam ball; to make it hard, we cover it with tape, since the foam can open. We begin to paste over the top of the ball, first one coin, then around it at an angle, continuing from top to bottom, like fish scales.
It is more convenient to glue with a hot-melt gun; the glue hardens very quickly, you just need to press and wait a second. So circle by circle we glue the entire ball to the bottom, at the end we leave a place for attaching the barrel. For clarity, see step-by-step photos:
The trunk in our topiary is a thick aluminum wire, we wrap it with shiny decorative tape and stick it into our ball with coins. If there is empty space left, fill it with coins. We decorate the coins themselves with self-adhesive rhinestones. And finally, we cover the lower part of the crown with flower petals made from ribbon, as shown in the photo.
Related article: Do-it-yourself floating cup: master class with photos and videos
Under the pot we take an ordinary plastic glass, which we disguised with gold paint, decorate our pot with sparkles and the same ribbons that we wrapped around the trunk. Glue a gold leaf onto the front part.
We place the trunk with the crown in a pot and fill it with a mixture of alabaster and sand.
It is worth noting that alabaster dries quickly, so it is easier to knead the composition directly in the pot and “plant” our product.
When everything is dry, leaves and beads are attached to the trunk, and the very base of the pot is painted over with paint. If you used regular coins, we recommend that you also varnish the top.
Topiary made of dollars and beads: the principle of creation
A tree made of dollars and beads, made by yourself, looks very beautiful. The principle of creating the product is the same as described above. Only to such a tree are decorative branches with seeded beads added, from which patterns are subsequently formed. Beads can be used to make edgings for money bags.
DIY crafts made from money will never lose relevance
A tree that contains banknotes, coins, and beads will look no less effective. Just don’t forget that the composition doesn’t look “clumsy”.
Which coin topiaries are best?
Coin topiaries are small but original trees based on natural or artificial materials. All elements are selected depending on the person’s preferences and imagination. You can use a tree made of coins as a decorative pattern or a money talisman. According to Feng Shui, such decoration brings joy and happiness to the home.
How to make topiary from coins with your own hands: step-by-step photos
Coin topiaries are made quite simply; all you need is to acquire certain materials. They completely depend on the author's ideas. Decorative trees can be based on various elements.
To make a tree from coins, you need to take the following materials:
- Small diameter foam ball.
- Coins.
- Aluminum wire for the barrel.
- Braid.
- Gold beads of different diameters.
- Green cloth.
- Artificial leaves.
- Flowerpot.
- Glue.
- A can of golden paint.
- Alabaster.
Additional tools include: wire cutters, knitting needles, pencils, scissors and a gun for distributing glue.
The first step is to make stamens from floral wire; this is done by using wire cutters. A yellow bead is installed at one end, and a red one at the other.
You only need 3 stamens for a coin tree. Then you need to make tree branches, there will be two of them.
For this, floral wire is used, but red beads are placed on its ends, which are attached with glue.
The resulting stamens are fixed on a foam ball. Then you can start decorating with coins. Several stamens are installed around one element. The free space is filled with coins. It is recommended to install them at an angle in the third and subsequent rows.
Thus, the entire foam ball is covered. The main thing is not to forget to leave room for the barrel. It is made from thick wire using pliers. Branches are tied to it, and the trunk itself is attached to the ball.
It is advisable to secure it additionally with glue.
It is necessary to cut small flaps from green decorative tape that will be used to wrap the finished trunk. It can be additionally decorated with beads.
Then a flowerpot is taken and a cover is made for it. The inside must be covered with fabric. Then attach a gold braid to the outside and decorate with beads. Granules are laid out at the bottom of the flowerpot; these can be either stones or coins. Then alabaster diluted with water is poured into it and wood is inserted. When it hardens, coins are laid out on top.
Topiary made of coffee and coins - a simple apartment decoration
In recent years, topiaries have been gaining immense popularity. This is due to the prevalence of Feng Shui, and the desire of people to decorate their own apartment. Topiary will perfectly complement the interior of the apartment and bring good luck. The decoration can be based on coffee beans and coins. This will create not only an interesting, but also a fragrant decorative element.
In order to make a topiary, you need to arm yourself with the following elements:
- A foam ball.
- Yarn.
- Lock with zipper.
- Coffee beans.
- A can of spray paint.
- Construction plaster.
- Small coins.
- Wire and round cable.
- Brown acrylic paint.
- Glue.
- Paint brush.
To begin with, a wire barrel is created, which is decorated with brown yarn. Then a pot is prepared into which diluted alabaster is poured. The barrel is inserted into it and sent to a quiet place to harden for several hours. In the meantime, you need to decorate the tree itself.
A foam ball is wrapped with brown yarn and coins are glued to it. The lock is fixed with glue; it is advisable to place it immediately under the coins. This part of the wood must be painted over with gold paint. The entire remaining part should be sealed with coffee beans. The resulting decorative element is attached to the trunk.
The only thing left to do is decorate the trunk itself with colored paper and beads. Alabaster should also be hidden, using cinnamon sticks, coins or fake bills.
Creating a money topiary from coins with your own hands is not a difficult task.
Topiary is an interesting decorative tree that can be made from any decorative elements. To do this, you don’t have to buy anything, just look around your own apartment.
Making a money tree with your own hands involves using the following elements:
- Construction plaster.
- Wires.
- Pistachio shells.
- Pot.
- Golden paint.
- Decorative tape.
- Coins.
Each topiary comes with a step-by-step guide. The first step is to create a tree trunk. To do this, take a thick wire, which is wrapped with decorative tape, thread or painted. Then diluted alabaster is poured into the pot and the base is inserted.
