HATS WITH A VEILE WITH YOUR HANDS | How to make a pill hat
In this article we will talk about how to make fashionable women's hats with your own hands from scrap materials and fabric. Many centuries ago, humanity came to the conclusion that every woman simply must have a mystery. Accordingly, ladies constantly strive to emphasize their mystery. To create an aura of mystery, they used a veil - a thin mesh that covered the face and head. After some time, the veil became inseparable from headdresses, which are becoming quite popular in our times. When did veil hats first come into fashion?
Back in the middle of the 19th century, wide-brimmed hats were in fashion, not without a light veil, and at the end of the 19th century they replaced the large ones with small ones. Small hats that were worn tilted to the side gained popularity and recognition. In the twentieth century, the function of hats with a veil was lost, and they were designed not to hide, but to emphasize a woman’s beautiful face. They began to decorate hats with their own hands using feathers, rhinestones, beads and all sorts of other decorative elements.
Nowadays, a hat with a veil has become a wonderful accessory that complements evening, cocktail and wedding outfits. And it is not at all necessary to buy such a hat in a fashion boutique - you can easily make a fashionable headdress with a veil with your own hands, and the master class, which you can find at the end of the article, will help you with this. Stores and designers offer a huge number of hats with a veil for wedding dress, which are harmoniously decorated with decorative feathers, flowers and ribbons. They can decorate the simplest bride's dress. And there is more originality in a hat than in a veil and tiara. Such a solution will be interesting and unique.
Mini pill hats with veils, which are increasingly becoming fashionable, can perfectly highlight and complement your natural beauty. There are many options for evening hats: round without brims, oval, heart-shaped and even cap-shaped. If you prefer a retro style, the characteristic pillbox hats will suit you. The veil on the hat adds flirtatiousness and mystery. If desired, you can choose a veil that will cover your entire face or will only reach your nose or lips. When a hat with a veil covers the entire face, it is even suitable for a wedding in a church. Mothers, bridesmaids and bridesmaids increasingly prefer this accessory.
Be sure to consider the shape of your face when choosing the type of hat you want to make yourself. If you have a round face, a hat in the shape of an oval or heart is suitable. If your face is oval, on the contrary, it is round. A hat with a veil will allow you to hide all your thoughts and secrets, to isolate yourself from those whom you do not want to let into your mysterious inner world. The hats change - the image changes. And not everyone will be able to guess who you really are. Therefore, they will be ideal assistants in the difficult task of being a mysterious femme fatale.
How to attach a veil to a wedding hairstyle. Photo gallery.
How to sew a fashionable hat with your own hands under a veil. Master class. Next article: Several options for making fabric brooches return to Main page
ALSO FIND OUT...
The following materials:
Previous materials:
bebi.lv
How to create an evening hat with a veil – Crafts Fair
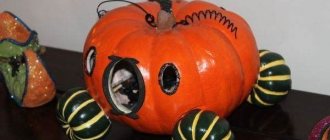
This master class is for those who want to become the queen of the ball at a party. Believe me, if you come in a hat, all eyes will be directed only at you.
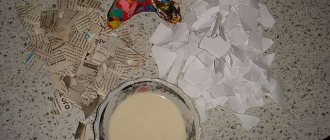
Prepare in advance, as some of the necessary materials are difficult to find in a nearby store.
You will need:
- Base for the hat. I took a ready-made base from sinamay, you can make it yourself (the next master classes will be coming soon).
- Fabric of the color you need. I have organza, so I had to take two pieces. It’s better to take a denser, but slightly stretchy one.
- Hat elastic, comb or headband (optional).
- Hat veil in a matching color.
- Feathers, flowers for decoration. I advise you to make your own flowers - even if you make them for the first time, they will still look more expensive and more beautiful than purchased Chinese ones.
- Thread, needle, thimble. Some places are difficult to stitch, and this is where a thimble comes in very handy.
- Rep ribbon 1 cm wide (in my case it was already sewn to the base).
Step 1. Prepare the base
Since I was going to cover the base with fabric, I had to carefully tear apart the grosgrain ribbon. By the way, it is still needed because it protects the hat from contamination by skin secretions and cosmetics, and in our case it also hides the seams.
Cut out two circles from the fabric, approximately 3-5 cm larger than the base. Iron it and straighten it on the hat. You can secure it with pins, just be sure to tighten it properly. The fabric should not wrinkle or bulge.
Sew along the edges to the base. The edges of the finished sinamey base are curved inward - it is convenient to sew on and there are no seams left on the outside of the cap.
We do the same with the second layer if the first one is visible. Trim off excess fabric
Step 2
Sew on a comb, hat elastic or headband. We do this at this stage so that all traces of sewing are hidden under the decor or grosgrain ribbon. Since I couldn’t decide until recently what the hat would be held on, I simply inserted the headband under the grosgrain ribbon at the very end of the work and secured it with thread.
Step 3
Sew on the grosgrain ribbon. It can be sewn before the decor, it will be even more convenient.
Step 4. Decorate the hat
Attach your decorations to the hat in different ways, add or remove. Remember: your hat should not look like a flower bed, this is no longer fashionable. All elements are sewn firmly. We leave the knots on the inside of the hat and hide all the stitches under the decor.
I used a double folded veil. The veil was gathered on a thread and pulled together - it turned out to be a “birdcage”. First, I sewed a veil to the hat, and additionally attached it in several places with hidden stitches using color-matched threads. I sewed flowers and feathers on top of the veil, hiding the place where the veil was attached. I sewed a feather butterfly onto the veil itself.
Don't forget to constantly try on your hat! Only on yourself will you be able to see how the hat looks, whether you need to move the decor a couple of centimeters or change its places. Each face is individual, and a hat can hide imperfections or highlight them.
Good luck!
Save
Save
www.livemaster.ru
DIY veil hat. Six video master classes
A veil hat will make any woman mysterious and a little unapproachable.
You can wear such a hat with your own hands to any celebration, party or carnival, arrange an interesting photo shoot or go to the theater. And of course, for brides, a DIY wedding hat-veil is an indispensable accessory.
It is not at all necessary to wear a store-bought mini-headdress; it is much cheaper to make a hat yourself. In addition, you can choose the decor of the hat yourself according to your taste and discretion. Anything can be used: feathers, artificial pearls, satin and grosgrain ribbons, velvet, organza, lace, glass or acrylic rhinestones, ready-made or homemade brooches and of course, homemade flowers.
Today we have prepared for you a selection of master classes on making a hat with your own hands, after viewing which you will know exactly how to make a veil.
1. DIY silver hat with a rim, master class in 2 parts from Alina Boloban.
2. DIY veil, video master class from Olga Tyumireva.
3. DIY kanzashi hat with veil from Natasha.
4. Master class on making a veil with your own hands from the “LegiArtis1” channel.
5. DIY hat - veil - video master class from Elena Shevchenko.
6. DIY flower wedding hat video master class from Olga Kanunnikova.
Discussion of the article
You can rate the article, share your opinion, and subscribe to comments on the article.
What else to read on this topic on the Handicraft Runet:
www.darievna.ru
Process of creation
A detailed master class will help you get acquainted with the basic principles of creating a veil with your own hands.
In this case, an example of fastening on a ridge is given. This method is convenient for hairstyles, but is not suitable for loose styles.
Basic materials you will need:
- Hair comb;
- Tulle;
- Fabric scraps;
- Decorative details at your discretion (pearls, lace, crystals);
- Threads, needles, scissors.
First we will make a flower to decorate the veil. To do this, you will need a piece of tulle measuring 85 cm * 25 cm. We assemble the fabric with an accordion.
Using a narrow strip of tulle, tie the workpiece in the center. Trim the ends of the future flower in a semicircle and straighten the “petals”.
Give free rein to your imagination and decorate your flower with decorative elements.
The flower is ready, and we can work on the main part of our accessory - the veil.
Take tulle or mesh (large or small, depending on your preference). The size of the segment will depend only on the initial plan, whether the veil will be lush or not, whether it will cover the entire face or only part. Distribute the veil over your head and, having given the desired shape, secure it with careful stitches.
Securely sew the comb to the place where the veil is collected.
Article on the topic: Blankets: knitting and crocheting - a selection of the best master classes
Sew the flower you made earlier to the reverse side.
Our veil is ready. You are ready to win hearts and surprise your friends.
Let's look at a small photo selection of celebrities who, not only on screen, but also in real life, prefer this small but very original accessory.
So, we got acquainted with the most common types of veils. We looked at how to make them and even studied a master class that showed step by step how to make a veil with your own hands. All you have to do is choose a style, color and get to work.
Having made such a stylish accessory, you will shine at your friends' party. Or maybe by adding a mysterious twist to your image, you will win the heart of that very person? Experiment, dare and the result will not disappoint you!
How to make a veil with your own hands
1
Wedding veils, hats with a veil, headbands with a veil are gaining more and more popularity, more and more brides want to add a touch of vintage, retro, and nostalgia to their wedding.
Oddly enough, making a wedding veil is very simple, and the effect is stunning!
Fascinators give the bride a unique touch of charm, relaxed luxury, sophistication, and femininity.
How to make a veil with your own hands? Just 5 simple steps.
Step 1
You will need the following materials:
- 60 cm mesh veil 45 cm wide
- Comb/clip
- Needle and thread
- Ruler
- Glue gun (optional)
Step 2
Cut out the base for your veil - as shown in the picture.
Important: there are 2 edges of the veil - open (these are 2 edges, the shorter ones that were made for you during cutting in the store) and closed - the edge that looks beautiful and neat, which will be visible in the finished veil. Don't get confused!
Step 3
Gather the veil from point A to point B - needle stitch first (basting stitch) - along the trapezoidal top.
Step 4
Sew/glue the assembled edge of the veil to the comb/clip with a glue gun. To prevent the gathered edges of the veil from being visible from the outside and inside of your hairpin/comb, you can glue a suitable piece of felt on top.
Step 5
Attach the veil with a comb/clip to the hair just below the crown, secure the loose ends at the sides with bobby pins. Add a faux flower or feather decoration on top of the comb/clip.
Veils are made from mesh veils or large tulle - materials related to the hat industry. You can buy them in specialized hat stores or fabric and sewing accessories stores.
Veil length and mesh veil width
Typically, the mesh veil has a width of 23, 30 or 45 cm.
If you only want to lightly cover your hair with a veil, then use a width of 23 cm; if you want the veil to cover your eyes, then take a width of 30 cm. And if you want the veil to fall below the level of your nose and chin, then a width of 45 cm will suit you.
Types of mesh veil
You can choose a mesh veil of any color: but the traditional ones are, of course, white and champagne. There are veils with velvet flies, beads or pearls. You can also create and attach decorative decorations to your veil yourself - rhinestones, appliqués, for example, in the form of small hearts, birds, stars, cherries. The main thing is that the decor of the veil matches your dress and the style of the wedding as a whole.
In the English version, a veil is designated as birdcage veil - that is, literally, a veil is a birdcage, so brides in veils are often depicted with a birdcage in their hands.
You can use a fascinator as a wedding accessory, and a birdcage or several birdcages to decorate your wedding - reception, banquet decoration - to create the complete look of a vintage romantic wedding.
Be unique - create your own veil!
s30893898787.mirtesen.ru
History of charm
If you need to add some mystery to your image, a veil will help you. The veil is one of the most stylish and delicate accessories in a woman's wardrobe.
A veil is a women's headdress made of the finest fabric, mesh or lace. The peculiarity of the veil is that it partially or completely hides the face. At the very beginning, the veil was created purely for practical reasons. It was designed to hide the face of its owner from prying eyes.
After the unusual headdress gained recognition in Europe, it was used to mark social status and belonging to certain high circles.
Also, special importance was attached to the color of the veil. Thus, white color indicated the innocence and purity of its owner, and black became a symbol of mourning and grief.
The popularity of veils among the fair sex rose and fell, but they still managed to reach the present day, having undergone great changes. And yet the main component of veils has remained unchanged. This is the thinnest veil, designed to add elegance and mystery to the image.
Unfortunately, these days the veil is not very common among the masses, so it is not always easy to find it in stores and salons. But there is always a way out. Making a veil with your own hands is not as difficult a task as it might seem at first glance.
Related article: Crochet lace border with roses
First of all, you should decide on the style of the veil. It depends, of course, on the event and place. Wedding or official reception, anniversary or party with friends - the choice of color and style of the veil will depend on this. An important point is who the accessory is being created for: a girl, a girl or a young woman, depending on this, you can create a brighter and more original or, on the contrary, an elegant and discreet veil. Another aspect that you should decide on before starting work is how to attach the veil. There are three most common options - on a hairpin, on a headband or on a ribbon.