How to sew a soft development cube with your own hands using the biscornu technique - master class
Educational toys help combine play and unobtrusively teach a child various skills, but they are not cheap.
If you are at least a little familiar with the basics of cross stitch, then you can easily make a soft developing cube with your own hands using our master class. The original toy is based on the biscornu technique - making small decorative pillows. Sewing a cube shape is much easier than a traditional crooked one, so feel free to get to work, even if you have never heard of this needlework.
- Preparation of materials and tools
- Step-by-step manufacturing technique with photos
Preparation of materials and tools
So, for work you will need:
- Aida canvas 11 in six colors, always hard;
- floss – 6 colors;
- buttons – 21 pieces;
- foam cube 10*10*10 or filler (sintepon, padding polyester)
You will also need tools: scissors, pencil, ruler, needles: with a sharp end, with a blunt end, a pattern for embroidering numbers.
Manufacturing time – 6-8 hours. Difficulty – medium.
We talked about the main points of working in this technique in one of the previous master classes, so in some places we will refer to it. about what biscorn is and what threads and materials are best to choose in another publication.
Step-by-step manufacturing technique with photos
To see small details , click on the photo, they will enlarge! For even more fun, open the pictures in new tabs or save to your computer!
To sew a soft development cube with sides 10*10*10 with your own hands, you need to prepare six squares of canvas 13*13 cm.
On each square of the canvas, mark with dots the contours of the square of 56 cells - along this border you need to lay a seam, with the help of which the faces of the cube will be connected at the final stage of work.
Select floss in a contrasting color for each square. You need to take high-quality floss; it should not fade when washed!
Use a needle to sew the seam back. This seam and the assembly process are described in detail in the master class on sewing biscorn “Chamomile”.
Cross-stitch the “frame”, leaving five squares from the seam.
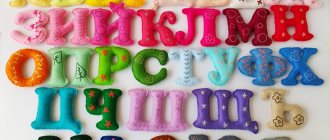
Now you need to embroider numbers on each edge. This scheme would be ideal.
The numbers on it are quite recognizable and can be embroidered easily and quickly. To embroider numbers, you can take a floss of a different color, the main thing is that they stand out well against the background.
Select buttons for each edge. In this master class, wooden and quite large cubes with bright patterns and holes are used for the developmental cube. You can take the buttons on the leg, but they “dangle” on the cube and there is a chance that the baby will be able to tear them off and swallow them.
Please note that the buttons are not exactly the same, so that you can play the game “find the differences”.
Sew the buttons firmly to the edges; you can also use floss for this. On the wrong side, the thread must be firmly secured.
Now it's time to connect all the edges. Return to the Chamomile MK, the link to which is given above, to get acquainted in detail with the nuances of the assembly.
Sequentially sew the edges according to the diagram. You should end up with a box like this.
Now put the foam cube inside. If you plan to use padding polyester or other filler, then you can fill the mold at the moment when one side of the developing cube remains open.
Connect the remaining sides and give the gift to the baby.
With this educational toy you can:
- study colors (edges and embroidered elements);
- master counting from 1 to 6 (embroidered numbers on the edges and buttons);
- develop attention (the buttons on the edges are not exactly the same - you need to find the differences);
- fine motor skills (embroidered elements have a relief, buttons protrude above the surface of the toy);
- use it as a playing piece in walking games or just play each other - it is quite durable and will last for several years.
A soft development cube made with your own hands is safe for a child, has no odor and can be washed with baby detergents in warm water, and after thorough rinsing and gentle spinning it easily returns to its original shape.
A master class for readers of the online magazine was prepared by Tatyana Makarova.
Come visit us to find a new hobby and learn how to relax in an interesting way!
Developmental cube (many photos)
When I was still pregnant, I already began to prepare for how my baby would grow and develop. I started sewing educational toys for him. This is the cube I got.
I took the ideas from the Internet. Sorry, I don’t provide links, I didn’t save them. And in fact, there are many similar works, the authorship cannot be determined...
Start over.
I used four bath sponges as a basis. Glued with Titan.
Cube size 14x14 cm.
In the middle, for sound, I inserted a container from a cosmetic product into which I poured a small amount of beans.
I coated the bottle with the same “Titanium” and inserted pieces of a kitchen sponge into the cracks. I also sealed the top and bottom of the hole with a kitchen sponge.
The base fabric is all different. I glued the base and small parts with non-woven fabric.
Take a closer look at all the scenes. The ship is made of denim, the mast is leather, the sails are cotton.
I made waves from a satin ribbon: I fix the thread on the fabric, gather the ribbon, and fix it on the fabric again.
The sails can be moved aside (I wanted to sew some kind of face under them, but I couldn’t find one), and the “lifebuoy” on the rope can be pulled.
Bell. Material is fleece (leaves), felt napkins for cleaning (the bell itself), lace (stem), beads, button, lace.
The leaves are filled with padding polyester. Sewn so that they can be moved aside.
The bell has stamens - beads strung on a thread. You can pull it)
I stretched a cord at the base of the bell, fastened a butterfly button on one side, and a bead on the other. You can pull, the butterfly flies into the flower.
Everyone's favorite story is sunshine, rainbows and clouds with rain. Material: satin ribbons (rainbow, rays of sun and rain), felt napkins (sun), lace (rays), fabric... (cloud), bells.
The sun can be unfastened - it is attached with Velcro, but so as not to get lost, one ray is fixed to the edge of the cube. You can “control” the rain by pulling ribbons through the eyelets. The bells are ringing. The rainbow is stitched with a zigzag. Moving your finger, you get a pleasant tactile sensation))
My favorite apple! Material: various types of fabrics (apple, leaf, caterpillar), leather (apple tail), bead (caterpillar head).
The leaf bends back.
And also half of the apple is bent. Inside is a caterpillar. Performs the function of a “button”.
Smile)
Mushroom. Material: various types of fabrics (mushroom cap and stem, leaf), leather (leaf petiole), lace (grass), beads.
The leaf rises, there is a ladybug! The grass can be bent.
Flower. Material: various fabrics.
The petals bend back. The petals are made of fabrics of different textures. All this contributes to the baby’s tactile development.
Additional elements: a curtain ring, secured with ribbons, sewn to two faces of the cube.
Beads and a bell on a cord are fixed on one side.
Under one flower petal there are beads strung on two ribbons.
And under another petal. All beads can be moved.
A cord is sewn to one of the edges, on which beads and a ring are strung.
This is the kind of toy I got.
Thanks to everyone who stopped by!