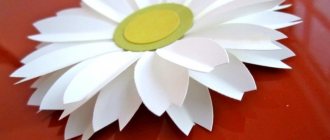
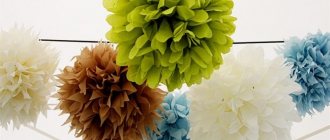
The word “topiary”, originally used to denote the art of curly pruning of tree crowns, today is more often used as the name of original souvenirs that are given for good luck with wishes of financial well-being. They are made from different materials, usually giving the shape of a ball. For example, you can make a beautiful topiary from foamiran with your own hands. This material easily turns into delicate flower petals, so it is often used to create interior decor items.
Simple do-it-yourself foamiran topiary: master class (what you need)
As a first experience in making such a souvenir, we can offer a fairly simple option, without the use of heat treatment of the petals, for which you will need:
- Foam base. For example, you can use a small ball. Other shapes made from the same material (star, heart, etc.) are also suitable.
- Foamiran of several colors.
- Pins with a cap-bead or tailor's pins with a “pearl” head.
- A flower-shaped hole punch, preferably larger (more than 1.5 cm).
- Beads, sequins and/or beads for making flower cores.
- Acrylic paint for the barrel.
- Bucket or pot.
- Pebbles and plaster.
- A straight tree branch without knots for making a trunk.
- Wire.
- Glue gun.
- Multi-colored sisal.
- Glue "Moment".
Purple rose
To perform a certain range of work you will need the following tools and materials:
- Foamiran olive and purple colors;
- scissors;
- glue gun;
- fastening for a hairpin, brooch or other decoration.
So, the master class on making our flower will consist of four stages:
- cutting out;
- gluing;
- fluffing the bud;
- sepals and calyx.
Each step will be described in detail by us with the provision of relevant photos.
Step one "Cutting"
From a roll of purple Foamiran, cut out a long strip, the width of which should correspond to three centimeters. Then we cut it into separate pieces, preferably rectangular in shape, from which the flower petals will be cut out.
When creating this composition, the shape of the petals can be arbitrary, but in our case it is oval with a small cut.
Now you need to twist the opposite edges of each cut petal with your fingers, and then slightly stretch the middle with your fingertips. You will need about 20 or 25 such petals.
Step two "Gluing"
After giving each petal the required curved shape with wavy edges, you can begin gluing them together. For this purpose, we take a glue gun or strong-hold glue. We apply it in small quantities to the “cut” part and gradually form a flower bud from them. In its center, to make work easier, place a ball rolled out of foil. You can also use other convenient materials at hand.
The petals are glued in a “checkerboard” order, the next one on top of the previous one, do not forget to press them tightly against each other. Using cold glue will significantly increase the process time, and using a glue gun will speed up any part of the work.
Step three “Blooming bud”
The petals are glued at approximately the same level in relation to each other. This method makes it possible to end up with a beautiful flower with smooth edges and a blossoming bud.
Now our master class can move forward and tell you exactly how to create an equally beautiful green part of the plant with your own hands.
Step four “Sepals and calyx”
From a flap of Foamiran, but already olive-colored, with scissors we cut out several long strips with a length of 7 to 8 cm and a width of no more than 1 cm. After this, we cut each of them into two even parts almost to the very end. Using our fingers, we twist the elements to the state of tight flagella, which, as they unwind, will acquire the desired “natural” shape for us.
While our flagella take the required state, from the same piece we cut out one, or maybe two, circles, the diameter of which does not exceed 3 cm. With their help, we will create a base for the flower. Subsequently, it is to these circles that the decorative fastening for our creation will be glued.
Perhaps our master class seemed a little difficult or insufficient in explanation to you.
For a more detailed look at how exactly this kind of flowers are created from Foamiran with your own hands, use the corresponding video, from which you will learn a lot of useful information.
The procedure for making a “flower ball”
To make topiary from foamiran (the master class is presented below), you first need to work on the flowers. They need to be made in large quantities using a hole punch. The result should be the same number of colors, for example, light green and pale yellow. Followed by:
- put a sequin core on the pin;
- pierce the centers of the yellow and light green flowers with its tip;
- stick the pin into the foam;
- continue to collect flowers and attach them to the ball until it is completely covered with them, except for a small area at the base;
- bend the petals down a little to give them more naturalness.
Another idea concerns glasses with a long stem.
They can be made on top, on a glass, or, upside down, on a stem. If you want, try making it in a tall glass. It also looks very original! I'll tell you about an upside down glass.
We outline the top of the glass. We make 2 blanks from beautiful paper. We glue these blanks together. Let's align them. Glue a toy in the middle of the blank.
Cut out a circle from foamiran to the size of the bottom of the glass. Turn the glass over and glue this circle.
On it, in the middle, we glue a foam ball with one edge cut off. Glue flowers and leaves around this ball.
If you want, you can decorate the base of the topiary, add shiny buds or beads.
How to make a trunk and install a tree in a pot
Before continuing to make topiary from foamiran, you should remove the bark from the branch and leave it to dry for a couple of days. Then:
- paint it with acrylic paint;
- wait until it dries;
- sharpen one end;
- make a small hole on the ball;
- insert the pointed end of the branch there, having previously coated it with any suitable glue (for example, “Moment”);
- Place pebbles in a pot with a suitable decor or painted with acrylic paint in the desired color;
- At the end of the topiary trunk, fasten a thick wire and make a large loop;
- insert the tree into the pot and add pebbles so that they tightly compress its frame;
- in a separate bowl, mix building plaster, gradually adding water until you get a composition that resembles sour cream in thickness;
- quickly pour it over the stones in the pot and level the trunk strictly in a vertical position;
- hold the tree until the plaster dries (usually about 10 minutes);
- leave the topiary to dry for 3 hours so that the moisture completely evaporates from the plaster;
- Roll balls from floral sisal;
- stick them to the surface of the plaster using hot glue.
We create topiary from foamiran: 7 recommendations for craftswomen
Foamiran topiary is a decorative decoration that you can make with your own hands. You can create an incomparable decoration for your home with your own hands by reading the step-by-step master class.
Making petals for topiary from foamiran: master class
To make a composition with your own hands, you need to take care of the basic elements. These can be any available means; each component is easily replaced. You need to think about this question in the process of creating a unique decoration.
The main components of any work are:
- Rows of petals;
- The base of the tree;
- Crown.
To create a lush effect, three rows of flowers are used. They are easy to make; for this purpose, take paper on which three identical circles are drawn. It is desirable that their diameters differ from each other.
You need to try to make identical, symmetrical petals. Then sheets of foamiran of a certain color are selected. The paper blank is outlined, this allows you to form an outline.
The action is repeated with three circles.
Each row must have a concavity. You can do this yourself using a hairpin with a bead at the end. Then the resulting petals are laid out on a sponge. Carefully apply the petal row to the sole of the iron. The heated elements are returned to the sponge and secured with a pin.
It is necessary to work with the material while it is heated. Otherwise, nothing will work. When everything is ready, the bud is formed. There are no rules here, the work is done according to personal preferences.
Topiary with foamiran flowers: step-by-step production
After making the flowers, you need to begin further work.
In addition to the main decoration, you will need the following elements:
- Flower pot (ready-made or self-made);
- Branch for the trunk;
- Ball-blank made of foam;
- Glue gun;
- Little bird (optional);
- Beads:
- Additional decorative elements in the form of ribbons, braid;
- Bird's nest (optional).
Sizes, additional elements and color contrast are chosen independently. Here you need to rely solely on personal preferences. To form the main element, it is recommended to use a blank ball, it is very convenient. You can buy it in craft stores in any size. This will significantly save time and allow you to get a high-quality and even element.
If there is no ball, and there is no opportunity to purchase it, it is made independently. To do this, take a lump of newspaper and thread. The paper is tightly crumpled, then wrapped with thread. This will allow you to create a ball of any diameter.
Making topiary: forming a tree
It is necessary to make a hole in the finished ball; it is in this hole that a suitable piece of driftwood will be attached. Its other end remains in the pot. You can secure the elements using a glue gun.
The base of the driftwood can be secured with plaster, if desired. But in the case of a foamiran tree, it is recommended to use ordinary glue. The pot also needs to be properly decorated.
To do this, use braid and satin ribbons. There are many ways to lay them out. Before decorating, you need to check the stability of the driftwood. It must be securely fixed.
A beautiful tree can be created with your own hands within an hour.
The main elements can be:
- Manufactured roses;
- Flower pot or flowerpot;
- Wire;
- Glue;
- Styrofoam ball.
A hole is formed in the ball, a piece of driftwood or wire is inserted into it and fixed with glue. The second edge is placed in the pot and attached in a similar way. The ball is then decorated with previously made flowers. The pot is decorated with ribbons.
How to make a crown for topiary
The most crucial moment is the formation of a crown from foamiran. To do this, glue is applied to the base of the bud, onto which the rose is carefully placed. You need to hold the flower for about 30 seconds so that it is well fixed. According to this principle, all the roses are located on the ball.
The final decoration is gluing beads and decorating the trunk with small beads or coffee beans. You can use satin ribbons to form a bow that will sit beautifully on a tree trunk. The upper part of the pot is decorated with additional decorative elements.
You can place a bird on the flowers; it will complement the main composition well. Satin ribbons are covered with roses. You can also sit a bird on them.
Additionally, everything is decorated:
- Sequins;
- Beads
- Insects.
Here you should rely only on personal desire. A bird's nest can serve as an additional and interesting element.
It's easy to make; all you need is nut shells and ribbons. Sisal or any other material is placed at the base of the shell.
The main thing is that it resembles the natural filling of the nest. Then everything is decorated with ribbons, beads and attached to a pot.
Topiary made of dried flowers and foamiran (video)
The result is an interesting composition that will fit well into any interior and become its main highlight. It’s not difficult to create something beautiful, the main thing is to arm yourself with the necessary elements.
Foamiran topiary (photo)
Delicate version in a tea cup
A miniature topiary made of foamiran roses will decorate your dressing table or be a good gift for a friend or colleague whom you want to please.
To make it, you should learn to “collect” such blossoming flowers as in the photo below, and their buds. At first glance, this task may seem difficult, but in fact it can be done by anyone who is able to show a little patience.
To create a souvenir you will need:
- an old tea cup and saucer, preferably quite large and deep;
- foamiran of different colors;
- glue gun;
- some foil or small foam balls;
- wire (thick for the trunk and thin for the flowers);
- building gypsum;
- small pebbles;
- ribbons and other decorations;
- small foam ball.
How to make roses from foamiran: master class
This master class will be useful for those who decided to make flowers for topiary with their own hands.
First, let's figure out what foamiran is. Otherwise it is also called artificial suede. You can also say that it is similar to foam rubber. Its main advantages are that it does not fade over time and is a waterproof material. The foamiran is soft and pleasant to the touch.
Flowers made from foamiran are very similar to natural flowers, so this material is actively used in decoration. You
need to work with it, taking into account the fact that the material is slightly deformed under the influence of heat. An iron, curling iron, or even just the warmth of your hands allows foamiran to give a natural shape - curved petals and leaves. After cooling, the shape does not change.
Each method of making a rose from foamiran involves its own method of assembling the flower. What all methods have in common is the need for materials
So, to make a rose from foamiran with your own hands you need:
- Three rows of petals. They will create the effect of a half-blooming rose. Draw three circles on paper, the diameter of which will differ from each other by 10 mm. For example, 5,6, 7.
- From the outlined circles you make petals with wavy edges, not necessarily perfectly even and symmetrical. The smallest circle should have the fewest petals.
- Next, take a sheet of foamiran of the desired color, for example, light pistachio. You need to trace the paper blank not with a pencil or pen, but with a toothpick, so that only the outline remains on the faomiran. Having traced all three rows, you can cut out the petals.
- Each row of petals should have a concavity. To make it yourself, you can use a hairpin with a bead at the end. Place the petal row on a regular unused sponge.
- Apply the petal row very carefully to the sole of a barely heated iron (set the value to 1.5). As soon as you see that the material is heating up, quickly remove it, place it on a sponge and press the petals inward with a pin.
- If something goes wrong, you need to heat the foamiran again and do it as it should. Work while the material is still warm. Press down the middle of the row well so that the rose bud looks more like a half-closed one.
- To connect the petal rows, you need to string them on a wire with a bead of the desired color, which will be in the center of the petals. The bead is fixed with a glue gun.
- Next, form the bud with your own hands, the way you like - if you want it to be more closed, you can press one petal to the other with glue.
Another way to assemble a rose from foamiran is to form not petal rows, but each petal directly and winding the elements onto the bud
It turns out that each row of petals is strung on a wire, the petals are applied to each other with glue, and the result is a very delicate, openwork rose. The master class also suggests that instead of an iron, you can use a hair curling iron or a flat iron to make your hair smooth.
Rose from foamiran (video master class)
Pink topiary made from foamiran flowers: manufacturing procedure
To start creating a flower, you will need a pattern. If you don’t have a ready-made one on hand, you can draw two petals yourself on thick cardboard: one in the shape of a droplet, the second larger and wider. For one rose you will need to cut out 7 large petals and 5 small ones from foamiran. Then:
- take a small foam ball and stick a piece of wire with a small loop into it;
- pull out the end to make a kind of “lollipop”;
- tightly wrap the ball with a small petal, after applying a drop of glue at the base;
- repeat the same steps with all other parts of the same size;
- larger petals are applied to a hot iron for a couple of seconds;
- give them a convex shape, “pulling” them on the thumb;
- glued to the workpiece;
- a backing is cut out of green foamiran in the form of 4 leaves with denticles, connected crosswise;
- pierce it in the center and put it on a wire;
- the required number of roses is made in the same way.
Topiary with lily flowers from foamiran
What flowers will decorate your lucky tree? Perhaps it will be lilies? Then let's find out how to make them.
Cut out the petals according to the diagram. We will need:
- 3 large petals,
- 3 small ones,
- strip 7 by 1 cm,
- a triangle whose sides are 2 cm.
- We apply the pattern. Usually at the base of the petal the color is green or more saturated, dark. Revives the drawing and small dots.
- Heat the petals.
- Lightly stretch their edges. And draw relief horizontal stripes.
- We wrap the wire in a strip. We wrap a triangle around the edge of the wire to form a stamen. If you want shiny stamens, dip the edge of the wire in PVA glue, then in glitter. Stamens can also be easily found at a craft store.
- We tie the petals together, large ones at the edges, smaller ones in the middle. We place the stamens in the middle.
- We make oblong leaves. And we also heat it, stretch it, apply a pattern of stripes (we just push them through).
These are the flowers that will decorate any surprise for your loved ones!
Installation in a cup
A miniature topiary made of foamiran will look better on a gracefully curved trunk made of very thick wire. If you can’t find the desired color, you can take a satin ribbon and make a winding, covering it with glue. Further:
- make a large loop at the end of the wire;
- small flat stones are placed in the cup, which should ensure the stability of the structure;
- insert the topiary trunk;
- pour a gypsum mixture as thick as sour cream;
- without allowing the base to dry, multi-colored glass balls are embedded in it;
- if necessary, tint the plaster with a thin brush;
- decorated with bows, etc.
To a topiary made as a gift, you can tie a small card with wishes on a ribbon. Another option is to write the name of the person for whom the gift was intended or draw a heart on the base of the cup.
Now you know how to make topiary from foamiran, and you can please your friend, mother or sister with an original gift.
Source
The embodiment of tenderness
Foamiran roses in delicate tones, decorated in the form of topiary, can decorate both a coffee table in the living room and become an excellent souvenir for a loved one.
For creativity you will need:
- flower pot;
- foam ball (8-10 cm in diameter);
- curved branch;
- foamiran in pastel colors;
- hot glue;
- satin ribbons, lace, beads;
- thin wire.
A hole is made in the ball into which a prepared branch, pre-treated with glue, is inserted.
Glue is applied to the bottom of the flower pot and the tree trunk is attached to the bottom with the free end. If the branch could not be fixed well with glue alone, then it is better to add a solution of alabaster or gypsum.
The top of the pot is draped with wide satin ribbons, as in the photo.
The preparation of flowers begins. Before starting to work with foamiran, it is advisable to make a pattern of rose petals on cardboard.
Petals of different sizes are cut out from foamiran according to the pattern.
Each petal is slightly heated with an iron, after which a concave shape is formed with your fingers, and the outer edge is bent outward. For half-open buds, there is no need to bend the outer edge of the workpiece. A wire 5 cm long is cut. At one end of the wire you need to make a small loop. The wire will be the frame of the rose.
The small petals come first. To do this, glue is applied to the part and the petal is wrapped around the wire. The second petal is wound on the opposite side of the first, covering its joints. The process continues in this manner until the rose reaches the desired size.
Article on the topic: Applications on the theme “Spring” for children from napkins with photos and videos
From the bottom side, the visible part of the wire is cut together with a small amount of foamiran. The flower should have a flat bottom.
When all the parts are ready, the topiary is assembled. When designing, it is advisable to take into account the alternation of shades in order to obtain a spectacular result.
The bottom of the rose is generously coated with hot glue and pressed onto the foam ball. This is how all the workpieces are attached. Flowers should be placed frequently so that there is no free space left on the base.
When the ball is completely formed, all that remains is to add pearl beads to the crown. They are fixed using hot glue.
Thin satin ribbons, in harmony with the flowers, and a lace bow are tied to the base of the topiary “cap”.
If desired, the trunk of the craft is decorated with a string of beads and small cute details, for example, a bird and a bird’s nest.
Based on the instructions presented, you can create completely different topiaries. It is enough just to replace the roses with other flowers, or add foamiran foliage to the composition.
The leaves are made according to the principle of flowers: a pattern is drawn, on the basis of which blanks from foamiran are cut out. Each leaf is heated with an iron, after which the natural curves of the leaf are formed with your fingers.
In order for the greenery to attach well to the base, it is advisable to trim the lower part of the part in order to achieve a flatter bottom.