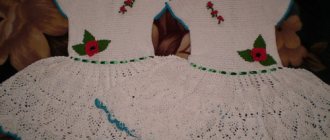
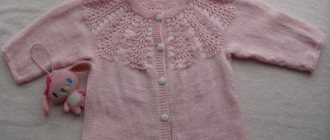
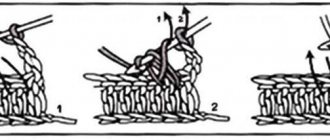
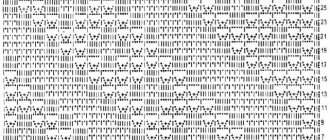
Here are the most beautiful yokes that a hook can make.
The most accessible diagrams and the clearest description can be found in this article.
The yarn for the yoke is selected depending on the model of the dress or blouse.
No one will take thick and warm fiber for a summer product. For the winter model, on the contrary, no one will pay attention to the thin iris yarn.
The hook is selected according to the size of the thread - this is its main rule.
But its models can be very different, depending on the master.
Calculation of yoke size
When calculating the yoke, you should pay attention to the model. But it is very important that the child’s head fits through the neck.
Therefore, we add the required number of cm to the neck circumference. Next, look at the dimensions of the shoulders and shoulders. Since with expansion the shoulder and shelves will increase.
The first set usually has the following proportions: the sleeves are the same, and the fronts are twice as large as the sleeves. Knowing the rules, you can knit women's or children's models.
Two options for determining neck circumference
You can simply measure your neck circumference using a measuring tape or look at the approximate dimensions depending on all the measurements.
It is better to use the first method in your work. Another option is to define it by things.
Options for crocheting a square yoke for a children's dress
The square armhole for a crocheted girl's dress looks very beautiful. This is a very comfortable raglan knit.
Then several beautiful and fairly simple models that can be performed by both a very experienced master and a beginner.
Beautiful square yoke with mesh
This yoke is crocheted using the raglan technique. A very interesting mesh pattern with small inserts in orderly rows.
The work will require:
- iris yarn;
- hook number 0.75.
Stage: sample
You will need to knit a sample and calculate the knitting density from it. Next, determine the neck circumference (along the neck circumference with appropriate allowances).
Stage: coquette
Cast on chain stitches to your size and knit the first row according to the pattern of the diagram. It is better not to immediately connect the air loops into a ring, since the chain can easily turn over and the row will then turn out to be a wave.
It is better to connect into a ring after the first row.
Then knit in circular rows. But there may be exceptions for dresses with fastenings on the side, front or back of the dress. In this case, knit the fabric according to the pattern, but not in circular rows.
Important!
It is better to rely on the size of the head when creating a square yoke. Next, divide the entire circle into 6 parts. For sleeves, take one sixth, and for shelves, 2 sixths. Since the sleeves are usually half the size of the front shelf.
Knit the required width of the shoulders and width of the shelves. Then leave the sleeves aside and continue knitting only the fronts and, depending on the models, in circular or straight rows.
Double crochet yoke
A very dense yoke is made with single crochets
. One of the raglan crochet yoke patterns is also used for it.
The work will require:
- iris yarn;
- hook number 0.75.
Stage: measurements
Measure your neck circumference and add extra weight. Assess how far the shelf fits the size of the head.
Then knit a small sample using double crochet stitches and evaluate how many stitches you should count.
Stage: coquette
Cast on the appropriate number of stitches. Make several stitches less for the sleeves than for the armholes. Since the sleeves are always smaller in size than the loops themselves than the shelves themselves. Measure the width of the sleeve and knit according to the raglan pattern to that width. Increases are made by using four dots with two chain stitches and paired double crochets in chain stitches.
The result of this pattern is this neat square yoke. If the width of the shelves is not as wide as required according to the model, then after making the yoke you can cast on additional loops and make the shelves wider.
Stage: border
very nice.
It is better to do it using contrasting yarn.
These simple patterns help you create elegant and very even yokes for a dress. The most beautiful crochet dresses are dresses with smooth and elegant yokes. No less attractive to the designer is that these yokes can be decorated with many things. Therefore, we try to make such beautiful and neat yokes and create favorite dress models for our children.
Every girl wants to have many different beautiful dresses in her wardrobe. To have both casual and dressy dresses. It will not be difficult for needlewomen to make beautiful outfits for their little princesses with their own hands. A combined dress for girls with a knitted top and fabric bottom turns out great.
The next option is a square yoke
The square yoke is firmly rooted in modeling and looks great on children's products. It is knitted in the round with the only difference that the increase in stitches is not done along the entire row, but only in four designated places. The furrows formed as a result of the increase start from the neckline and end in the armpits. There they connect, and the line of sleeves and front with back begins.
Crocheted square yoke
Let us describe step by step the scheme for making a yoke for a children's combined dress:
- We collect 92 air loops for the neck and connect them into a circle;
- We knit 4 “airs”, skip 1 stitch of the previous chain and knit 1 stitch from every 3 loops. with one double crochet, then 1 double crochet, and so on within 21 loops of the chain (it turns out a total of 16 double crochets + 4 double crochets in between). Then we knit 3 chain stitches and again 3 tbsp. with one double crochet, 1 double crochet in continuation of 23 chain loops (total 18 double crochets + 5 double crochets in between). We repeat this rapport 2 more times and reach the end of the row. Where the 3 air stitches are laid, the grooves will be determined, and during the work the loops will be concentrated to add a yoke;
- Having reached the end of the row, we pin a pin to indicate the beginning of knitting. We knit 3 chain stitches and 2 tbsp. with one double crochet from one loop of the previous row, 1 double crochet, 3 tbsp. with one double crochet from one loop, which is the space between the double crochets of the bottom row. Knitting 3 tbsp. from one point + 1 “air”, we continue, reaching 3 “airs”, which will later become grooves. These 3 stitches are knitted like this: from the 1st loop we knit 3 tbsp. with one double crochet, knit 3 chain stitches, skip 1 chain stitch of the bottom row and knit 3 stitches from the 3rd chain stitch. with one crochet. Rapport from 3 tbsp. with 1 chain we continue, reaching the next 3 chain stitches, and with them we perform the procedure described above;
- We crochet in a circle the pattern suggested in the pattern, not missing the grooves consisting of 3 “airs”. They are the basis for the expansion that creates our beautiful square. In total, if you follow the pattern, we knit 6 rows. But if a larger size is required, then you can continue in the same vein, adding grooves and rows to the size you need. This creates a square yoke.
Knitting pattern for a square yoke for a children's dress.
In the video you can see an example of calculation for a square yoke, loin and continuous knitting:
To determine the size of the yoke, just put it on the model’s shoulders and try to connect the places where the loops are added in the armpits. If tension occurs, it means you need to knit an extra few centimeters. Conversely, if the grooves are much lower than the armpits, it is worth loosening a few centimeters. Do not be sorry to dissolve unnecessary things, the further outcome of the matter directly depends on this. The dress should sit beautifully and fit your figure. Otherwise, the main drawing will either corrode or shrink and its structure and beauty will not be shown.
Variety of models
The huge advantage of combined dresses is that they are very simple to make and look amazing. And what a variety of models and styles can be made using knitting and fabric!
Such wonderful outfits are suitable both for home and for a holiday. The main thing is to use your imagination and boldly implement your ideas. Even standard models will become a masterpiece if you choose an interesting fabric for the hem and knit the yoke with an openwork pattern. Also, do not forget about decorative decorations for outfits. Ribbons, bows, flowers, embroidery, brooches, beads, lace, ruffles - all this will make the dress of a little fashionista exclusive.
In everyday models, the girl will be very comfortable and beautiful. For the bottom, small pieces of fabric sewn together, inexpensive fabric, are suitable.
Elegant dresses will turn a girl into a real princess, because they are so magnificent that you can admire them for a very long time. If you make a fluffy petticoat from tulle, choose a beautiful and interesting fabric, do openwork knitting, you will get a chic festive dress.
Simple option
Very interesting and beautiful clothes are knitted for children. It is in its creation that fantasy has no boundaries. For a child, you can knit fancy ruffles, decorate them with stunningly beautiful knitted flowers or animal figures, weave beautiful ribbons, and combine many details in one outfit. How beautiful elegant dresses look on girls, like princesses! For mothers of girls, it’s simply a creative outlet to dress up their daughters using knitting. Moreover, taking even the most common knitting pattern, the item can turn out to be absolutely unique if you decorate it with various beautiful buttons, brooches, knit beads, choose a harmonious combination of colors, add lace, braid, and bows to the outfit. A variety of colors and types of yarn, as well as the presence of all kinds of decorative accessories, allows you to create unique models. Knitting is perfect for all this.
In addition to festive dresses, you can also knit practical everyday dresses, T-shirts, blouses, tunics, which will look no less attractive. Casual knitted clothes can also turn into amazingly beautiful things. If you decorate the pockets with bright details, knit a neat brooch, decorate the collar or neck with braid, and select beautiful buttons, then the clothes will become not only practical, but also incredibly attractive.
Related article: Painting stones with acrylic paints: a master class for beginners
To create all this beauty, you need to learn how to knit yokes. There are a lot of options for creating them and you can choose one to suit every taste. Or knit a simple yoke, and make the main pattern on the knitted pattern of the hem of the dress, skirt or bottom of the blouse. Or you can make bright accents using color combinations. And, of course, you can compensate for a simple yoke pattern with a chic detail that will decorate it. There can be an infinite number of options, the main thing is to use your imagination and create wonderful things for your beloved children.
Types of yokes
The top of the dress is made of knitted yokes. There are three types of yokes: square, round and classic.
Before starting work, you need to take measurements and determine the knitting density. Measurements are taken for neck girth and chest girth. The sample is knitted, washed, dried, steamed and the number of stitches per centimeter is measured.
Let's look at how to do each type correctly.
The square yoke has a raglan sleeve. To describe the construction, double crochet is used. If the yoke is made with a pattern, then the report of the pattern must also be taken into account. You should pay attention to the width of the neck. If it is smaller than the volume of the head, then you will need to make a fastener at the back and divide the back of the yoke into two halves at the top. If a fastener is not provided, then you need to add a couple of centimeters for the neckline so that the dress can be easily removed and put on.
Before knitting, convert the centimeters into loops and knit a cast-on row from the required number of loops. Then the number of loops for each part of the yoke is calculated. Immediately subtract 4 loops for raglan. The remaining amount should be divided into 4. Two parts for the sleeves and one each for the front and back. If there is a fastener at the back, then the number of loops should be divided by 2. To determine the armhole of the sleeve, you need to add 5-6 cm to the half-circumference of the chest for girls under one year old and 7 cm for girls older. After the yoke to the armhole and sleeves are knitted, the knitting is closed under them and knitted in a circle to the end.
Below are knitting patterns for a square yoke.
To knit a round yoke, measure the neck circumference and chest circumference. Knitting occurs in the round until the width to the armhole is knitted. In the armhole area, as with a square yoke, the knitting is closed and knitted in the round. If the sleeves have reached the required length, but the yoke still needs to be knitted, then the knitting is closed under the armholes and the yoke is knitted in turning rows. Or we continue the pattern, but along the front and back.
Schemes of patterns for round yokes are offered below.
A classic yoke can be knitted to the hips, waist or chest. In order to make it, you need to create a pattern. The figure shows figurative parameters. Instead, you need to put the values of the measurements taken.
You can simplify the construction of the pattern by choosing a T-shirt or tank top that fits your child.
Or you can change the style a little and move the straps, increase or decrease the armholes.
The yoke can be knitted as a beautiful top and a dress skirt can be sewn to it. Makes a great outfit.
A classic yoke can be knitted using the following patterns.
Knitting in circles
If you thought we were talking about a round top, that's not entirely true. Both patterns are simply knitted in the round without a seam. But both the square and the round yoke - both of them are performed continuously. This method greatly simplifies the knitting process, but does not impair the appearance and originality. The highlight lies in the chosen pattern and its combination with the color and structure of the yarn.
Knitting a one-piece round yoke
Let's start with a round model and delve into the meaning of the task set before us. The main goal is to start working from the neckline and smoothly move on to making the sleeves and front with the back. This transition is called a yoke, is located in the shoulder area, and looks advantageous on almost any dress model. Now we will learn how to crochet a round yoke for a children's dress.
Yarn option for crochet
For children's clothing, it is better to take “iris” or “snowflake” cotton yarn because they have medium thickness and a glossy texture, which is necessary for making a light, delicate dress. Synthetic or wool blend non-thick yarn of the “children’s whim” type is also suitable, but it is more suitable for the winter or spring-autumn season. So, the knitting pattern is as follows:
- We cast on 72 air loops and close them in a circle;
- We continue working in the same direction and knit 2 double crochets from one loop, and 1 double crochet from the next. We repeat this until the end of the circle.
Tip: in order not to lose the beginning of the work, we pin a pin to mark it;
- Constantly following in one direction, we continue (after the pin) to knit each loop with single crochets;
- We knit 5 air loops, and knit the 6th in every 3rd stitch of the previous row;
- Loops were formed from 5 “airs”. Now we knit 3 single crochet stitches from them and do this with each bow;
- Then from one loop we knit 2 double crochets, from the next - 1 double crochet, skip 1 stitch and repeat this repeat until the end of the row;
- Next we repeat points: 3, 4, 5 and 6;
- We repeat points: 3, 4, 5.
An example of a knitting pattern for a round yoke.
The point is an air loop. Cross line - double crochet. When we have a crochet yoke for a children's dress ready, we can move on to making the sleeves and fronts. First the sleeves are knitted, and then the front and back. Some knitters, to avoid seams, knit them together in the round if the pattern allows. It seems that the mating progresses faster this way.
However, given the difference in size, our upper part can be increased by continuing to add to the desired parameters. If the size turns out to be larger than necessary, then you can undo one or two rows. The yoke pattern is designed for gradual expansion, which allows you to knit it until you reach the desired size.
The patterns offered here are not designed for your individual knitting density , hook number and yarn thickness.
Therefore, starting knitting from the first chain, be sure to try to thread the head into the future neck. Or take measurements of your head volume so that you can easily put on a ready-made dress.
For a younger baby
Let's make a wonderful dress for a girl of three or four years old. You can use your measurements and make a dress for an older or younger girl.
We will crochet a square yoke. Let's prepare the yarn and hook 2. The yarn and hook should match each other in thickness.
We will knit according to this pattern. The front and back will be made from double crochets, and the sleeves will be openwork.
We knit 142 air loops. We distribute them into 35 loops for the sleeves, 38 loops for the front and 17 loops for the two halves of the back, since there will be a fastener at the back.
When the sleeves are the desired length, we form armholes. We close the knitting under them and knit in the round. We will put a zipper at the back, so we don’t connect the back halves.
Along the neck we will make a binding by alternating double crochets and air loops. We will also attach the strips for sewing on the zipper.
Along the bottom you need to knit two rows with single crochets. This is necessary in order to sew the fabric between the main and these two rows. This will make the connection look neat.
Now let's start creating the bottom of the dress. To do this, smooth the fabric and measure the desired length. Don't forget to make indents for the seams. The skirt will be 30 cm. Allow 15 cm for the seams.
For the zipper, you also need to leave 1.5 cm at the seams.
We sew the back part and press the seams.
We overlay the bottom of the skirt.
The skirt will be gathered at the top. We make two lines along the second edge.
We assemble the top by tightening the thread at the top stitch.
Then we steam this seam. Insert the zipper. We thread a ribbon through the neckline. Tighten a little and tie bows.
We decorate the shelf with a beautiful ribbon bow. You can also knit a brooch of three colors and attach it to a shelf. We decorate the dress as your imagination tells you.
It turns out to be a wonderful combined dress for a beautiful girl.
Delicate dress with a square yoke for a three-year-old
A summer version of a knitted dress that uses a square crochet yoke. The undeniable advantages of this product are its elegant design and 100% breathability. Even on the hottest days, the baby will not experience any discomfort
The size of the dress is designed for a child of two to three years old
To work you need to prepare:
- 200g of yarn with a composition of 70% viscose, 30% cotton;
- hook 2.5;
- button
- satin ribbon or nylon lace 0.8 - 1.0 m long.
We will crochet from top to bottom. We cast on a chain of 90 chain stitches and then knit DC in straight and reverse rows: 15 stitches. back, 2 VP, 15 pet. sleeves, 2 VP, 30 pets. front, 2 ch, 15 pets. sleeves, 2 VP, 15 st. backrests Thanks to this scheme, as a result we will get a cut for the fastener on the back.
We continue crocheting as shown in diagram 30.1. After 6 cm from the start of work, close the knitting in a ring and continue knitting in a circle. Leave loops for the sleeves at a height of 11 cm from the beginning. We close the front and back loops into a ring, there should be 96 of them, and continue knitting the double stitch. in circular rows. In this way we perform 1-2 rows, after which we proceed to the pattern of diagram 30.2. Also, it is necessary to make 1-2 repeats in height (depending on the desired length of the product).
We finish knitting the dress with a border (3 rows according to pattern 30.2.). We decorate the edge of the sleeves with a border according to scheme 30.3. We tie 3 RLS around the neckline, then sew on the finishing lace. On one side of the cut on the back we make a loop using a VP, and on the other side we sew a button. We stretch a ribbon through the holes of the first openwork row of the skirt and tie a bow in the central part of the front of the dress.
Crochet dresses for girls - diagrams and descriptions
A more complex dress is knitted on a yoke that fits close to the body. The skirt with this style has a flounce. A special pattern is selected for it, for example, a fan pattern, which can be easily increased from top to bottom of the product. As a rule, the yoke is made dense, and the skirt is made airy. But you can make a yoke in the form of a cape, which is incredibly beautiful. It is good to decorate the edge of the yoke and skirt with the same teeth.
Crochet yoke
You can crochet different yokes - round and square. Each option can really be played in its own way so that it looks advantageous.
Example in pictures
You can see samples of yokes in the pictures below. The name of the “square” yoke version is not entirely correct, since this part is most often rectangular. A round yoke is often an oval. It all depends on the style of the children's dress.
How to knit
It is convenient to start a round yoke from the neck, since its size is initially known. We assemble a chain of air loops of the required length. We begin to knit double crochets from every second loop, alternating them with chain loops. To make the yoke larger from the center, in the next rows you need to knit two single crochets from one loop, alternating them with chain loops. After a couple of rows, the number of air loops between paired columns can be increased to two or three. The length of the yoke depends on what kind of short sleeves a summer dress should turn out from it.
A square yoke forms a bob collar. You need to add loops in it not along the entire length of the knitting, but in the corners. In reality, the product turns out to be rectangular: the smaller side is on the shoulders, the larger side is on the back and front.
Crochet sundress for girls
It is even easier to cope with the work on the sundress, since the product can be made on straps. It is enough to knit a cone or cylinder with an openwork pattern and then attach the straps to it.
Example in pictures
The styles of sundresses are different. The lower part of the product may consist of only flounces, frills, and ruffles. The top one is made more modest, it is a smooth canvas with or without an openwork pattern. Conical models can be openwork from top to bottom. Sometimes the pattern fades into the background giving priority to color. Sundresses made from colored motifs or with multi-colored rows look especially expressive.
Knitting pattern
It’s interesting to see a sundress with alternating motifs and openwork fabric. We choose floral square motifs. They are knitted from the center, where a round flower or an eight-pointed star is made, which are tied in the shape of a square with a couple of rows of stitches. A strip is sewn from such motifs. Similarly, we knit motifs of a different color and collect them into a strip. Between these stripes, you can knit the canvas with a monotonous pattern, choosing either a transitional shade from one motif to another, or a contrasting color with both.
The children's dress “Zefirka” or “Zephyr” has become popular among mothers. It is not at all necessary to knit it with cream or white threads: after all, babies can sometimes be such “packs”! The secret of the dress is that it is knitted from the yoke and continues in a single fabric, like one piece. And the sleeves and hem do not require special tying, because thanks to the pattern, a nice edging is obtained.
Example in pictures
There are many successful projects where plain or multi-colored yarn was used. The pattern is relief, fan type. Experienced knitters, even looking at the finished work, will understand how this ornament is made.
How to knit
The neckline is drawn on with a chain of air loops to the required length. A lifting chain of 3 air loops is knitted from it, and then double crochets are made through two loops. And between these columns three air loops are made. Next, for density, a row of single crochets is knitted from each loop so that the neck is not loose. Next you need to form a fan pattern. The beginning is done like this: we skip a loop, from the next we knit one double crochet, a couple of chain loops and again a double crochet. The result is a kind of tick. Next, relief (front) columns are knitted, and between them there are bridges made of air loops. A fan or shell is knitted from these bridges. All knitting follows similar patterns. The dress expands towards the bottom due to a gradual change in the length of the bridges and the number of columns in the shells.
Video master class: Crochet flower yoke. Continuous knitting
I also sketched out the order of knitting the motifs and redrew the pattern for continuous knitting.
With such motifs you can knit not only a yoke for a child’s dress, but also a blanket and a scarf... Never limit your imagination!
So today we will knit a yoke of flowers in one continuous fabric without seams and without ever cutting the thread. I invite you to study a master class on continuous knitting, while I think about who to give my crocheted dress to.
Crochet children's dresses - beautiful patterns
A wide variety of patterns on the Internet are a great help for young mothers who have time for knitting. When the baby is not very capricious, she gives her mother the opportunity to knit, and in gratitude she transforms into a little queen. Where to begin? From the creation of kryzhma - baptismal attire.
Crochet christening dress for baby
You can do the same “Marshmallow”: the child will be in a dress like an angel. It will turn out very beautifully if you thread a white silk ribbon through the holes of the openwork and tie bows. Those who know how to make patterns well should try to depict an Orthodox cross or knit an angel.
The motif for such a dress will be snowflakes. To achieve naturalness, you need to find patterns of hexagonal motifs, because snowflakes in nature look exactly like this. Unlike square motifs, hexagons are connected in a running pattern, so you need to have a good idea of how to crochet a one-piece dress for a girl from them.
What kind of knitted daisies do needlewomen come up with! If the flower is voluminous, then it is better to place it as a decoration on the bodice of the dress. You can also put small convex daisies along the belt.
Such products exist in summer and winter versions. For summer clothes, the yoke can be knitted, and the bottom of the dress can be linen or cotton. And vice versa, the yoke can be made as smooth as possible from the fabric, the bottom can be knitted with an openwork pattern. This dress comes with a cover. Woven details framed with knitted edging look great.
Warm crochet dress for girls
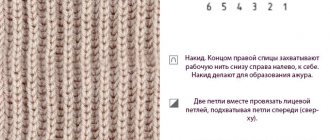
A warm crocheted dress for girls is made from woolen threads. Such clothes can be assembled from multi-colored motifs, but they need to be made from thick yarn. The pattern should be chosen so that it has as few empty spaces as possible. If you want to give a corrugated structure to some parts of the product, you need to crochet an English elastic band. It doesn't stretch as much as it bulges, creating corrugations.
A warm dress must have sleeves. This shaped product can be made according to the “raglan” pattern, which is much easier for beginners. Knitting begins from the neck according to the square yoke pattern. Next, there is a division into sleeves, front, and back panels.
If you need to knit separate sleeves, it is better to find a pattern on the Internet or prepare a pattern by taking the child’s measurements. Make a knitting plan and make sleeves. Next, they will have to be tied into the bodice of the dress.
