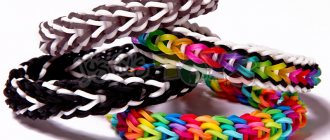
Minions from the cartoon Despicable Me (and later from their own cartoon of the same name) were liked by both children and adults. Let me tell you how to weave a miniature from rubber bands. It won’t be difficult at all, and the figure will turn out voluminous and cute. Follow our weaving pattern and you can make your own army of minions to take over the world =). Let's start!
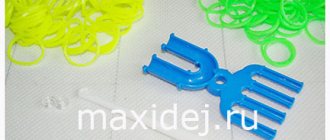
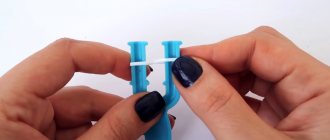
Rules for weaving on a machine
Weaving a minion out of rubber bands on a machine is the most difficult thing to do. This requires a minimum of 40 minutes. It is necessary to weave in several rows only on the front columns. So you should be more careful.
The whole figure should be woven on such a loom. Individual small parts are attached to the toy during the weaving process. Once the arms are attached, the top should be raised.
Next, after completing several rows of blue parts, you need to attach the legs to the minion and carefully remove it from the machine. The thrown elements should be thrown onto the opposite hook.
If one of the minion’s legs is not in the middle of the figure, it must be carefully pulled out through the loops draped over the hook. To make the work look finished, you need to throw all the loops onto the blue elastic bands, pulling them tightly.
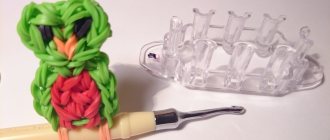
How to weave a minion out of rubber bands in a step-by-step do-it-yourself master class
First, you need to prepare all the necessary materials:
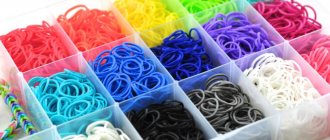
Hook Clip with which we will make a mask 35 yellow elastic bands 30 blue elastic bands 4 black elastic bands 4 white elastic bands Weaving machine
If you wish, you can weave a minion figurine not only on the machine, but also on a slingshot, or even on forks.
This master class will show you how to work with the machine, because this is the most common and convenient way of weaving. It is best to have a braiding kit, such as Monster Tail. How to weave a beautiful minion from rubber bands on a machine?
Set up the machine so that the columns are staggered. Extend the central row by one column. The pins should be facing away from you. Take twelve yellow rubber bands. We put two pieces on the first columns of the central and left and central and right rows, and we also put the rest in pairs along the left row. Then we put on yellow for the first two columns of the central row. We take a white elastic band and put it on the second and third pins in the central row. We put another pair of white elastic bands on the third and fourth columns of the same row. Add yellow elastic bands from 4 to 5 and 6 to 7 columns in pairs on the central row. On the side rows we put on two pairs of blue elastic bands. Now we put the blue elastic bands on the central row. Three pairs, starting from the sixth pin. We make the minion’s eye separately: We put a black elastic band twisted four times on the hook. One yellow elastic band needs to be hooked and pulled through the black one. We put what we got onto the third columns in the side rows. The black elastic should be between the white ones on the middle row. Now we take blue pairs of elastic bands and throw on columns 6 to 8 of the side rows. One part of these rubber bands needs to be transferred to the central columns in the same way. You should get triangles. We make the same triangles with yellow pairs of rubber bands from the second to fifth pins. We turn the machine towards us with the open parts of the posts to make it easier to remove the elastic bands. We start with the nearest pin in the left row. We insert the hook inside the column and grab only the two lower elastic bands, after which we throw them onto the column in front. We go to this same column and do the same. Thus we move to the end of the row. When we reach the column with the rubber band of the minion’s eye, we do the same as with the previous columns. From the last pin on the row, we transfer the elastic bands to the last one in the central row. All weaving should end there. We begin to remove the elastic bands from the middle row. But first you need to move the transverse elastic band, put on the columns of the side rows, a little forward, or rather, hook it to the middle column. Having completed this action, you need to insert the hook inside, remove the lower elastic bands and throw it over to the column in front. Thus we move to the last column. When you reach the white elastic bands, take them off so that the black one is between them. We do the same with the right row. Next, insert the hook into the central column and throw a black elastic band over it. It needs to be pulled through all the elastic bands on the column. The second part of the elastic band must be pulled through the first so as to form a loop. Then tighten. That's it, the minion figurine can be removed from the machine! But that's not all. All that remains is to make a mask for the minion: 1. Tie a knot from black elastic bands. 2. Insert the hook under the eye between the white and black elastic. 3. The loop of the mask must be pulled through the elastic bands so that it remains inside the eye. 4. Connect the mask with a clasp on the minion’s back. There you go! A cute and cute cartoon character is now in your hands!
Your little child will surely like this toy. It is bright, beautiful, the manufacturing scheme is simple and it is quite interesting and exciting to make. A rubber band minion can be used as a keychain, for example, for a phone. In any situation it will look very beautiful and original. It can also be used as a bracelet:
Let's make a crochet figure
How to weave a minion from rubber bands using a crochet hook? To do this you will need to take:
- Hook;
- Rubber bands - blue, yellow, black and white.
In this version, weaving also occurs along columns. The total operating time is about 20 minutes.
In crochet weaving there are no complex elements and strong elastic tension.
However, the Minion keychain woven in this way turns out to be quite small, this is due to the strong tightening of the connecting rubber bands.
Simple movements make knitting faster and easier. Therefore, this is a great option for beginners.
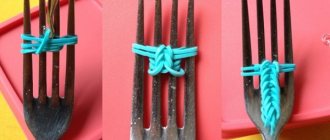
An interesting way to use forks
Finally, let's look at the whole process of weaving a minion on forks. For this we need:
- 2 Forks;
- Hook;
- Rubber bands - yellow, blue, black, white.
Working on the forks will take you about 20 minutes. Weaving is quite simple, especially for experienced craftsmen. You will need three cloves from each fork, which can be secured with duct tape or a rubber band.
The second option is more convenient, since it allows you to control the progress of work. Quite simple actions allow you to remember the movements and work faster.
There is no strong tension on the rubber bands (if the forks have short enough teeth), which is good news. The figurine's black eye is woven separately, and later includes black color to imitate the frame of glasses. The frame is woven in the standard way. Everything will become clear in the video.
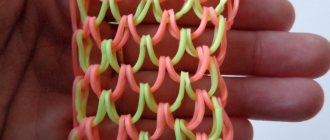
Fresco in the form of a minion
For those who are interested in frescoes, we will add this option. For it you will need:
- Machine;
- Hook;
- Rubber bands - 140 yellow, 112 blue, 60 black, 24 gray, 16 white, 53 horizontal - connecting;
- The weaving pattern is in the photo below.
This painting can be done in about 40 minutes. For such weaving, the middle row of the machine must be removed, and the wide blue part must also be removed.
We move the narrower parts as far as possible so that there is a place in the center where the figure will grow. Next, you will need to select 10 columns on which you will weave.
Weaving goes along 2 elastic bands. The contact ones form 3 turns - they can be made directly on the post, or they can be pre-twisted on a hook and moved to the machine. All irises must be of high quality, because in weaving a fresco a lot depends on the tension of the elastic bands.
How to weave a 3D minion figurine from rubber bands?
• Ninety yellow rubber bands. • Ninety blue rubber bands. • Two pink ones. • Twenty black. • Five whites. • Machine.
• Hook.
On the machine, set the middle row so that it protrudes one notch forward and turn the columns with their free sides to the right.
You begin to weave a Minion figurine on a loom from the head. choose a pair of yellow elastic bands and put them on the first and third pins of the middle row, turning them over in a figure eight. You go around the second ledge.
The next pair is also turned over in the form of a figure eight and put on the first protrusion of the top and second bottom row, also going around the intermediate pin.
Add another row in the same way.
Continue weaving, throwing a couple of yellow elastic bands around the perimeter of the Minion’s head, starting from any pin.
Now turn the base of the machine sideways so that you can clearly see the bottom rows of each pin. Transfer them all to the middle using a hook.
Again, put on paired irises around the perimeter of the figure. It turns out that each row contains six pairs of elastic bands.
- Next, proceed according to the old scheme - grab the four lower rows of elastic bands from each protrusion and throw them into the center of the Minion’s head.
Now you begin to weave an eye on the Minion’s head on the machine. You will need black and white irises.
Wrap the black circle around the base of the hook four times. This will be the pupil of the Minion's eye.
- Now equip the pupil with a white base.
- To do this, wrap it twice to the right and left of the black pupil.
- You managed to make an eye, in the center of which there is a black pupil, and on the sides of it there are a couple of white layers.
- Throw on another white ring, wrap it twice around the tip and throw all the rows of the Minion's eye onto it.
- Return the second part of the loops back to the base of the hook.
- Now attach this eye to the first pin of the central row.
- Grab all four rows of the ledge and throw an eye on them.
- Carefully remove these rows from the column, stretch the eye further and return the layers to their place again.
- Again, throw a couple of irises on each protrusion, going around the perimeter.
- Continue weaving the 3D figure, throwing off the lower layers from each pin in turn.
- Now it’s the turn to weave the mouth using two pairs of red elastic bands.
- Take them and screw them onto the hook four turns.
- Place the mouth on the craft in exactly the same way as you put on the eye.
- Pull out all four layers of the first column and throw the red loops over them.
- Next, remove these layers, move your mouth further and return them to the same place.
- Turn the base of the machine into its normal position and put on top a regular layer, again made of double elastic bands.
- Continue weaving, transferring the lower layers from all the pins up to the middle.
Now you can start weaving the body on the loom. You put on a couple of irises that are already blue, walking in a circle.
- Then proceed according to the scheme - throw the yellow irises to the center.
- It's time to make the layer on which the hands will be placed.
- To do this, use two black irises and wind them onto the base of the hook four times.
- Take a couple of yellow ones and twist them on your fingers two turns.
- You grab them and transfer the black layers there.
- Return the second part back to the base.
- Again, twist a pair of yellow irises on your fingers twice and repeat the same steps.
- It turned out to be two yellow loops, which determine the length of the arm.
- There should be five such layers in total, so you put on three more pairs in the same way.
- Take a couple of blue rings, throw them on the tip of the hook and transfer the hand loops to them.
- Place the first loop on the second protrusion of the first row of the machine, and the second on the first.
- Make the second arm in the same way and attach it to opposite posts of the machine.
- By the way, you can also make hands on a slingshot if the hook is busy.
We weave a minion onto a hand
To weave a figurine in the form of a decoration on a pen or pencil you will need:
- Machine;
- Hook;
- Rubber bands - 36 yellow, 26 black, 24 blue, 2 white and 2 gray.
We will weave the minion for about 20 minutes. The photo with the necessary materials clearly shows that the middle part of the machine has been removed, and also the open sides of the columns of the near row look to the right, and the far one to the left.
The process will take place on 6 columns, the base under them must also be removed, because the figure is weaving downwards. Weaving is reminiscent of the previous version, when we learned how to make a three-dimensional figure.
But here we go through the whole process from the bottom up, starting with the overalls and ending with the head.
It is very important to carefully ensure that the layers of elastic bands are arranged in order. It is advisable to separate the layers with your fingernails. Gray elastic bands are needed to give more volume to the eyes.