Any clothing decorated with beaded embroidery looks amazing! And when you did all the decorating work yourself, and even using complex schemes, it’s a masterpiece!
Mastering embroidery technology is not a difficult task at all - with explanations of how to sew beads to fabric with your own hands and diagrams, let's figure it all out together!
What is bead embroidery used for?
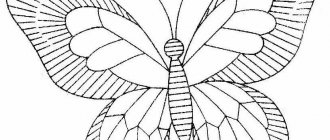
With bead embroidery it is possible to decorate absolutely any thing - from clothes and shoes (dresses, jeans, blouses, embroidered sneakers and even UGG boots) to jewelry and bags. There are many ways to decorate using small beads that seem to be scattered along the legs, a repeating pattern that runs along the side seam or neckline, floral and plant motifs, butterflies, bees and other insects, “cucumbers”, etc.
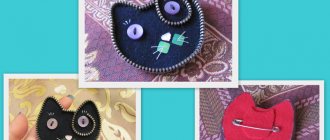
Using the bead embroidery method, needlewomen make stunning costume jewelry, decor for bags, and hair clips.
Once you learn how to sew beads onto fabric, you can easily repair clothing using embroidery.
Types of seams
Seam "forward needle"
Before embroidering with beads, you should decide on the choice of stitches for a specific part of the design. When creating flower petals, it is best to give preference to a stem stitch, and use a patterned stitch to make the leaves. And for the design of backgrounds, a monastic or lowercase stitch is ideal.
The principle of the “Forward needle” stitch is exactly the same as in cross stitch. In the video, the needle is brought to the front side, one bead is put on the fiber and pierced inside out through the fabric. The thread is brought out again and the next bead is tightly sewn in the same way. The result is a dotted line with the same distance between each bead.
Monastic seam
The monastery stitch is similar in execution to the half-cross technique. The stitches run diagonally in one direction and are brought out to the upper corner of the cell. In this case, the wrong side should consist of short vertical stripes. For a new row, pull the thread from the wrong side to the main side and continue to embroider in the opposite direction. For convenience, you can turn the fabric over while working.
The “stitch stitch” is used to make the embroidery more rigid. The first bead is strung on a thread, the fiber is brought out inside out, and its tail is pulled through one cell of the fabric. Place a second bead on the needle and secure it in the adjacent empty cage. This method of embroidery allows the beads not to deviate on the fabric in different directions, but to be tightly arranged in one even row. At the end of the work, the tip of the thread is not cut off, but hidden under the attached beads.
Line stitch
To obtain a “Stem Stitch”, put two beads on the thread with your own hands and insert a needle into the hole on the wrong side. At the junction of the two beads in the middle, a short securing stitch is made, which is brought out through the hole of the second bead. String the third bead and again draw a seam with a needle between the second and last bead, continue to embroider in this way correctly until the end of the row. Flowers made from beads using a stem stitch will turn out neat and beautiful if the needlewoman places the beads next to each other with tight stitches, filling the open areas of the fabric with them.
Stem seam
To embroider with the “Arched stitch”, several beads are put on the thread from the front side at once, but only the one located at the intersection of stitches (2,4,6, etc.) is attached to the canvas. This type of seam allows you to secure the beads to the fabric more freely.
Arch seam
To place beads on the canvas using the “Hook” stitch, you need to string several beads (up to ten pieces) onto a thread, and then sew them to the fabric with short stitches after each one or two subsequent beads. Bead embroidery in this way is done using two threads: with one the lines are laid, and with the other they are secured to the canvas. “Vprikrep” is considered one of the easiest types of seams. It is very convenient to use it to create a background, contour lines or distant objects of a picture.
Seam "stuck"
You can embroider with “Fixed” beads in a free order or in strictly parallel (horizontal or vertical) lines.
Variety of materials to work with
Even experienced craftswomen, not to mention novice embroiderers, can get lost in the large number of products on offer. Therefore, it is worth considering what types this material is divided into:
- Plastic beads - also called children's beads. It has a low cost and can be used on children's things.
- Bugles - regular and “cut” when the edges are cut obliquely. It is made from cut pieces of glass tubes. It is distinguished by its bright shine.
- Small glass beads of various shapes - round, cylindrical, square.
- Japanese, round in shape. He is valued above all others. Its quality is recognized as the best, and the price matches.
- “Pony” - with an elongated shape, made of plastic, clay or glass.
- Beads in the form of seeds, butterflies - Barri.
- Beads - drops - Drops.
- There are beads with two holes, like a button.
When choosing beads, keep in mind that the Japanese are the leaders in the production of the highest quality beads, followed by the Czechs, and then Taiwan. At the same time, Taiwanese beads can be completely different - from excellent to disgusting.
The numbering of the beads is interesting - the higher the number, the smaller the bead. For beginners, it is optimal to choose number 11.
Before sewing beads to the fabric, pay attention to the shape - it is also varied, select it according to the pattern you want to embroider.
Bugle beads and cutting beads have a very bright shine, the downside is that they easily cut the thread with sharp edges. Alternate them with round beads.
Decorating clothes with beads
Beaded embroidery will not only decorate clothes, but also make each item of clothing exclusive. Craftsmen advise beginning needlewomen to use simple patterns in their work to gain experience. After this, you can embroider patterns with beads on clothes, the patterns of which will be larger and more complex.
It should be noted that the numbering of this type of material goes in the opposite direction, that is, the higher the number, the smaller the beads. Japanese decorative balls are considered the best in quality, Czech ones are in second place, and Taiwanese ones are in third place.
There are the following types of beads:
- Made of plastic, it is considered children's.
- Bugles are chopped tubes with a bright shine.
- Small glass beads in round, cylindrical and square shapes.
- Charlotte - small balls.
- Delica - small angular beads from Japan, the highest quality.
- Pony - large plastic, clay or glass beads of elongated shape.
- Barry - beads in the shape of seeds or butterflies.
- Drops - in the form of a drop.
- Twin - elongated in width with two holes.
- In the shape of a cube, square or triangle.
Beads, stones and rhinestones should be sewn especially tightly onto knitted and knitted items. This will ensure that the pattern maintains its integrity even if the thread breaks while the product is being worn. If any part of the ornament is lost, it will not be difficult to restore it.
Embroidery of things with decorative elements is carried out in two threads. For this, a special thread is used - linen-lavsan, but you can use cotton-lavsan and nylon. Sewing thread is always matched to the tone of the item of clothing on which the pattern will be. The color of the decor is not taken into account. To create a large ornament, synthetic canvas is used. After finishing the work, it is carefully removed from under the embroidery. The needles are chosen as thin as possible, since the beads have very small holes.
Large-sized embroidery, which will use a lot of beads, rhinestones and stones, is best done on a separate piece of fabric. In this case, the finished embroidered decor is carefully sewn onto the clothing so that it can be easily removed during washing.
Tools and materials for decorating with beads
Choosing the right material for bead embroidery is practically the most important step, because there are a lot of handicraft products on store windows.
So what do you need?
The thread chosen is quite strong, based on the method of work used.
Let's say for T-shirts, dresses, sweaters and other knitted items they use special threads - lavsan, nylon, and the work is done in 2 threads. The stitch must be strong to give the embroidery not just beauty, but also durability.
Since beads must be sewn to the fabric using invisible stitches, the shades of the threads and the base on which the embroidery is done are selected to be the same.
Large embroidery requires a serious approach. Do it on a separate piece of fabric, and then carefully sew it in place. This will make it easier for you to take care of your clothes - just steam them before washing.
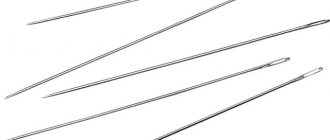
Needles for embroidery are special - beaded. They are thinner and have much narrower thread holes.
The basis will be the item on which the embroidered design will be located. It can be completely different materials - leather, suede, jeans, knitwear, non-woven seal, etc.
Transferring the design to fabric
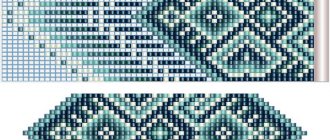
Any pattern is suitable for decorating wardrobe items. You can come up with it yourself or choose from numerous schemes on the Internet. The design is transferred to the fabric using one of the following methods:
- Tracing paper. The pattern needs to be copied onto translucent paper, crumpled a little, and then basted to the area of clothing to be decorated. Embroidery is done using tracing paper. After finishing work, the paper should be carefully removed.
- The design can be redrawn onto the fabric with special markers or pencils.
- Tailor's chalk or powder made from it. You need to make holes in the material that follow the contour of the design, and rub the coloring matter into them. These operations should be performed as carefully as possible so as not to harm the product.
- You can transfer the pattern onto clothing using special fabric transfer paper.
- Iron and transfer pencil. You need to trace the diagram with a special pencil, then place the paper on the product and iron it. The design is copied onto the fabric under the influence of heat. Using this method, it is important to choose the correct temperature conditions.
Having transferred the ornament to the fabric, you can begin embroidery. It is important to follow each line of the drawing exactly, so the diagram should be clearly visible.
Tips for beginners for successful work with beads
- Prepare yourself a comfortable place in advance - the work is painstaking, you should be comfortable.
- Be sure to get a bright table lamp.
- For the work surface, take a white fabric; fallen beads will not get lost.
- It is advisable not to mix all the purchased beads - arrange them by shade.
- The embroidery pattern must be prepared in advance.
- Learn from cheap beads and inexpensive fabric.
- Avoid choosing non-standard size beads to avoid problems with holes and needles. Take number 11 or 12.
- Switch to small beads only after gaining some experience. You should not do this right away to avoid disappointment.
How to sew beads to fabric: instructions for beginners
Often it is used as a basis for embroidery. How to properly sew beads to fabric?
There are a number of individual characteristics. To make your work easier, use the following rules:
Apply drawings directly onto the base using carbon paper. Only after you have gained experience (and quite a lot!), try embroidering without transferring, marking the steps you have already completed on the diagrams.
Attach the material to the frame or stretch it onto an embroidery hoop.
Take cotton or nylon thread.
On dark fabrics, embroider with threads of the same color. For light colors, you can choose beige, gray or white threads.
The knots for securing the thread can be tiny, almost invisible.
Eleven numbered needles are the best choice.
Each of the above tips will make your learning easier. Hobby will not make you nervous; on the contrary, it will lead to relaxation and relaxation.
To become more familiar with the process, try creating a simple picture according to the diagram suggested below.
Prepare the following tools:
- Frame or hoop.
- Several shades of beads.
- Fabric for the base.
- Needles.
- Nylon thread.
- Wax candle.
At the beginning of your work, draw a sketch on paper or take a ready-made diagram.
- Stretch the material onto the hoop.
- Using transfer paper, transfer the design from the paper to the base.
- Insert the thread into the needle and twist the tip into a small knot.
- At the beginning of the design, pull the needle and thread from the wrong side.
- Place the bead on the needle, and then, inserting it into the material very close to the bead, pull the thread to the wrong side.
- Make a tiny stitch and bring the thread to the right side of the work.
- Take the next bead and attach it the same way.
- In this way, all the beads are fixed, and the outermost one is attached on the wrong side with a knot.
The beads are placed as closely as possible to each other, but without tightening the base - otherwise you will get wrinkles.
See how to sew beads to fabric, photo:
We looked at one of the stitches called the "forward needle". There are several other main types.
How to embroider with beads for beginners step by step with other stitches
How to sew beads
Line stitch
The seam is fastened
Beaded chains or figure eight
Cretan bead stitch
Loop attached
Attached loop with added beads at the bottom
Feather seam
Featherstitch
Double-sided stitch "forward needle"
Beaded pendants and loops
How to learn to embroider simple flowers with beads for beginners
The textured effect of beadwork combined with bright iridescent colors looks great on clothing and accessories. This is why most designers use beadwork motifs to enhance their creations. You can also do this. Here are easy ways to embroider small motifs with beads.
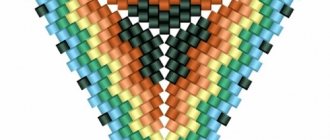
Floral motif with triangles or pinwheel
This is a swirling floral motif. It can be designed as a pattern throughout the fabric or scattered around, as well as a large motif in the center.
To make this beaded motif, first draw a pinwheel shape.
Attach three beads across the intersection. Of course the number of beads will vary depending on the size of your pinwheel. Fill one side with two beads and then continue with one on the other side. For extra reinforcement, pass through the beads twice.
Beaded flower with sequins.
This beaded flower is pretty easy to make. Draw a small circle, enter from the wrong side of the fabric around the periphery of the circle. Place one bead on a beading needle. Then one glitter. Then another bead and another glitter. Finally, put on three more beads. Insert the needle closer to the center of the circle. We made one petal of your flower from beads.
Continue making these petals in a circle until it is completely filled. Finish with sequins and beads in the middle.
simple flower
It is a flower with four beads around another one in the center. We are talking about a simple flower. But when it is finished, it gives us brightness and beauty.
Flower with a large center
This flower is made from a small triangular center and then curved shoots all around with 5 beads. Fill the center with a large bead.
Flower with large beads around the edges
This beaded flower is made by threading three beads on a needle between two large beads. One petal comes out. Make enough petals to fill your design.
Sequins and embroidery
Everything is visible here. The chain stitch ends with sequins made around the middle. Replace sequins with beads for variation.
Sequin flower
This beaded flower is made by attaching it to a central bead. We put two sequins on the needle. Then one bead. After this there are two sparkles again. Secure them close to the center of the bead. Add a beautiful sequin petal.
Fixing beads with a “Monastery” seam
The following embroidery method is used for embroidering icons and paintings.
We bring the needle forward, it is obvious, it catches the bead and a stitch is made along the bias either downwards or upwards. One stitch corresponds to one bead. The main direction of the stitches is diagonal from the outside of the embroidery, vertical from the inside.
Stitches “Stem” and “Needle back”
- This method will give a very hard surface. Having brought the needle out, put 2 beads on it, then immediately, very close to the second bead, bring the needle to the wrong side. Return to the top between them, passing the needle through bead No. 2. Immediately pick up bead No. 3 and bring the needle to the wrong side of the work.
Continue in this way until the required length of the segment is reached. - How to sew beads to fabric back with a needle? This method is very similar to the “Stem”, but 2 or even 4 beads are put on at once. Their arrangement is freer, and the embroidered part is much softer.
To give it extra stiffness, go back on a couple of beads instead of just one.
Photos of finished works for inspiration
How to sew beads to fabric so that the finished embroidery does not look clumsy and clumsy? Of course, you won’t be able to create a masterpiece the first time, but with some dexterity and skill developed over time, both quality and beauty will come. Below are several photos of embroidery created by skilled craftswomen.
This is how a simple white blouse can be transformed.
But any fashionista will envy such glamorous sneakers!
Learn - and you will succeed!